
Amazon Relational Database Service (Amazon RDS) is a managed cloud database service from AWS that makes it easy to set up, operate, and scale relational databases without managing the underlying infrastructure. It supports multiple database engines including MySQL, PostgreSQL, MariaDB, Oracle, and Microsoft SQL Server. Connecting Amazon RDS to Databox lets you pull data directly from your managed database, build datasets using SQL queries, and visualize business-critical figures alongside data from your other connected tools.
If you've already established a connection, you can reuse it to add new data sources to your Databox account.
Databox only reads data from your database — it never writes to it. Create a dedicated MySQL user with SELECT-only privileges scoped to the Databox IP address. You can run these commands using a MySQL client connected to your RDS instance, or via the Query Editor in the AWS Management Console.
MySQL 8.0+ (modern syntax):
CREATE USER 'databox'@'52.4.198.118' IDENTIFIED BY 'your_secure_password';
GRANT SELECT ON your_database.* TO 'databox'@'52.4.198.118';
FLUSH PRIVILEGES;
MySQL 5.x (legacy single-statement syntax):
GRANT SELECT ON your_database.* TO 'databox'@'52.4.198.118' IDENTIFIED BY 'your_secure_password';
FLUSH PRIVILEGES;
Replace your_database with the name of the database you want to connect, and your_secure_password with a strong password. If you need to grant access to multiple databases, repeat the GRANT statement for each one.
By default, RDS instances are not accessible from outside their VPC. To allow Databox to reach your instance, it must be configured as publicly accessible.
- In the AWS Management Console, go to Databases and select your DB instance.
- Click Modify.
- Under Connectivity, set Public access to Yes.
- Click Continue, then choose when to apply the change (Apply immediately or during the next maintenance window).
- Click Modify DB instance to save.
RDS controls network access through VPC security groups. Add an inbound rule that permits TCP traffic on port 3306 from the Databox IP address.
- In the AWS Management Console, go to Databases and select your DB instance.
- Under Connectivity & security, click the link to the VPC security group associated with the instance.
- Select the security group, then click Edit inbound rules.
- Click Add rule and fill in:
- Type: MySQL/Aurora
- Protocol: TCP
- Port range: 3306
- Source: Custom — enter
52.4.198.118/32
- Click Save rules.
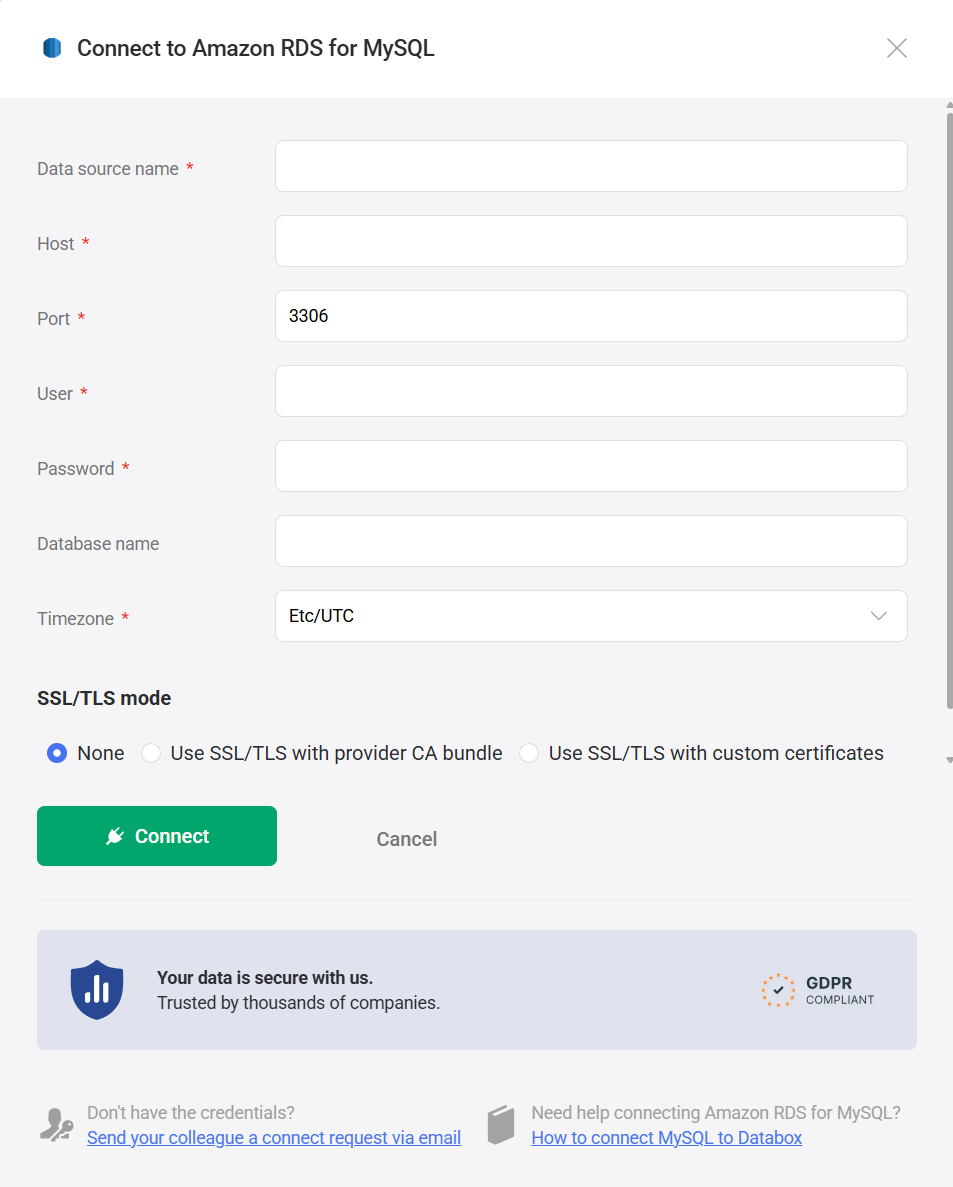
- In Databox, go to Data Sources > + New connection.
- Search for Amazon RDS for MySQL and click Connect.
- Fill in the connection form:
- Data source name — a label for this connection in Databox.
- Host — your RDS endpoint hostname, found on the instance's Connectivity & security tab in the AWS Console (e.g.,
mydb.abc123.us-east-1.rds.amazonaws.com). - Port — the port your RDS instance listens on. The default for MySQL is
3306. - User — the MySQL username created in Step 1.
- Password — the password for that user.
- Database name (optional) — the specific database to connect to. Leave blank to connect at the server level.
- Timezone — the time zone used to interpret date values in query results. Defaults to
Etc/UTC.
- Select an SSL/TLS mode (see SSL/TLS below).
- Click Connect.
Databox offers three SSL/TLS modes when connecting to a database. Choose the one that matches your server's configuration.
| Mode | Description |
|---|---|
| None | The connection is made without SSL/TLS encryption. Use this only when your server does not have SSL enabled. |
| Use SSL/TLS with provider CA bundle | The connection uses SSL/TLS and authenticates the server using a regional CA bundle managed by your cloud provider (for example, Amazon RDS). When you check Verify server certificate using regional CA bundle, an additional CA certificate bundle (ssl-ca) field appears, where you can paste your provider's CA certificate. |
| Use SSL/TLS with custom certificates | The connection uses SSL/TLS with certificates you supply directly. When Verify server certificate is checked, you must provide a CA certificate (ssl-ca). You may also supply a Client certificate (ssl-cert) and Client private key (ssl-key) for mutual TLS. If Verify server certificate is unchecked, only the client certificate and private key fields are shown. |
Amazon RDS provides SSL/TLS certificates signed by AWS-managed certificate authorities. To use SSL with server certificate verification, download the appropriate CA certificate bundle from AWS and paste its contents into the CA certificate bundle (ssl-ca) field in Databox. For step-by-step instructions on configuring each SSL mode, see Enable SSL/TLS for your database connection.
The Amazon RDS for MySQL integration supports the creation of datasets, which allow you to define and shape the specific data you want to use for reporting in Databox. Datasets make it easier to focus on the most relevant information, enabling you to filter, visualize, and analyze metrics across projects, teams, and clients without writing complex queries each time.
- Select a table: Pick the appropriate schema within that database.
- Select columns: Browse and select the specific columns (fields) from your tables or views to include in your dataset. These columns define the structure and content of your dataset.
For more advanced use cases, you can write a custom SQL query instead of selecting columns manually. This allows you to:
- Join multiple tables
- Apply filters and aggregations
- Format or transform data before importing it into Databox
Your query must return a valid tabular result to be used as a dataset.
- Amazon RDS documentation — Official AWS docs for Amazon RDS, covering instance creation, connectivity, security, backups, multi-AZ deployments, read replicas, and monitoring.
- Amazon RDS for MySQL — MySQL-specific guidance within the RDS User Guide, including supported versions, parameter groups, and engine-specific features.
For comprehensive details on metrics, data availability, templates, specifications, usage guidelines, and other key information, refer to the resources listed below.


FAQ
Does Databox support IAM database authentication for RDS?
No. Databox connects using standard database username and password credentials. IAM database authentication is not currently supported.
What should I do if Databox cannot connect to my RDS instance?
Check the following in order:
- Public access is set to Yes on the DB instance (under Modify > Connectivity).
- The VPC security group has an inbound rule allowing TCP on port
3306from52.4.198.118/32. - The subnet associated with the instance has a route to an internet gateway (
0.0.0.0/0). - The MySQL user was created with
'databox'@'52.4.198.118'as the host — not'%'or'localhost'. RunFLUSH PRIVILEGES;after any user or grant changes.
Where do I find my RDS endpoint hostname?
In the AWS Management Console, go to RDS > Databases, select your instance, and open the Connectivity & security tab. The endpoint is listed under Endpoint & port and follows the format identifier.xxxxxxxxxxxx.region.rds.amazonaws.com. Copy this value into the Host field in Databox.


