
Marketo (Adobe Marketo Engage) is a marketing automation platform used to manage lead generation, email campaigns, nurture programs, and audience segmentation. Teams use it to run multi-touch campaigns, score leads based on behavior, and automate follow-up at scale — generating a large volume of performance data across programs, emails, and audiences. Connecting Marketo to Databox pulls that data into a shared workspace alongside your CRM, ad platforms, and other sources, so you can report on campaign performance in context, track trends over time, and share results with stakeholders without exporting anything manually.
If your credentials don't include full access to the data source, make sure your access level meets any permission requirements listed in the Specification section of the integration's page in the Metric Library.
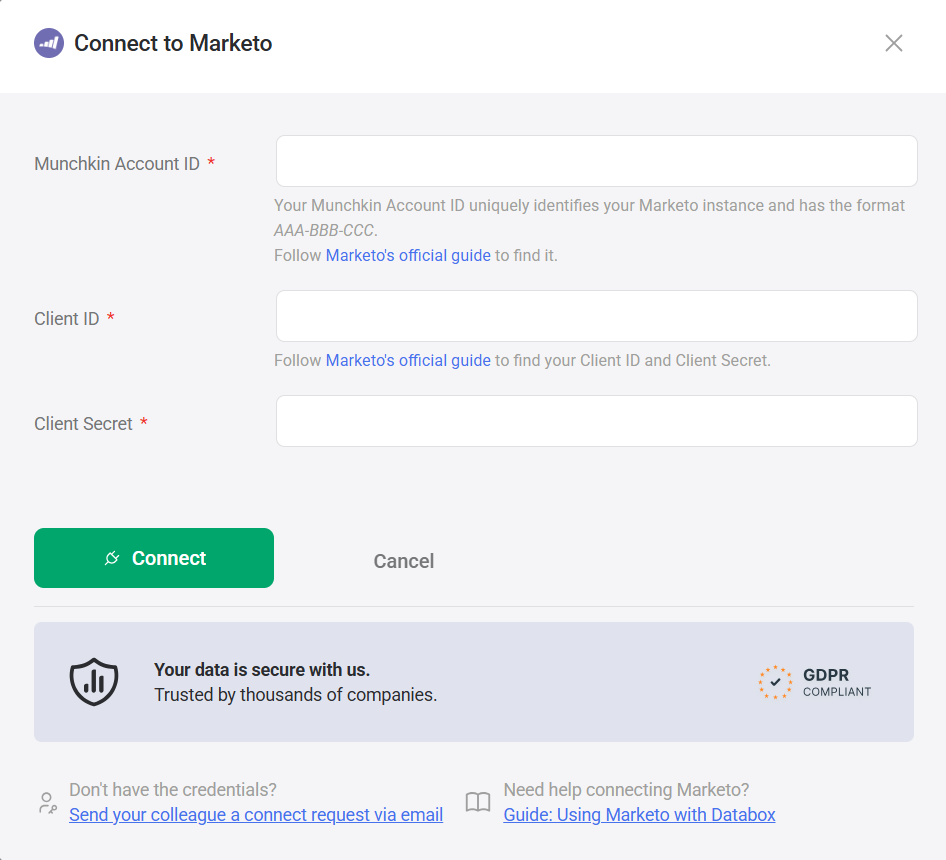
Your Munchkin Account ID uniquely identifies your Marketo instance and has the format AAA-BBB-CCC. See Adobe's official guide for where to find it.
API credentials in Marketo are tied to a custom service in LaunchPoint. If no custom service exists, a Marketo Admin must create one before proceeding. See Marketo's authentication documentation for setup instructions.
If you've already established a connection, you can reuse it to add new campaigns, as long as those campaigns are accessible with the existing connection's credentials.
To connect Marketo to your Databox account:
- Enter your Munchkin Account ID in the format
AAA-BBB-CCC. - Enter your Client ID.
- Enter your Client Secret.
- Click Connect.
After the connection is established, select the Marketo campaign you want to track. The list displays only active campaigns, sorted by most recently updated.
For comprehensive details on metrics, data availability, templates, specifications, usage guidelines, and other key information, refer to the resources listed below.


FAQ
Why is the campaign I want not showing in the list?
The campaign list is limited to the most recently updated active campaigns. If your campaign is not visible, connect with any available campaign, then contact help@databox.com to have the correct campaign connected manually.


