The options for changing the order of rows in a Table differs depending on the Metric you're using.
HOW TO
How to change the Sort Order in a Table

- In the Designer, click on the row of a Table Datablock where you want to change the Sort Order. This will open Datablock Editor on the right-hand side
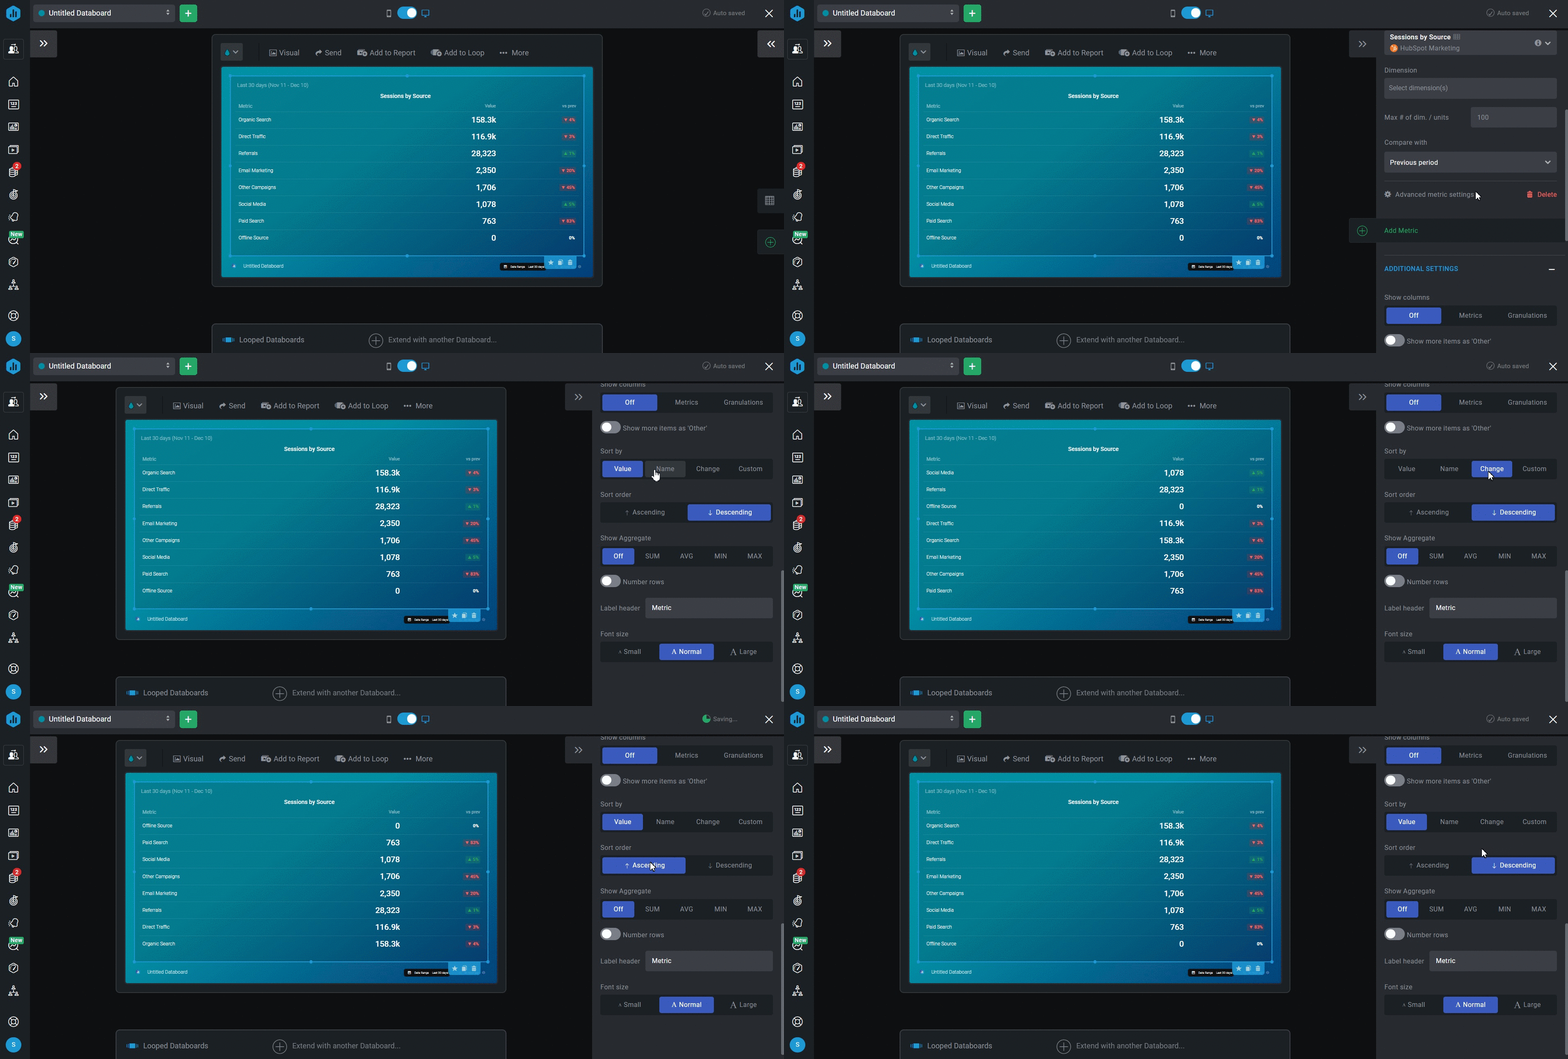
- Under the Additional Settings section of the Datablock Editor, you can select the Sort by field and the Sort Order.
The Sort by field determines the defining factor for sorting the rows of your Table, while the Sort Order gives you the opportunity to display either the highest or lowest values first. Value is the default Sort by selection and Descending is the default Sort Order selection, so rows are automatically sorted from highest to lowest values.
Selecting Name as the Sort by option will sort the rows in alphabetical order, Change will sort the rows based on the percent change value, Custom will allow you to drag and drop the Metric in your preferred custom order.
Pro-Tip: It is not possible to change the order of Dimensions in a Table by using the Sort by Custom option.
Selecting Descending as the Sort Order will sort and display rows from starting with the lowest value.
How to move rows in a Table
Pro Tip: This is the strategy for changing the order of rows in Tables with Multiple Metrics

-
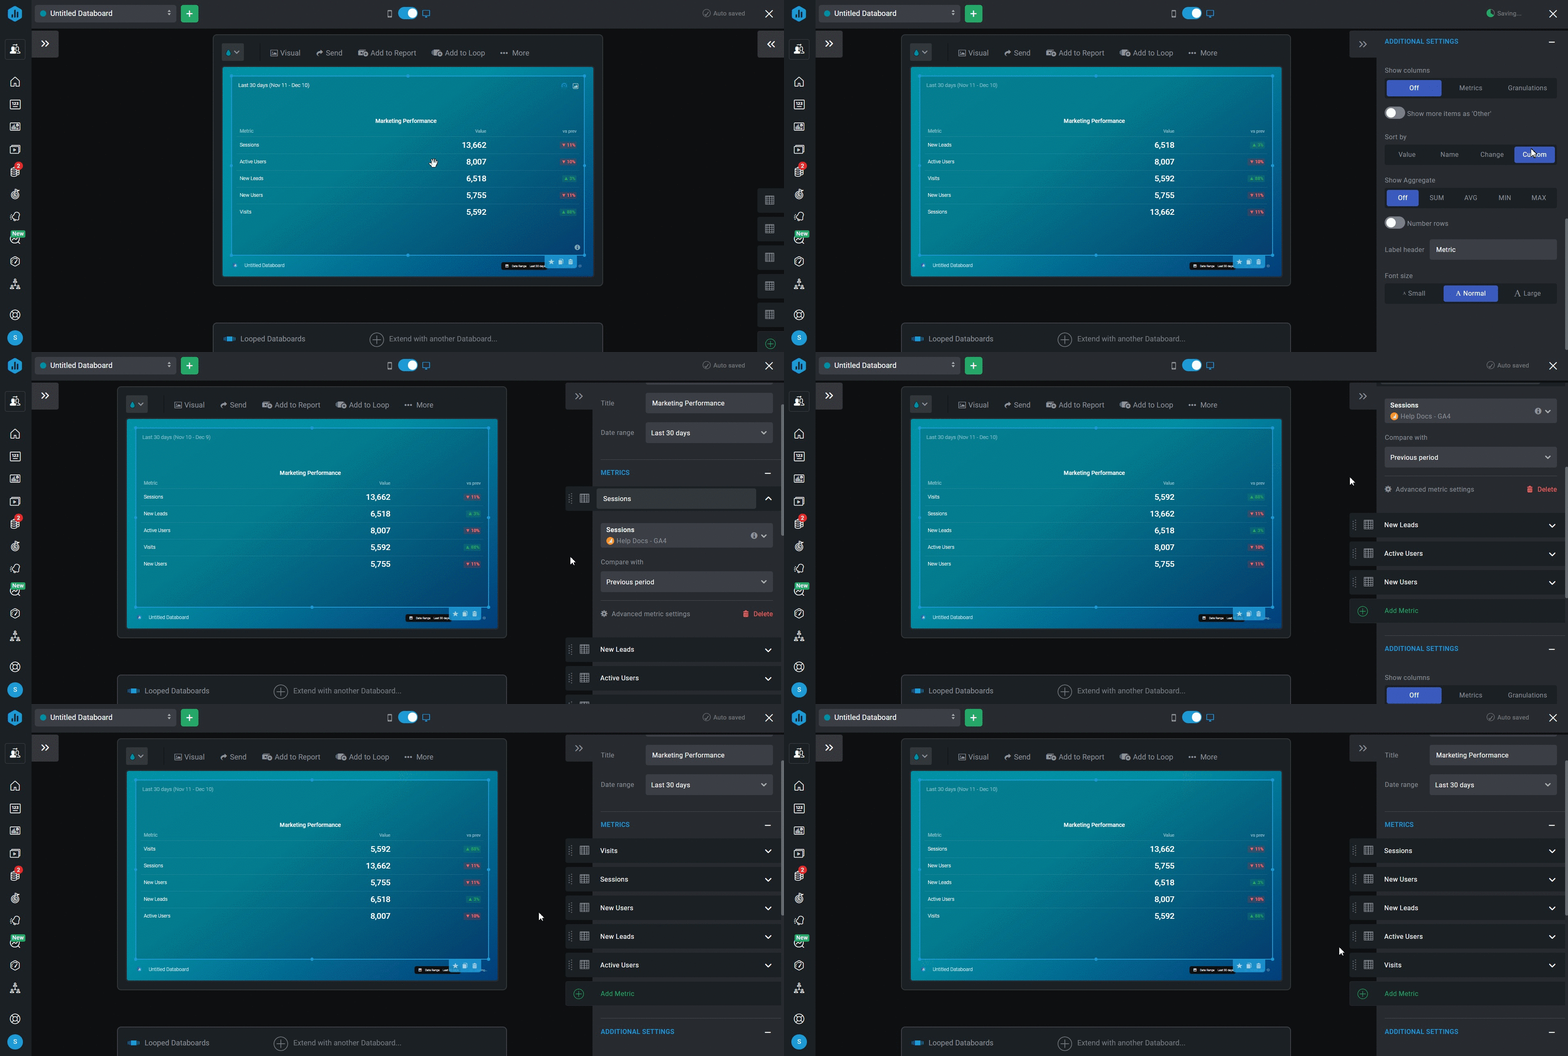
In the Designer, click on a row of the Table Datablock. This will open the Datablock Editor on the right-hand side.
-
Each Metric is manually added to the Table and is displayed in Datablock Editor. Under the Additional Settings section of the Datablock Editor, click on Sort by Custom.
- Click on the Dots on each Metric to drag and drop the Metrics in your preferred custom order.
It is not possible to change the order of Dimensions in a Table by using the Sort by Custom option. Learn more about Dimensional Metrics here.