


One dashboard rarely tells the whole story, and cramming everything onto a single screen makes it unreadable. A loop solves this by grouping several dashboards into a sequence that shares one link and cycles through them on a timer. It's what you want for an office screen that rotates through team metrics, a client review that moves from summary to detail, or any report that needs breathing room across several views.
- Go to Dashboards and open the Looped Dashboards tab.
- Click + New loop.
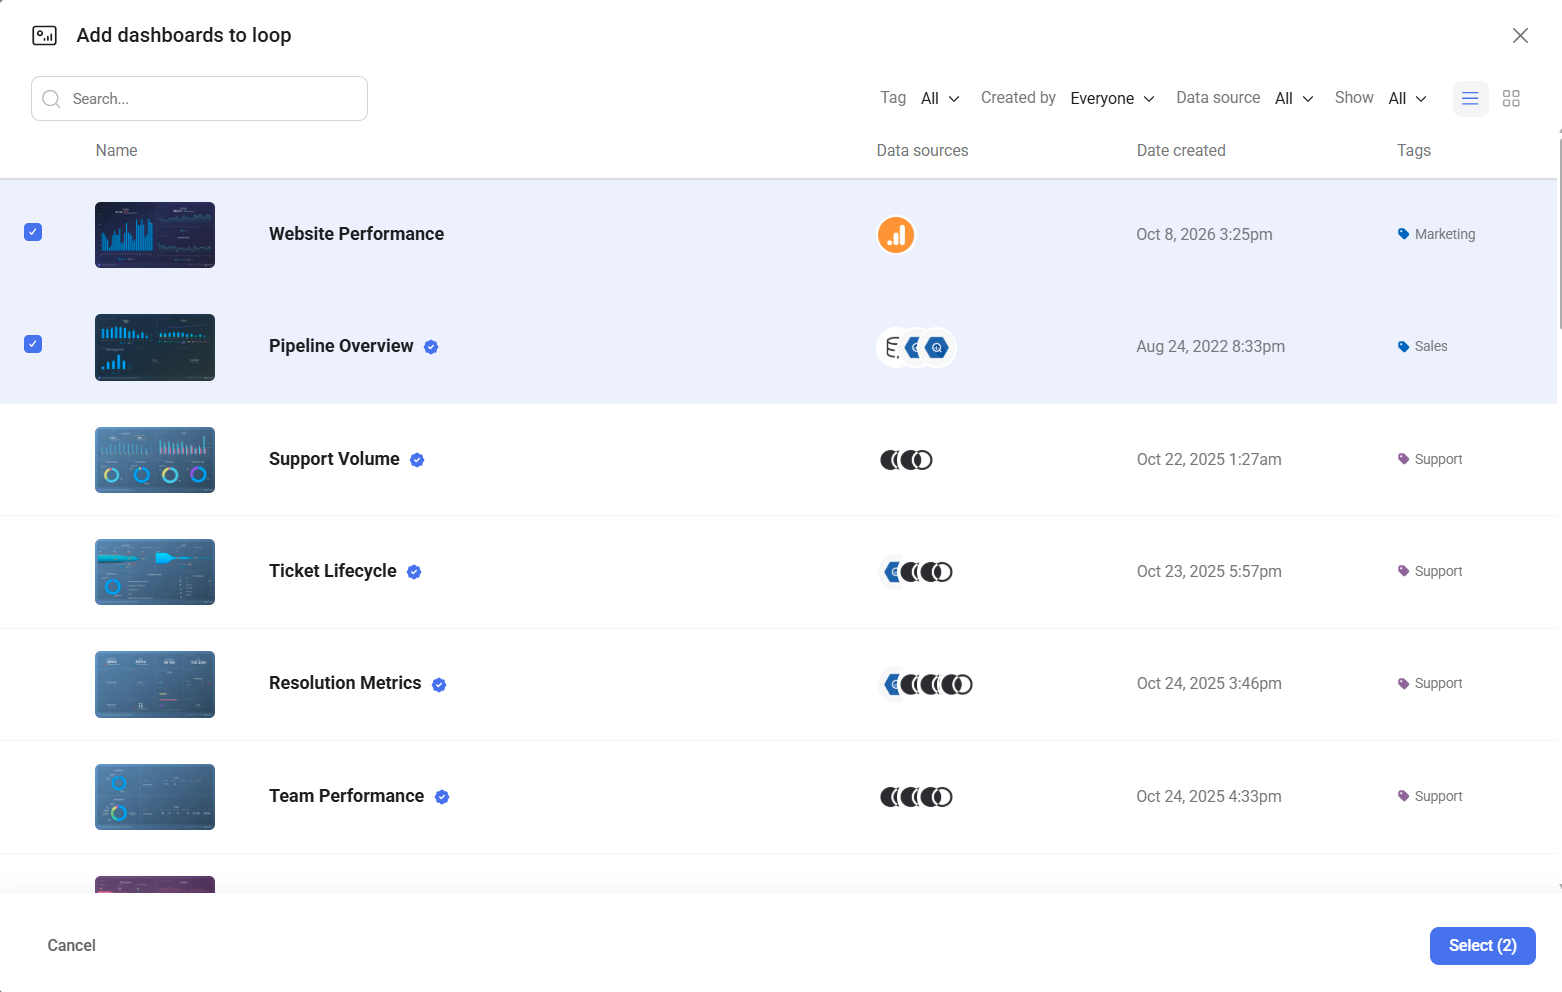
- In Add dashboards to loop, select the dashboards you want to include. Use Search or the Tag, Created by, Data source, and Show filters to narrow the list, and switch between list and grid view with the icons on the right.
- Click Select.
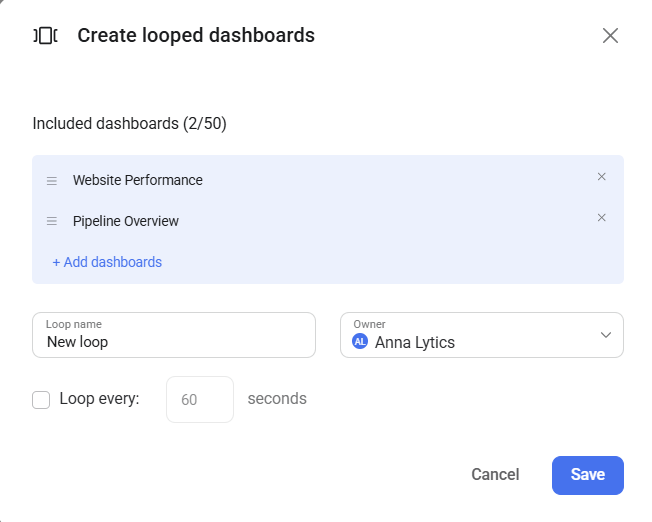
- In Create looped dashboards, enter a Loop name and choose an Owner.
- To cycle through the dashboards automatically, select the Loop every checkbox and set how many seconds each one stays on screen. Leave it cleared and viewers page through the loop themselves.
- Click Save.

The loop appears on the Looped Dashboards tab, listing how many dashboards it holds and which data sources they draw on.

A loop is only visible to people who have access to every dashboard inside it. If someone lacks access to even one included dashboard, the loop doesn't appear for them at all — so check access before adding a restricted dashboard to a loop your team relies on.
The order you set is the order viewers move through, so lead with the summary and follow with the detail.
- On the Looped Dashboards tab, click the drop-down arrow (
 ) next to View and select Edit.
 - In Edit looped dashboards, make your changes:
- Reorder — drag a dashboard by the handle on its left.
- Remove — click the × next to it.
- Add — click + Add dashboards and select more.
- Adjust the Loop name, Owner, or Loop every interval if needed.
- Click Save.
The counter above the list shows how many dashboards are in the loop out of how many you could add.
You can also build a loop around the dashboard you're already editing.
- Open a dashboard in the Designer.
- In the Looped dashboards panel at the bottom, click + Extend with another dashboard.
- Select the dashboards to loop with it.
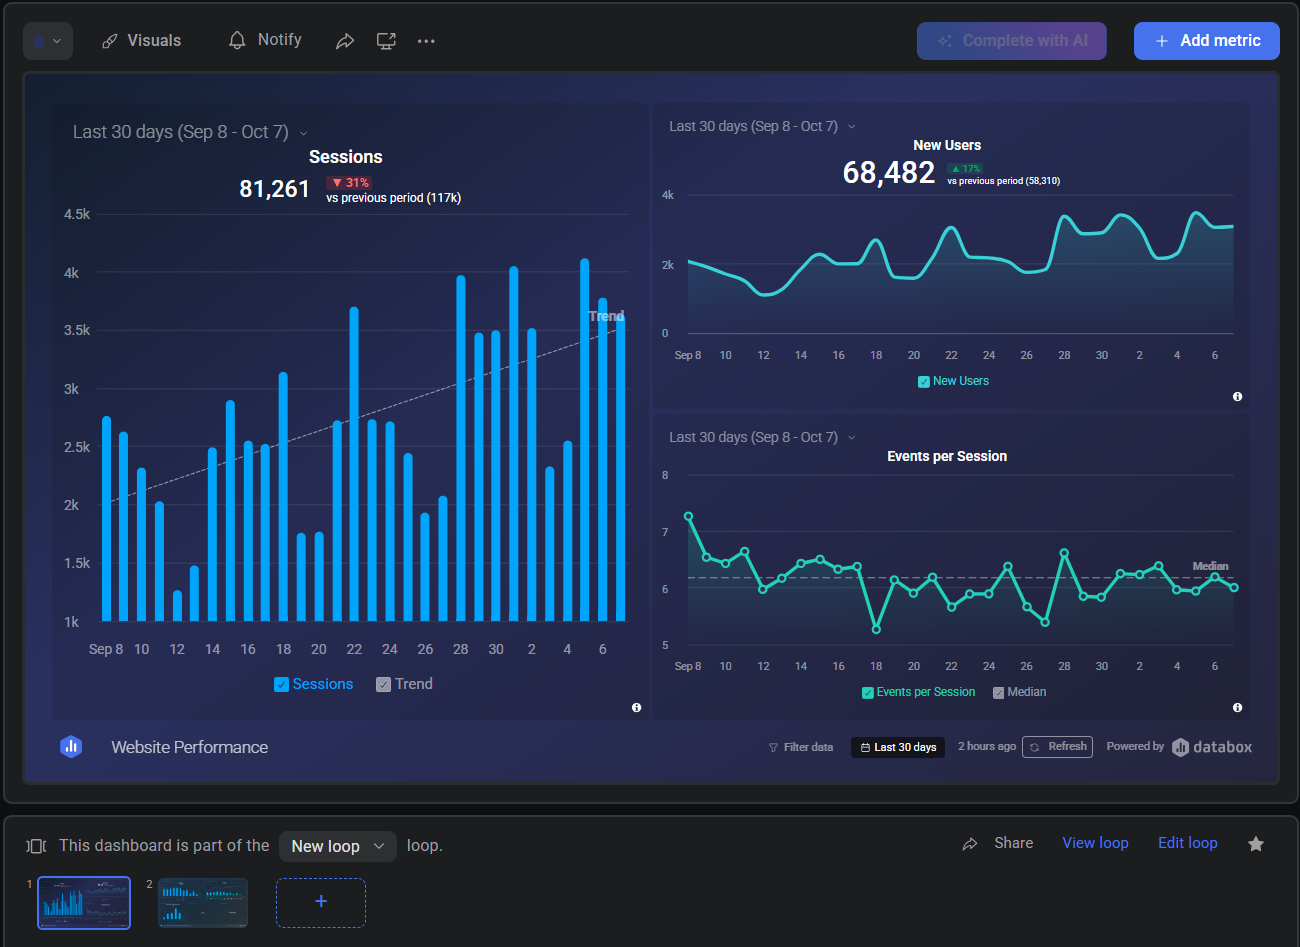
If the dashboard already belongs to a loop, the panel says so and shows every dashboard in that loop as a filmstrip. From there you can jump to View loop, open Edit loop, share it, or add another dashboard with the + at the end of the strip.
Click View on the Looped Dashboards tab to open the loop. The bottom of the screen shows your position — for example 1 / 2 — with arrows to move between dashboards.
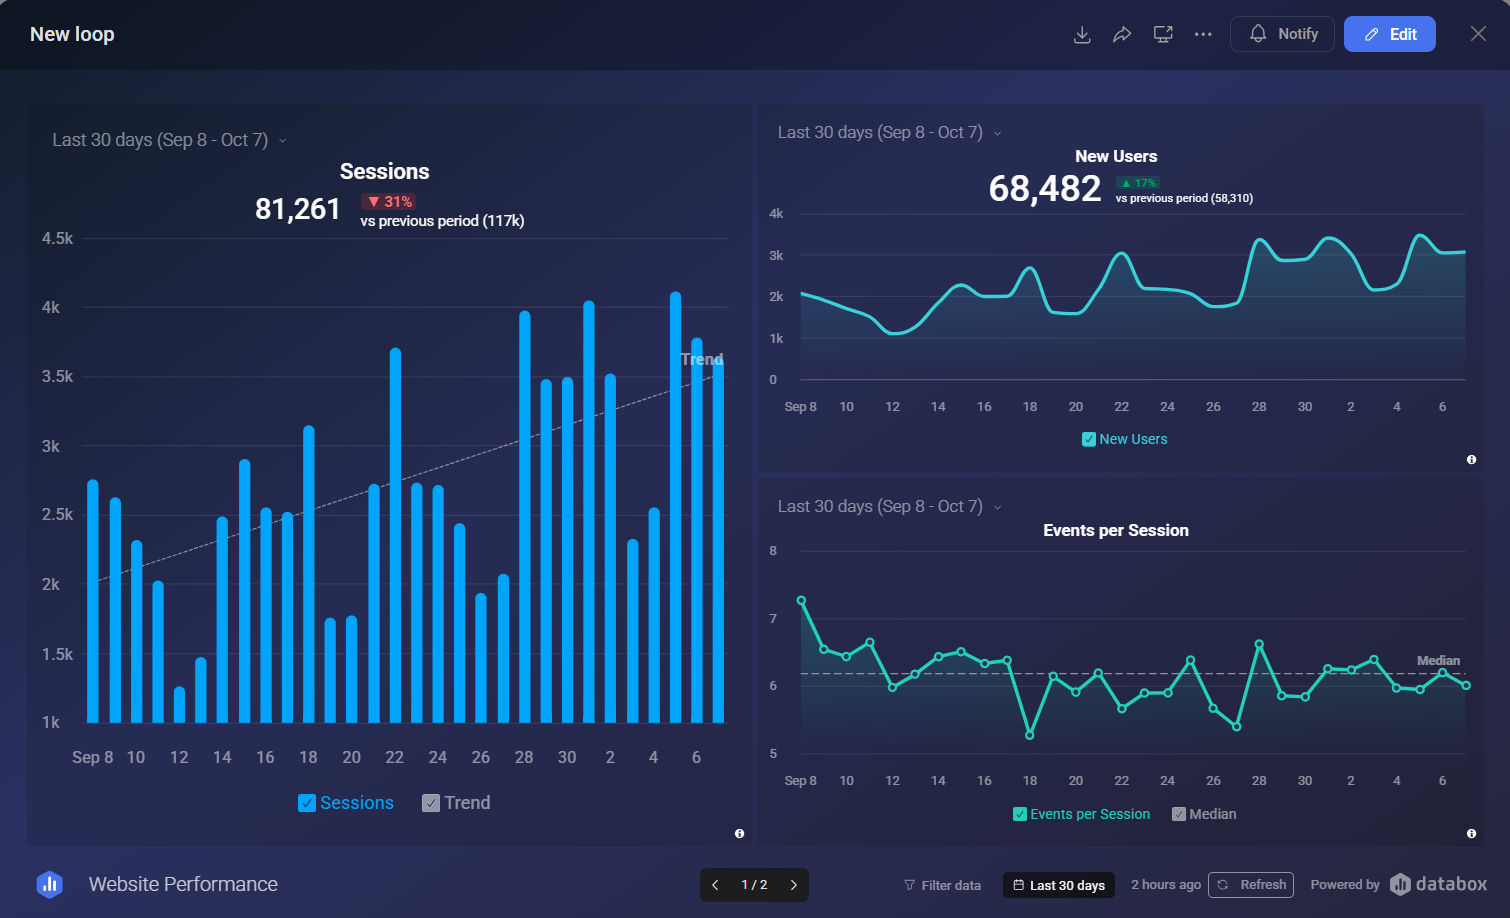
Everything else works as it does on a single dashboard: change the date range, filter the data, or refresh from the bottom bar.
The drop-down arrow () next to View holds the rest of the actions.
| Action | What it does |
|---|---|
| Edit | Opens Edit looped dashboards to change the contents, order, name, owner, or interval. |
| Open in Designer | Opens the loop's dashboards for editing. See Edit a dashboard. |
| Duplicate | Copies the loop, so you can vary it without rebuilding from scratch. |
| Save as template | Saves the loop for reuse. See Create a template. |
| New report | Builds a report from the loop's dashboards. See Create a single-page report. |
| Notifications | Sets up alerts and scheduled snapshots. See Set up a dashboard notification. |
| Add to Space | Files the loop in a Space. See Create a Space. |
| Change owner | Transfers the loop to another user. |
| Activity log | Shows who changed the loop and when. See Review the actions taken on your account. |
| Delete | Removes the loop. The dashboards inside it are not deleted. |
Sharing a loop shares the whole sequence, not just the first dashboard — anyone opening the link can page through all of it.
- On the Looped Dashboards tab, click the drop-down arrow () next to View and select Share.
- Choose how you want to share it:
- Shareable Link — copy an internal link for people who already have access, or switch on Enable public link for anyone with the URL.
- Send Snapshot — email an image or PDF of the loop.
- Embed — place the live loop on a web page.
- Stream to TV — run the loop on a connected display.
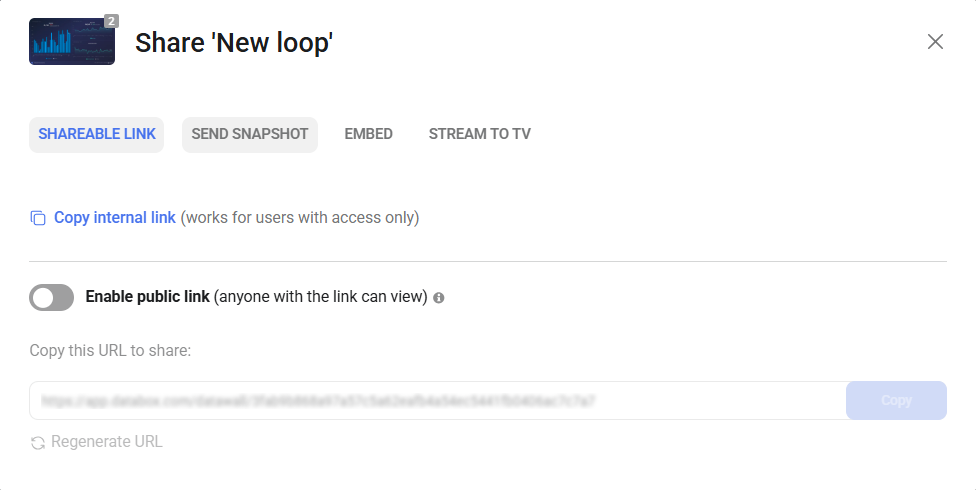
See Share a dashboard for the full detail on each option, including how to revoke a public link.
FAQ
Can one dashboard belong to more than one loop?
Yes. A dashboard can appear in as many loops as you need, and editing it updates every loop it belongs to. The Designer's Looped dashboards panel shows which loops the open dashboard is part of.
Does deleting a loop delete the dashboards in it?
No. A loop is only an ordered reference to dashboards, so deleting it leaves every dashboard untouched on the Dashboards page.
Does removing a dashboard from a loop delete it?
No. Clicking the × in Edit looped dashboards takes the dashboard out of that sequence only. The dashboard itself is unaffected.
What happens to a loop when a dashboard in it is deleted?
The dashboard is dropped from the loop immediately, and restoring it within 30 days does not put it back. Add it to the loop again after restoring. See Delete a dashboard.


