How to use Benchmark Groups for your Clients
HOW TO
- Update Company Information for your Clients
- Switch between your Agency and Client Accounts
- Join your Invite-Only Group on your Clients behalf
- Join a Benchmark Group on your Clients behalf
How to quickly update Company Information for your Clients
Company such as industry, business type, company size, and revenue is necessary for you to be able to join Benchmark Groups. By adding this information for your clients, you'll be able to add them to more relevant Benchmark Groups and benchmark their performance against similar companies.
Learn more on how to update your Company Information and your Clients Company Information here.
Only Agency Accounts have access to Client Accounts. Learn more about how to become a Databox Agency Partner here.
How to switch between your Agency and Client Accounts
Only Agency Accounts have access to Client Accounts. Learn more about how to become a Databox Agency Partner here.
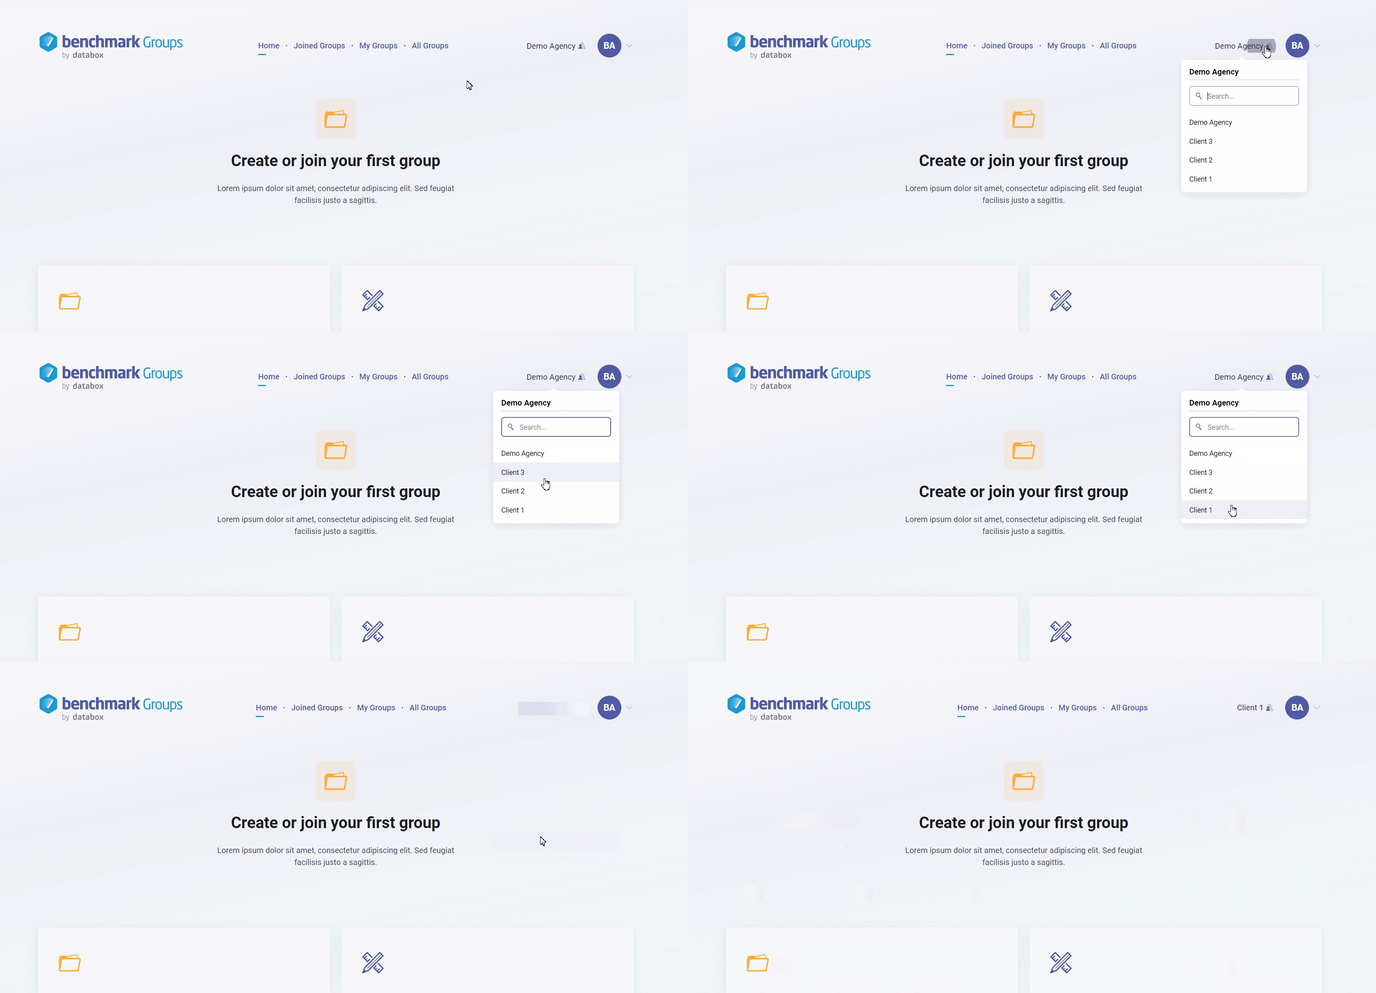
Pro Tip: Client Accounts created in the Databox app will also be visible in the Benchmark Groups. Learn more here.
- From any page in Benchmark Groups, click on the Switch Accounts icon on the top right-hand side.
- Select the Client Account from the available Client Account drop-down list to switch to the preferred Client Account.
How to join your Invite-only Group on your Clients behalf
Only Agency Accounts have access to Client Accounts. Learn more about how to become a Databox Agency Partner here.
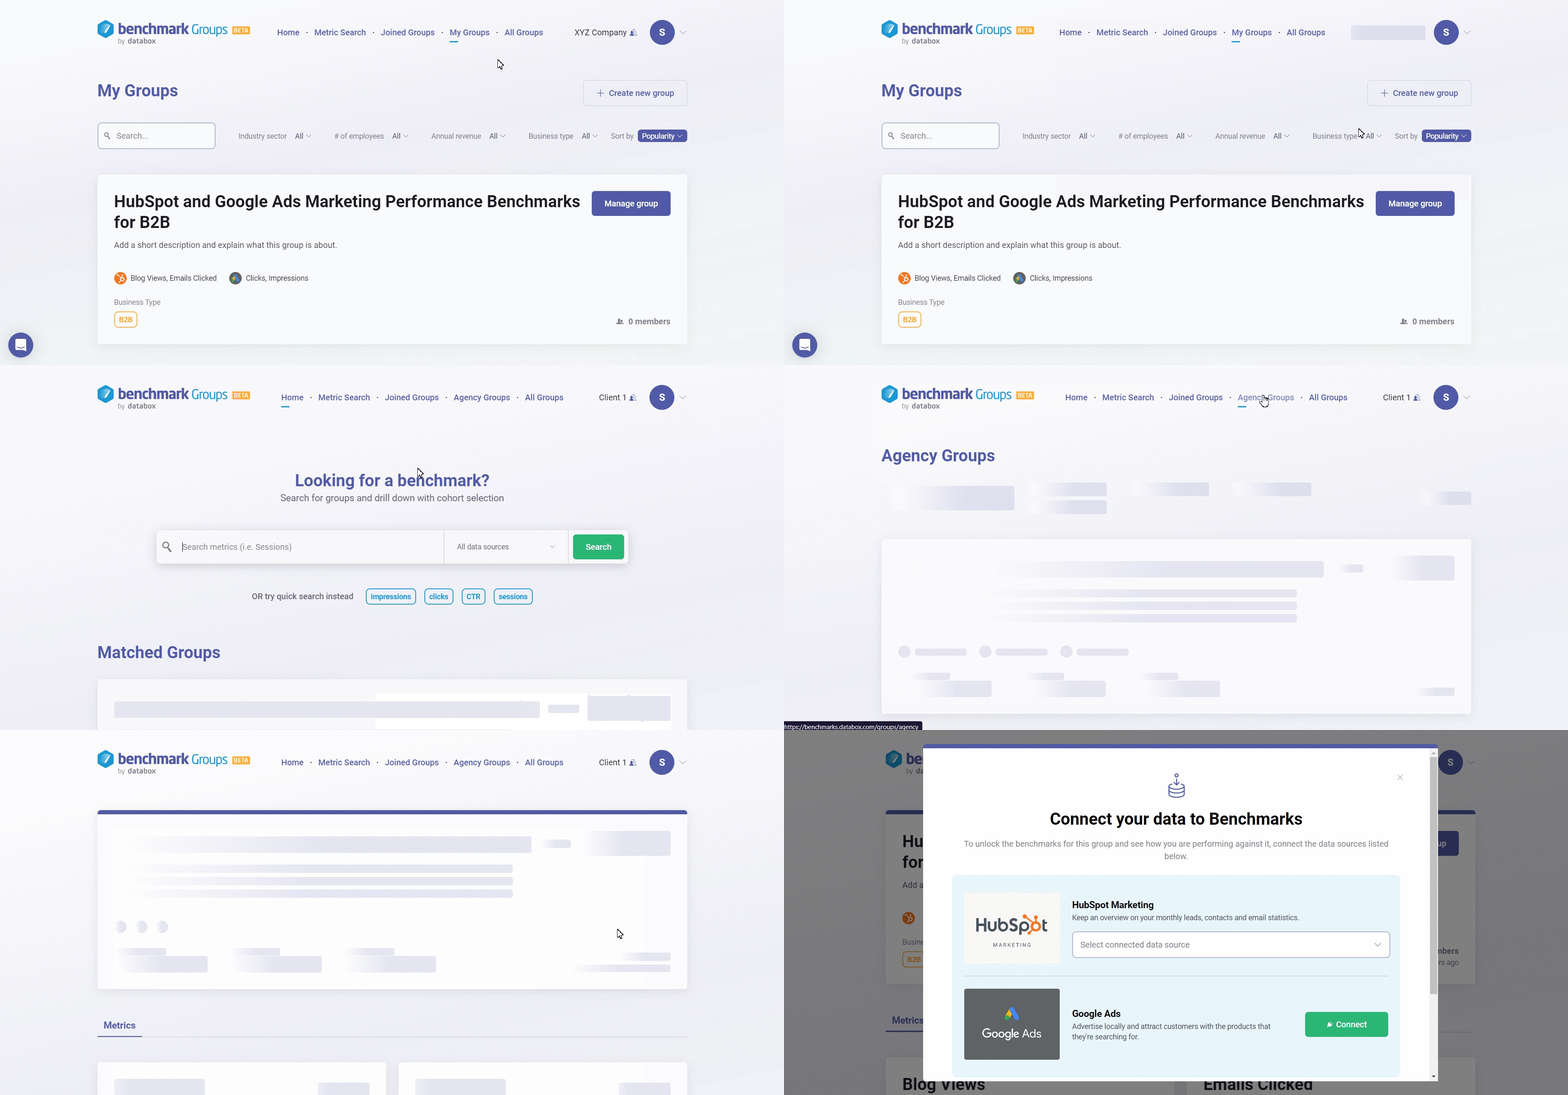
Pro Tip: Client Accounts created in the Databox app will also be visible in the Benchmark Groups. Learn more here.
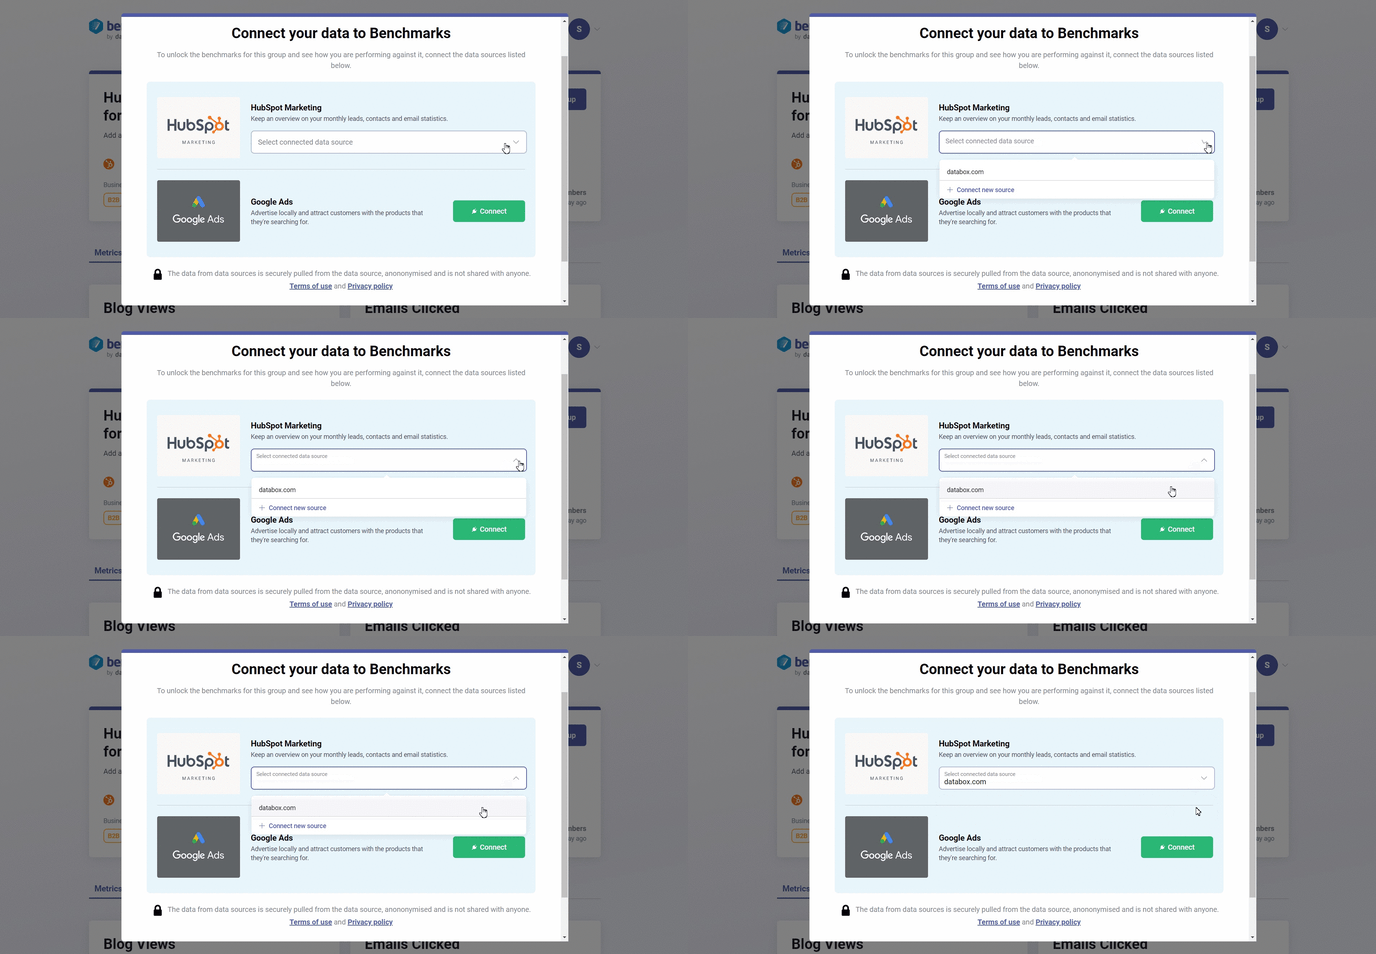
If the Data Source is not already connected in your Client's Account, click on the green Connect button to connect your client's Data Source(s). An Authorization window will open where you will be prompted to enter your client's login credentials for that specific Data Source.
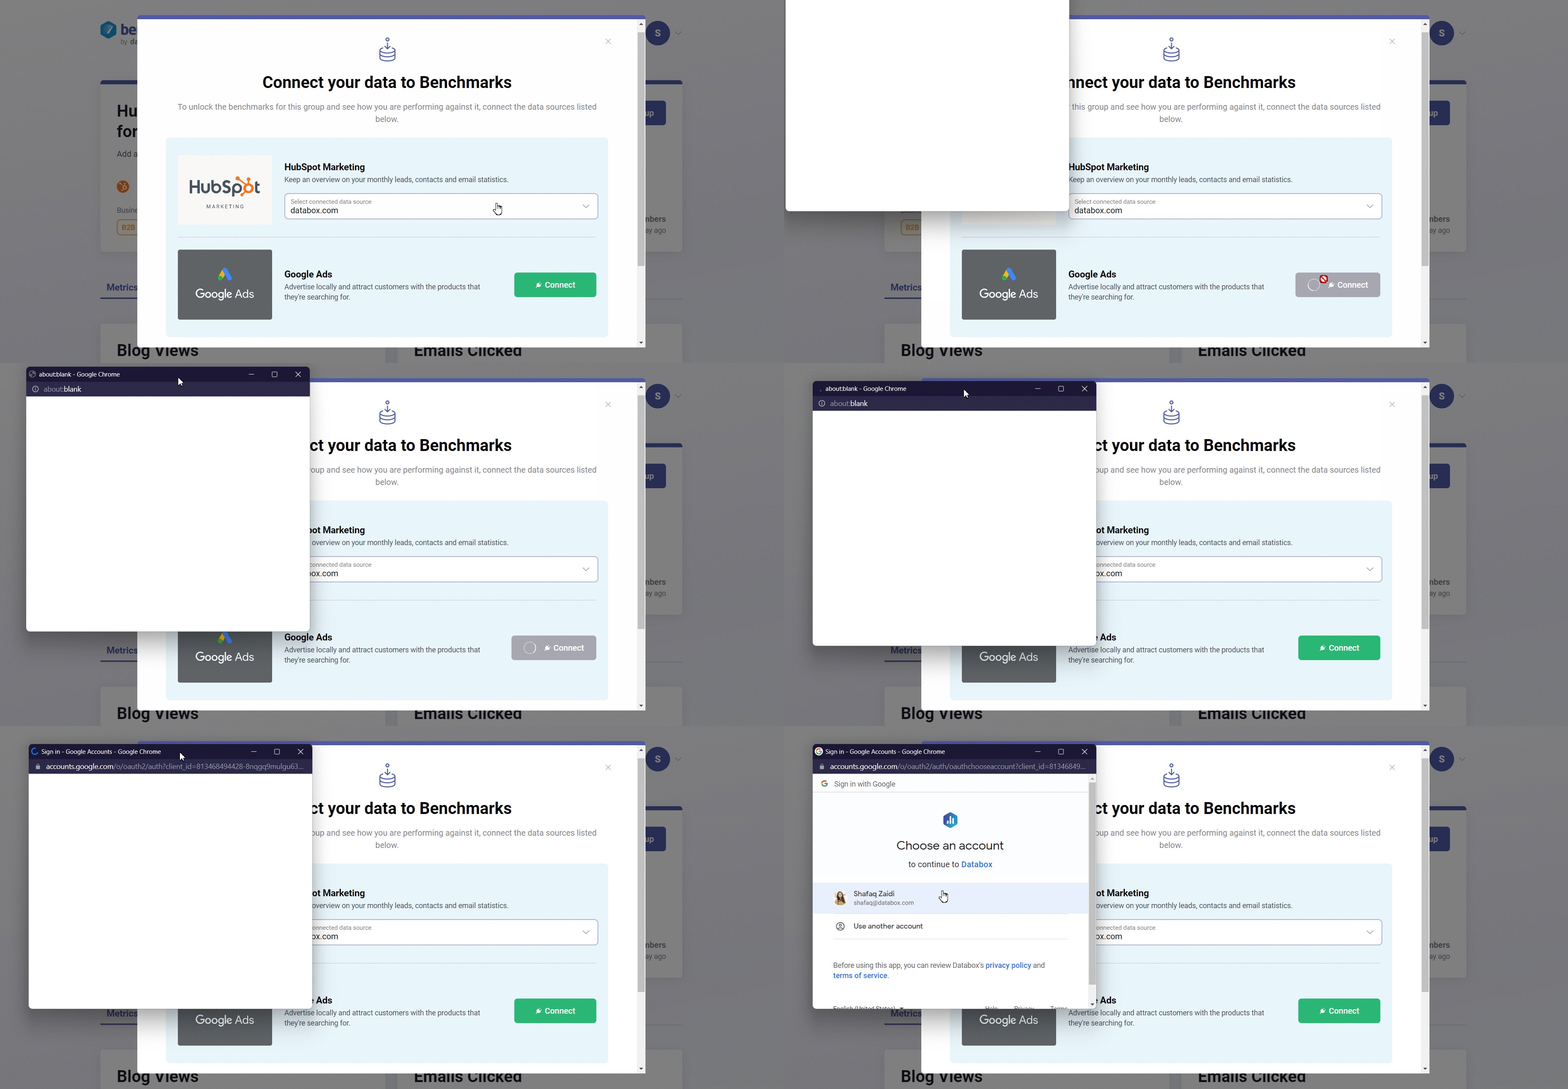
5. After you have connected the Data Source(s), click the blue Continue button, so your Client is added to your Invite-Only Group.
How to join a Benchmark Group on your Clients behalf
Only Agency Accounts have access to Client Accounts. Learn more about how to become a Databox Agency Partner here.
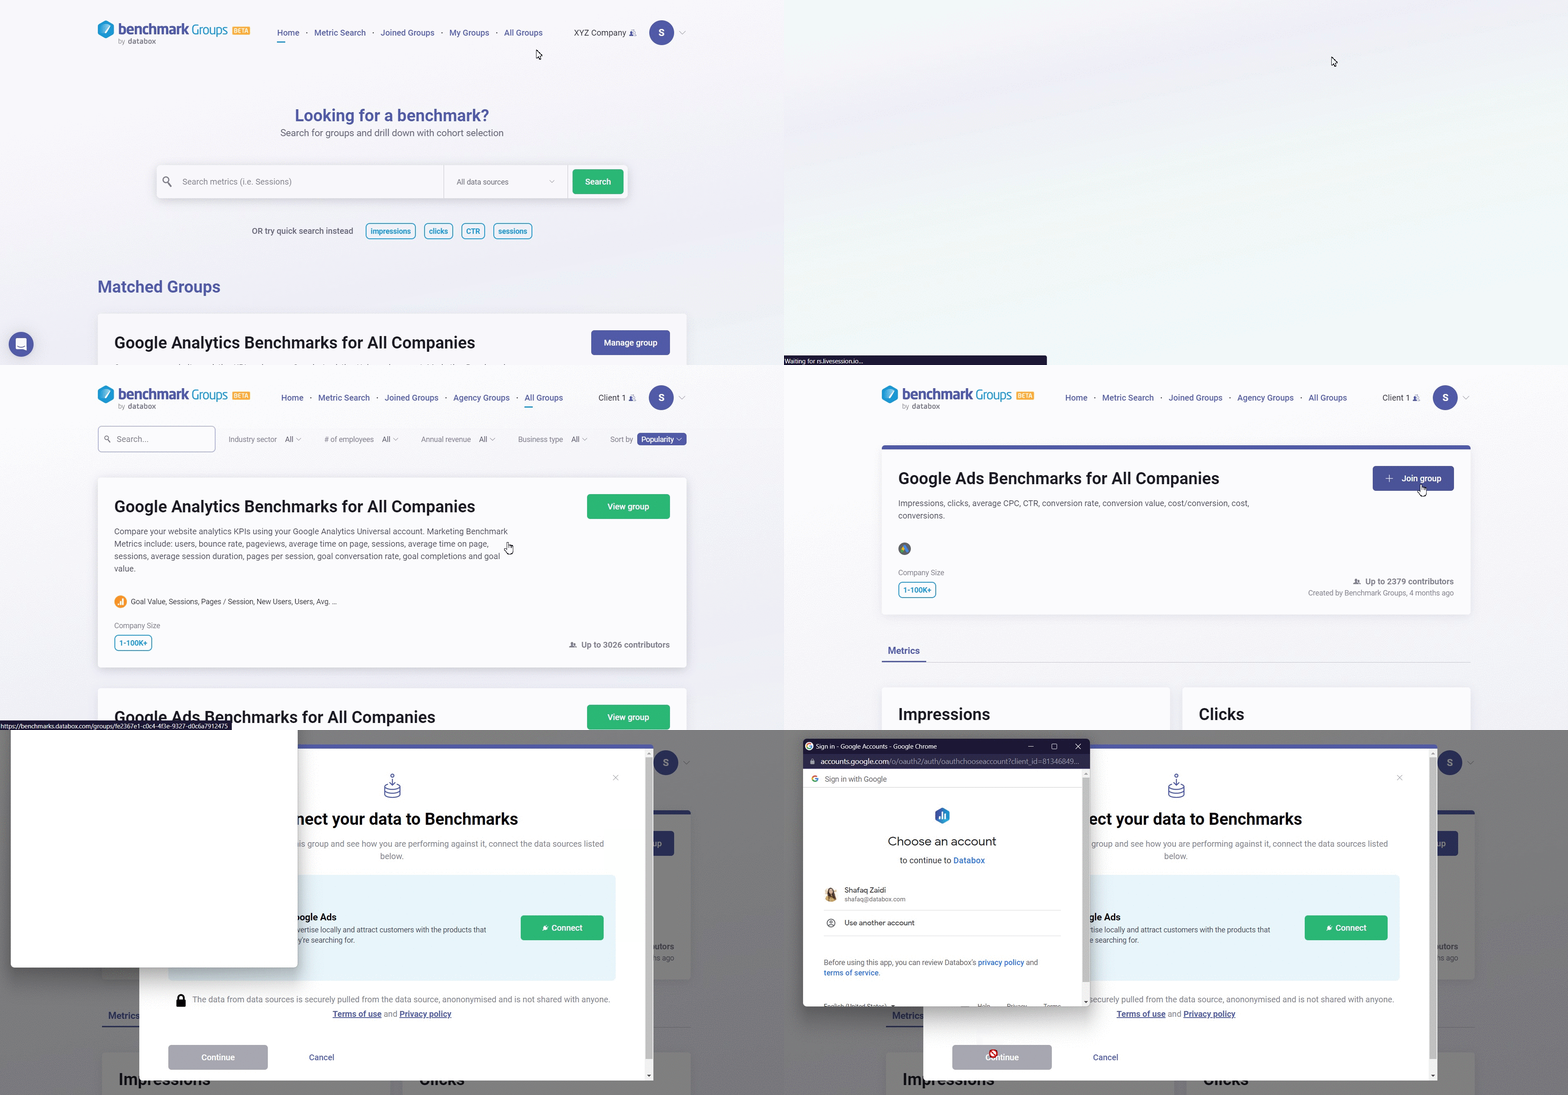
Pro Tip: Client Accounts created in the Databox app will also be visible in the Benchmark Groups. Learn more here.
- Click on the Switch Accounts icon on the top right-hand side and select the preferred Client Account from the available Client Account list to switch to that Client Account.
- Navigate to All Groups and click on the green View Group button.
- Click on the blue + Join group button to add your Client to the Benchmark Group. This will open a new window where you will be prompted to select or connect your client's Data Source(s).
- If the Data Source is already connected in your Client Account, click on the drop-down arrow to select the Data Source. If the Data Source is not already connected in your Client's Account, click on the green Connect button to connect your client's Data Source(s). An Authorization window will open where you will be prompted to enter your client's login credentials for that specific Data Source.
- After you have connected the Data Sources, click the blue Continue button, so your Client is added to the Benchmark Group.