
Databoards help you communicate performance data clearly and keep teams aligned around key metrics. Sharing them allows stakeholders to stay informed, monitor progress, and make data-driven decisions without needing direct access to the underlying tools or data sources.
Databox provides several ways to share Databoards depending on how you want others to access the data.
Follow these steps to open the sharing options.
Open the Share menu using one of the following options:
- On the Databoards page, hover over a Databoard and click Share.
- While viewing a Databoard, click Share in the top toolbar.
- In the Designer, click Copy URL in the top toolbar.
Select one of the available sharing tabs:
- User Access
- Shareable Link
- Send Snapshot
- Embed
- Stream to TV
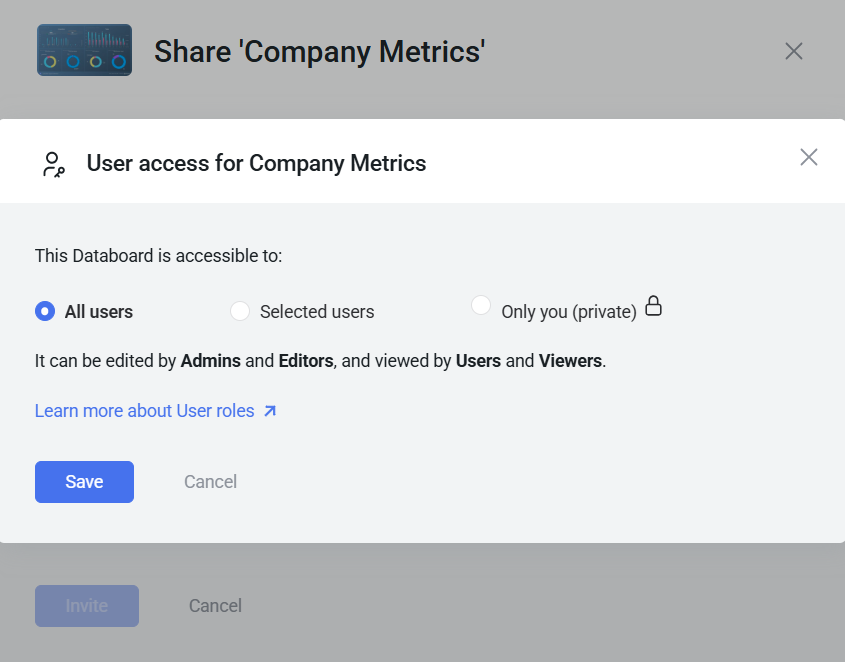
You can control who in your account can access a Databoard by configuring its permissions.
In the Share menu, select the User Access tab.
- Click Change permissions.
- Choose who can access the Databoard:
- All users — the Databoard is visible to everyone in your account.
- Selected users — only the users you choose can view the Databoard.
- Only you (private) — the Databoard is visible only to you.
- If you select Selected users, search for and select the users who should have access.
- Click Save.
Shareable links allow you to provide access to a Databoard using a URL. You can copy an internal link for users who already have access, or generate a public link that can be viewed outside your account.
In the Share menu, select the Shareable Link tab.
Use an internal link to share the Databoard with users who already have permission to view it.
- Click Copy internal link.
- Send the link to users in your account.
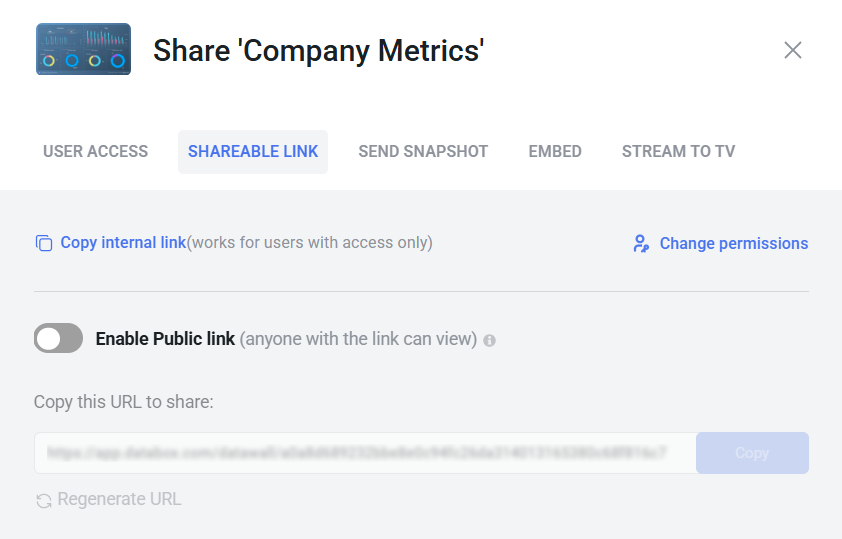
Public links allow people outside your account to view the Databoard.
- Turn on Enable Public link.
- Click Copy to copy the generated URL.
- Share the link with anyone you want to give access to the Databoard.
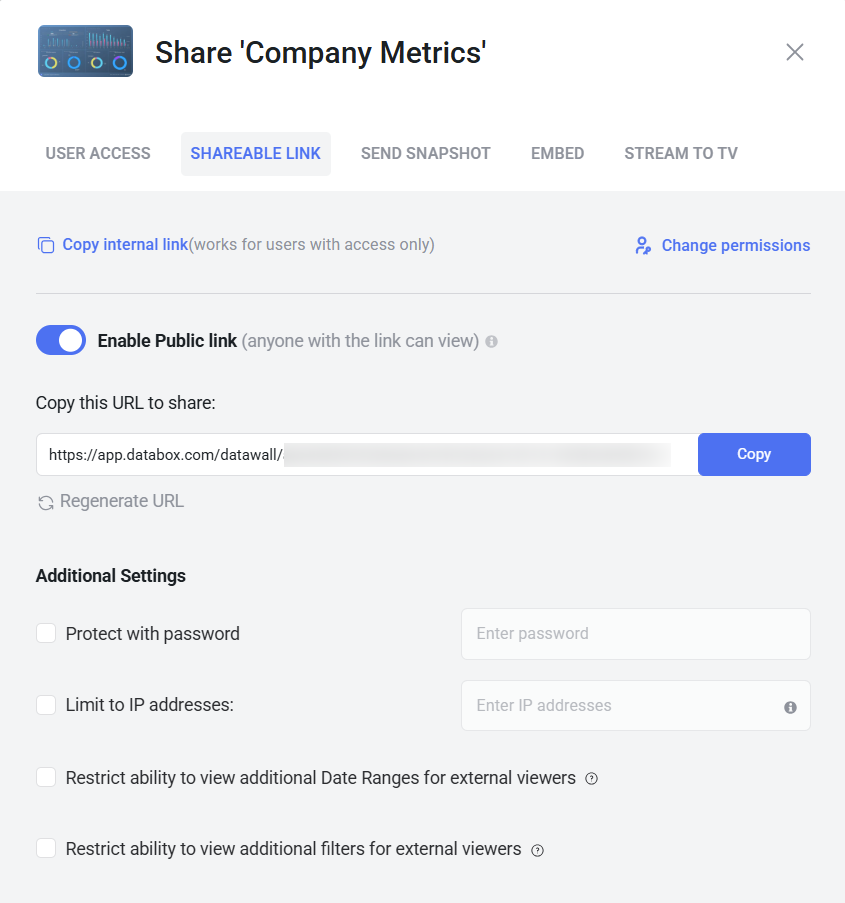
You can apply additional restrictions to control how external viewers access the Databoard.
- Protect with password — Require viewers to enter a password before accessing the Databoard.
- Limit to IP addresses — Allow access only from specific IP addresses. Wildcards such as * are supported.
- Restrict additional date ranges — Prevent external viewers from changing any date ranges.
- Restrict additional filters — Prevent external viewers from modifying Databoard filters.
You can send a Databoard as a snapshot by email or Slack. Snapshots capture the current state of the Databoard and send it as an image or PDF.
- In the Share menu, select the Send Snapshot tab.
- Choose where to send the snapshot:
- Select Send to Email and enter the recipient email addresses.
- Select Send to Slack and choose the Slack channel(s).
- Select the File format (JPG or PDF).
- Choose the Date range:
- As set on Databoard(s) to use the current date range.
- Select a specific date range (for example, Last Month).
- Click Send now.
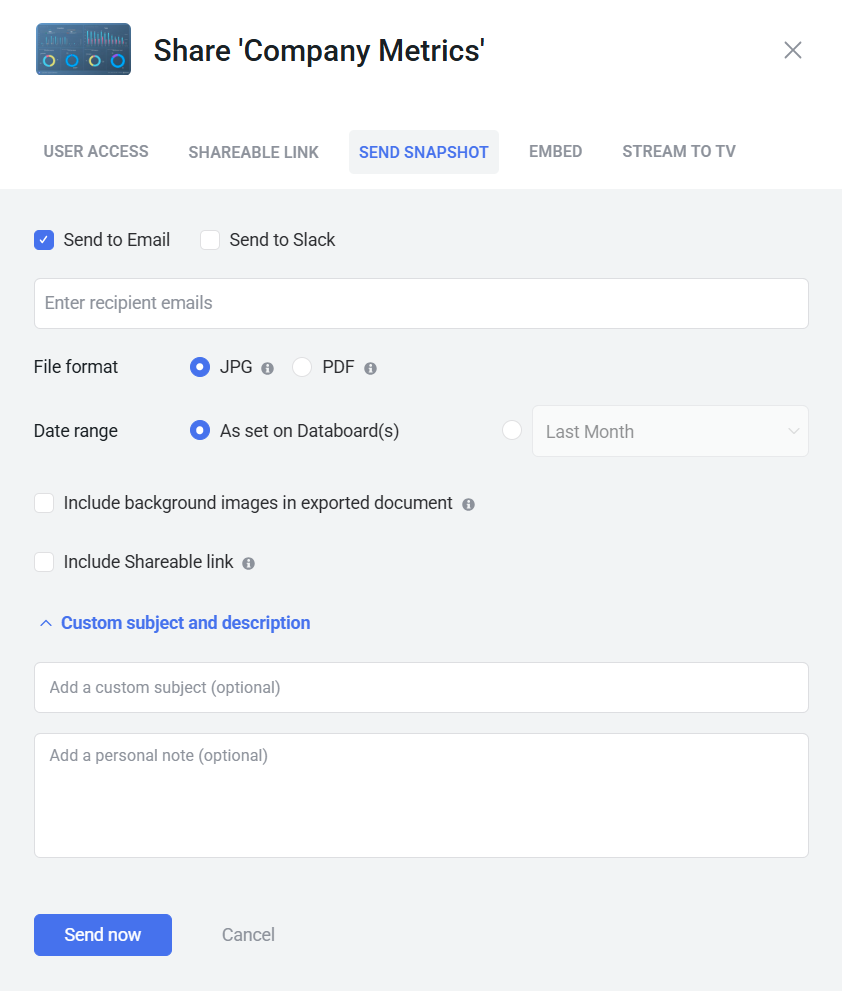
You can also customize how the snapshot is delivered:
- Include background images in exported document to preserve Databoard styling.
- Include Shareable link so recipients can open the Databoard directly.
- Custom subject and description to add a message to the email.
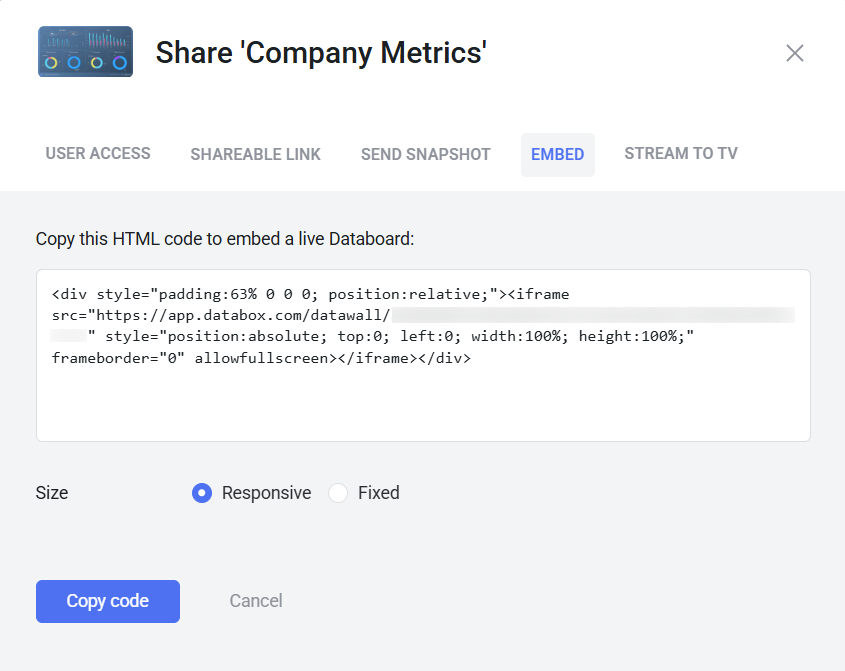
Embedding allows you to display a live Databoard on a website, intranet, or client portal. The embedded Databoard updates automatically as your data changes and remains interactive, allowing viewers to change the date range or interact with visualizations depending on the embed configuration.
In the Share menu, select the Embed tab.
Choose the Size option:
- Responsive to automatically adjust to the container size.
- Fixed to use a static size.
Click Copy code to copy the HTML embed code.
Paste the code into the HTML of your website or application where you want the Databoard to appear.
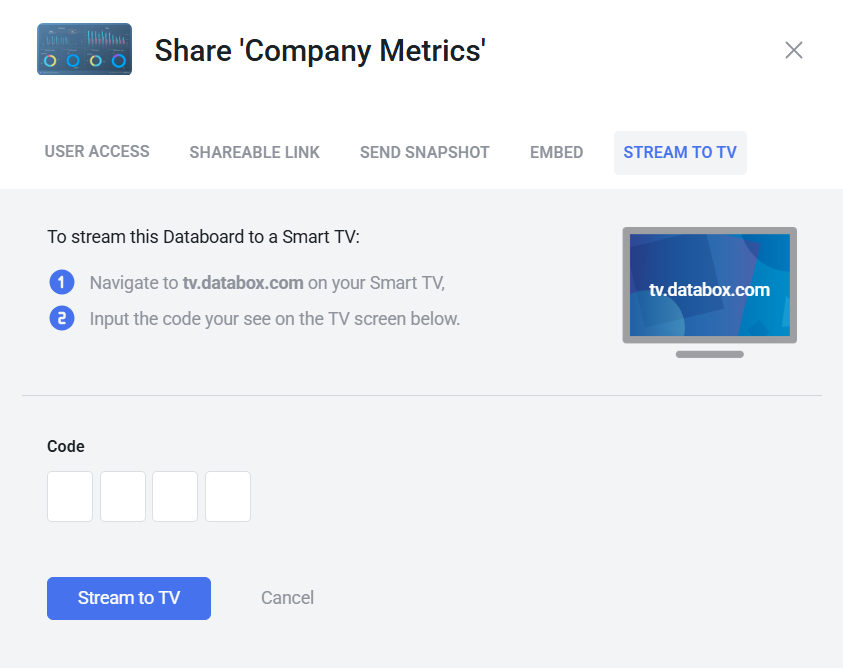
Streaming allows you to display a Databoard on a Smart TV or large screen for continuous visibility in offices, meeting rooms, or shared workspaces.
In the Share menu, select the Stream to TV tab.
- On your Smart TV or display device, open a browser and go to tv.databox.com.
- Enter the code shown on the TV screen in the Code field.
- Click Stream to TV.
The Databoard will begin displaying on the connected screen.
FAQ
Can I disable a public Databoard link after sharing it?
Yes. Turn off Enable Public link in the Shareable Link tab to immediately disable access.
You can also click Regenerate URL to create a new link and invalidate the previously shared one.
Can I pass parameters to the embed URL to control filters or date ranges?
No. Passing parameters through the embed URL is not supported.
Embedded Databoards always load using the configuration defined in the original Databoard and the available viewer controls. Filters, date ranges, and other settings cannot be modified through URL parameters.
Does changing Databoard permissions affect public links or embeds?
Permissions control access for users inside your account. Public links and embedded Databoards can still be viewed externally if they are enabled.
What can I do if my TV browser is outdated?
If your TV no longer receives browser updates, you can connect an external streaming device that runs a modern browser.
Devices such as Google TV devices, Amazon Fire TV, or similar streaming hardware allow you to open Databoards using an updated browser, independent of the TV's built-in software.
Which TVs work best for streaming Databoards?
Databox does not officially recommend specific TV models.
In general, newer TVs with browsers that receive regular updates work best. TVs running Android TV with Chrome-based browsers often provide a reliable experience. Newer Samsung and LG TVs with updated native browsers can also work well.
The most important factor is ensuring that the browser used on the TV continues to receive updates.
Why is my Databoard not displaying correctly on my TV?
This issue is often caused by outdated browsers on Smart TVs. You may see errors, a blank screen, or only some Databoard blocks appearing.
First, check which browser is being used on the TV:
- If you are using Chrome, make sure it is updated to the latest version.
- If you are using the TV's native browser, update the TV's software and try again.
If the problem continues after updating, try opening the Databoard using Chrome or another modern browser if your TV supports it.
Why isn't my Databoard switching to portrait mode on a vertical screen?
Databox switches to portrait mode only when both of the following conditions are met:
- The screen width is at least 1050 pixels
- The width-to-height ratio is less than 2:3
These requirements help ensure the Databoard remains readable and prevent portrait layouts from appearing on small screens.
For example:
- 1080 × 1920 → portrait mode is used
- 1080 × 1600 → portrait mode is not used (ratio too wide)
- 800 × 1024 → portrait mode is not used (screen width too small)
Databoard blocks always fit within a 16:9 layout in landscape or 9:16 layout in portrait view to avoid stretching.


