
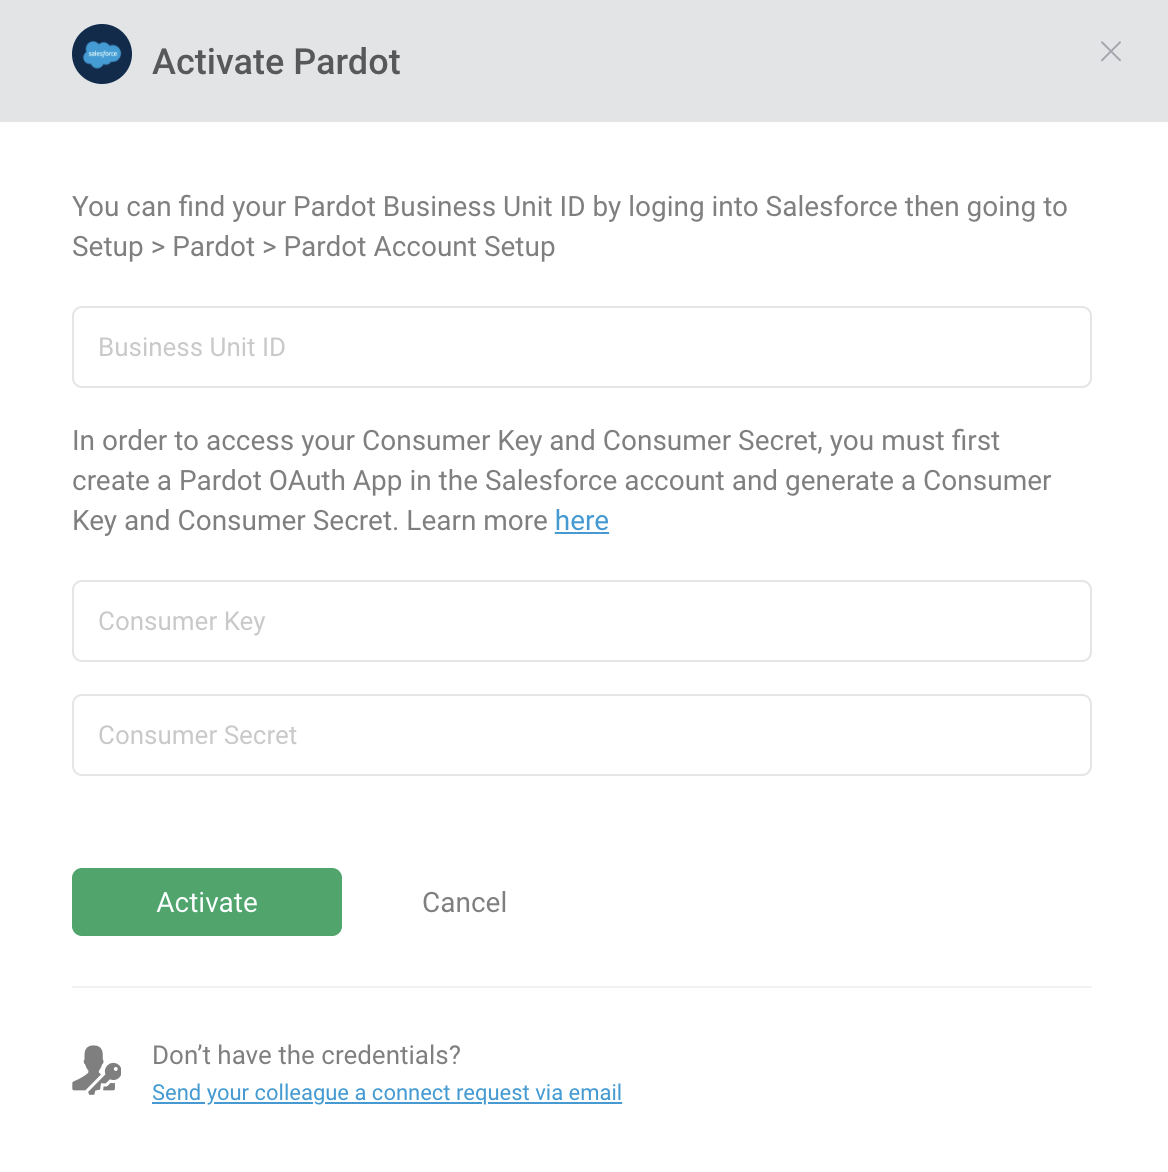
In order to connect your Pardot Account to Databox, you must provide a Pardot Business Unit ID and create a Pardot OAuth App to generate a Consumer Key and Consumer Secret.
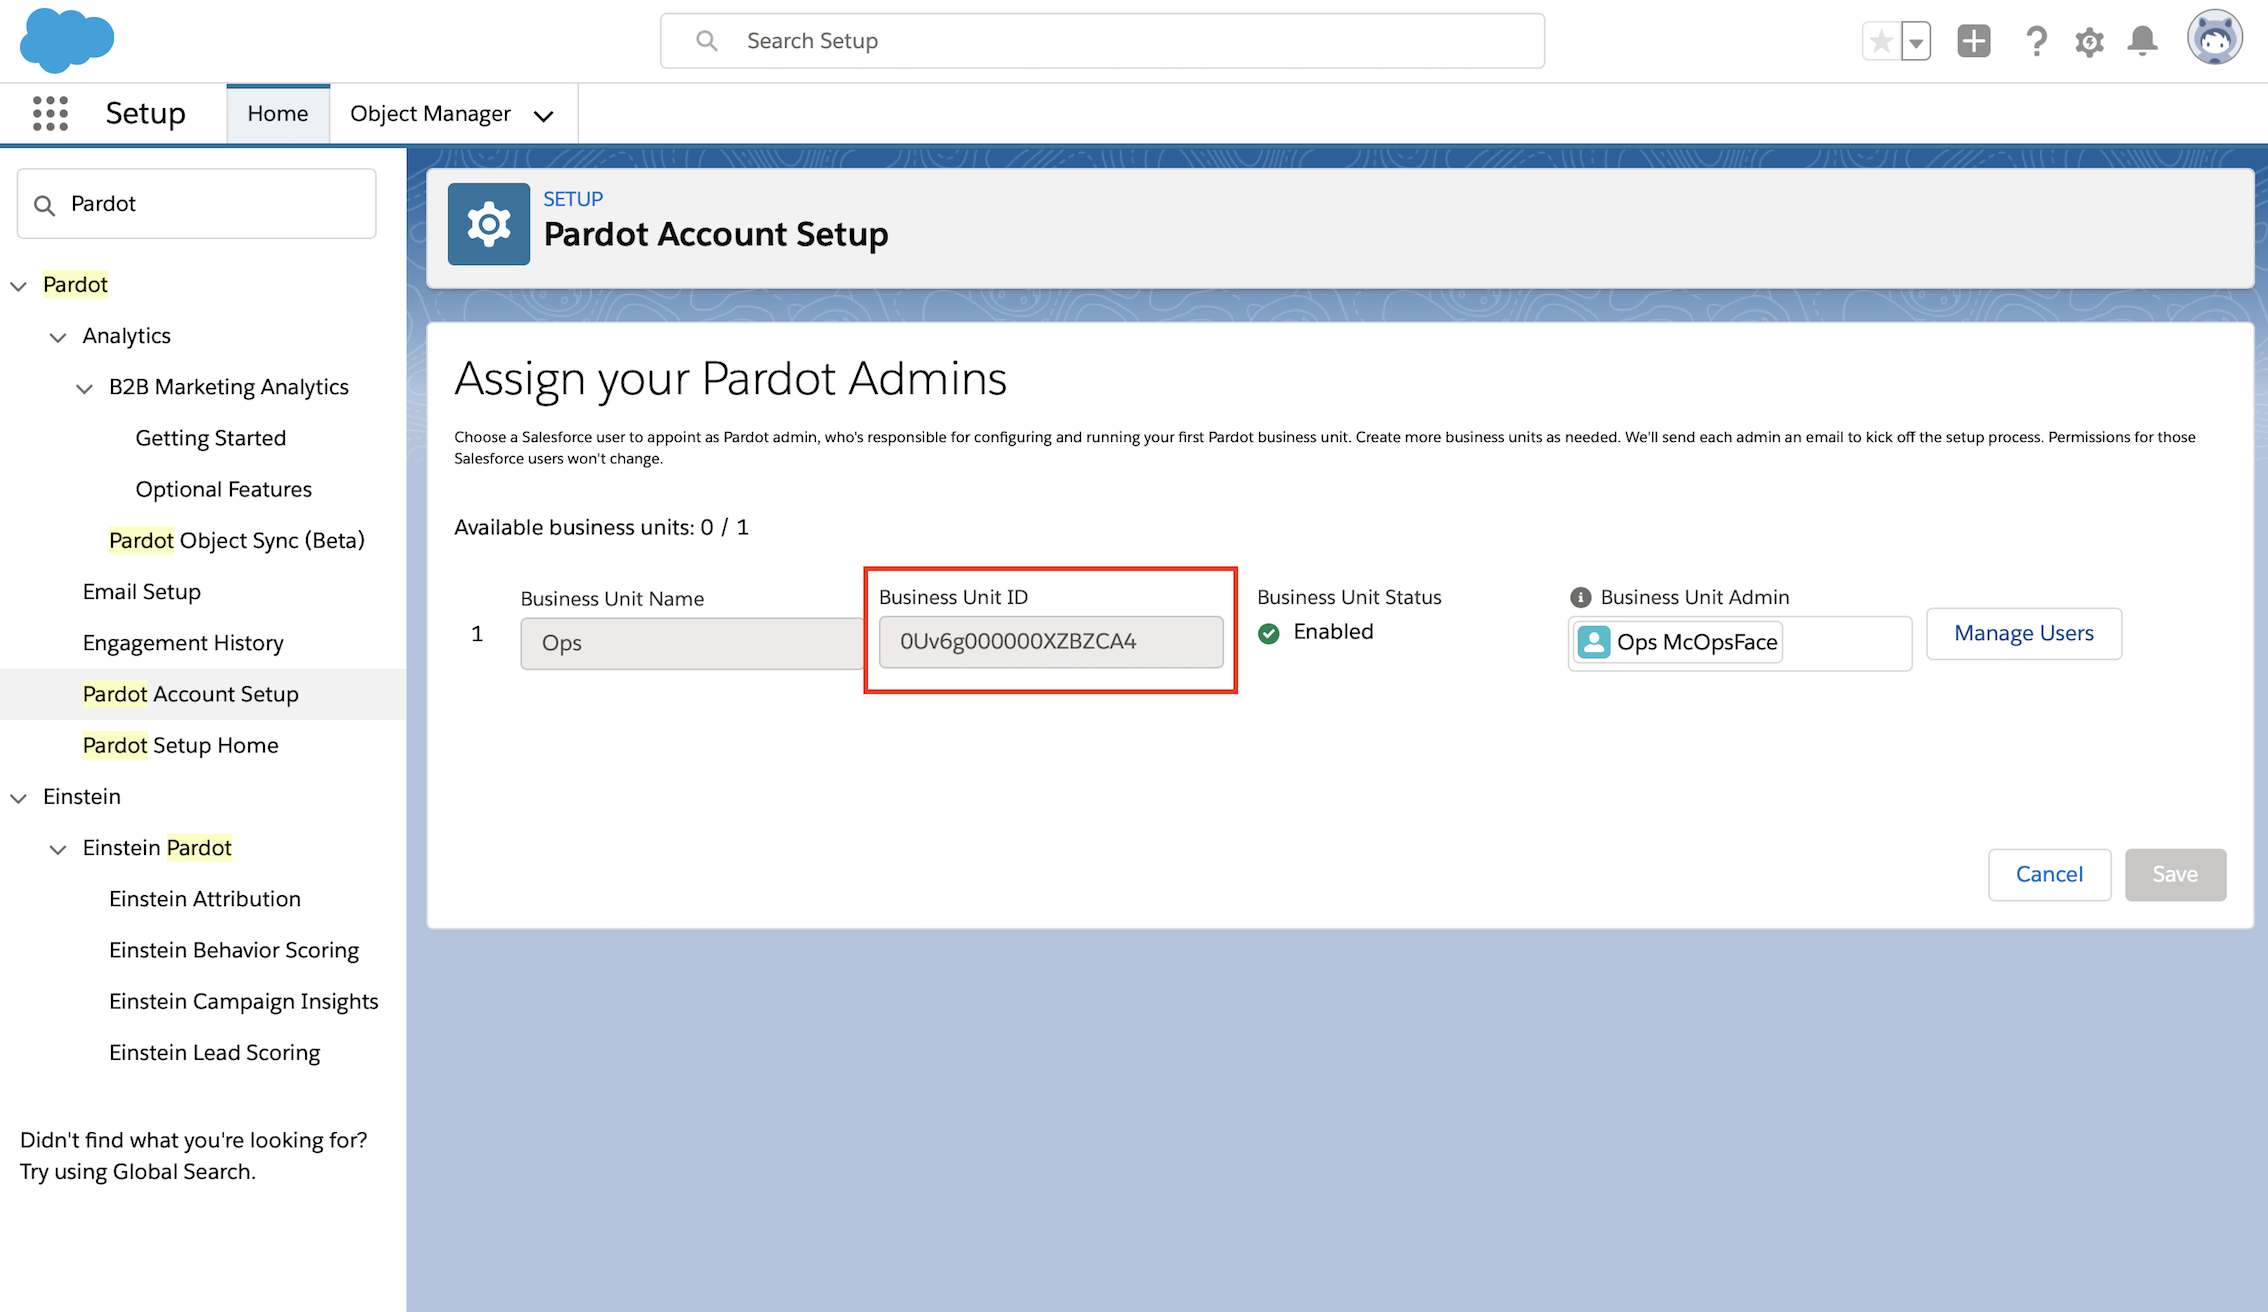
To find your Pardot Business Unit ID in Salesforce, follow the steps below:
- Login to your Salesforce Account using the same account you use to log in to Pardot
- Navigate to the Setup tab
- Type Pardotin the Search bar
- In the lefthand menu, navigate to **Pardot >**Analytics > Pardot Account Setup
- Copy the Business Unit ID
You may have multiple Pardot business units available. Use the Business Unit ID of the Pardot Account you want to connect with Databox.
To create a Pardot OAuth App, follow the steps below:
Login to your Salesforce Account using the following URL: https://na168.lightning.force.com/lightning/setup/SetupOneHome/home
In lefthand menu, navigate to Platform Tools > Apps > App Managerand click New connected App
Under the Basic Information section fill in the following fields:
- Connected App Name: user's choice of name (i.e, Pardot)
- API Name: user's choice of name (i.e, Pardot_API)
- Contact Email: user's choice
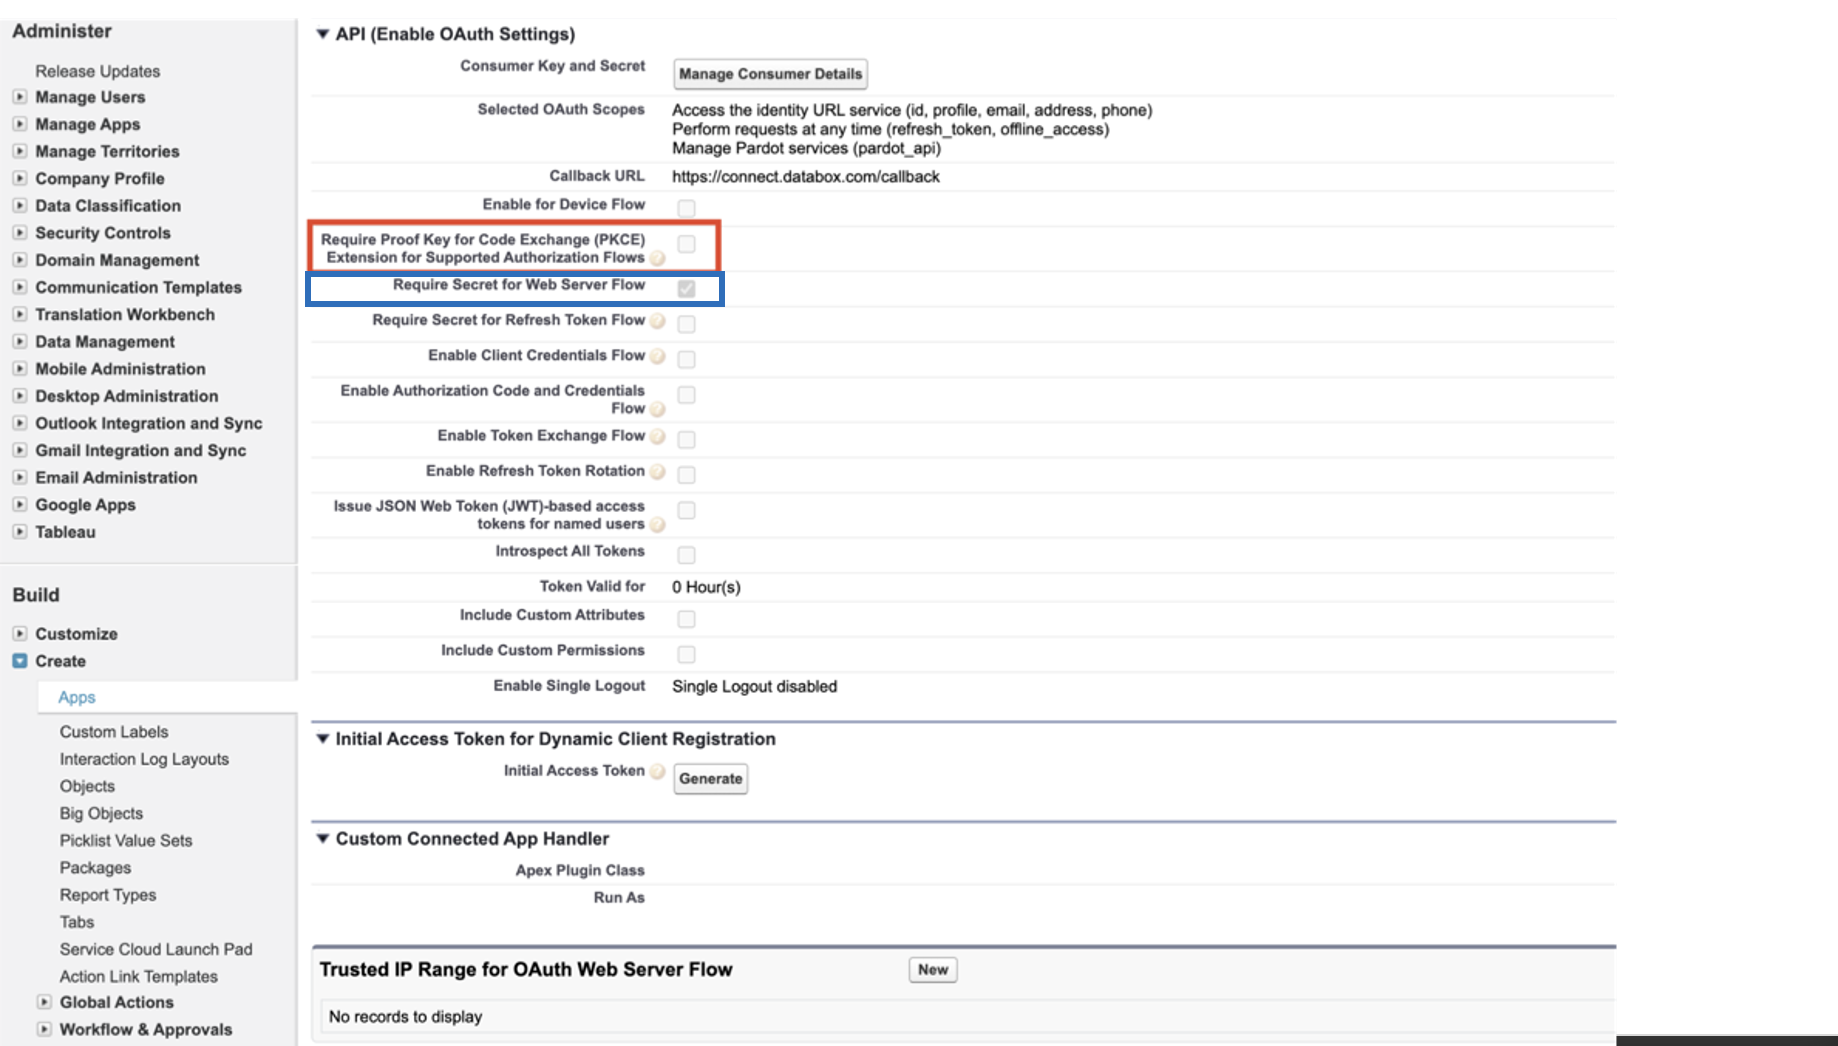
- Under API* (Enable OAuth Settings),* fill in the following fields:
- Select the Enable OAuth Settings checkbox
- Insert the following Callback URL: https://connect.databox.com/callback
- At Selected OAuth Scopes subsection move the following OAuth Scopes from Available OAuth Scopes left box to the Selected OAuth Scopes right box:
- Manage Pardot services (pardot_api)
- Access the identity URL service (id, profile, email, address, phone)
- Perform requests at any time (refresh_token, offline_access)
Click Save. Your app is now created.
The following message will appear on the page: *''Allow from 2-10 minutes for your changes to take effect on the server before using the connected app.''*Click Continue.
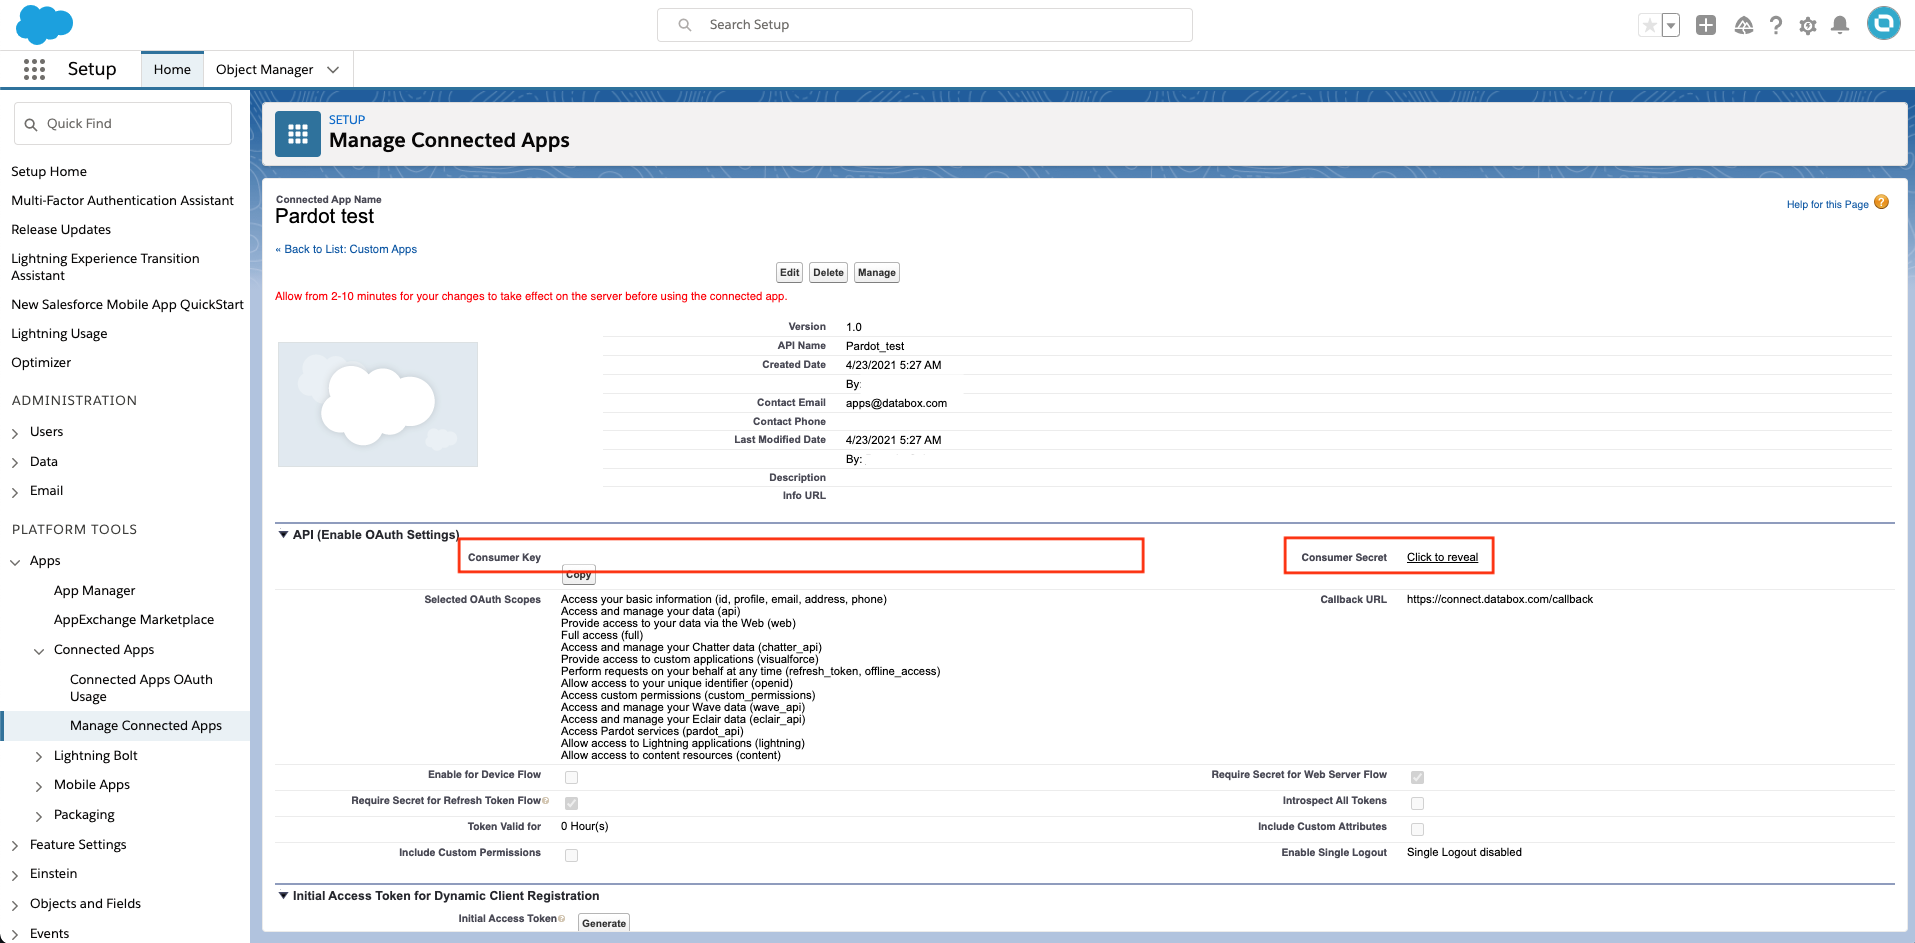
From the API (Enable OAuth Settings) section, copy the Consumer Key and Consumer Secret
Select Click to reveal to copy the Consumer Secret
Now you're ready to finish the connection process in Databox.
Navigate to Data Manager > + New connection
Type Pardotin the search bar and click on the green Connect button. This will open the Activation window, which is where you will be prompted to enter your Pardot Business Unit ID and Pardot OAuth App Consumer Key and Consumer Secret.
Once you've entered your Business Unit ID, Consumer Key and Consumer Secret, click Activate
At this point, the connection process is complete and Databox has been connected to Pardot.
You must be able to see the App Manager in your Pardot Account. This will confirm if you have proper permissions needed.
Navigate to the App Manager in your Pardot Account and uncheck the field "Require Proof Key for Code Exchange (PKCE) Extension for Support Authorization Flows". You must have this field unchecked to be able to connect Pardot to Databox.
The only checkbox you need to have checked in your Pardot account is 'Require Secret for Web Server Flow' to be able to connect Pardot to Databox.
Pardot OAuth App user must have System Admin or Developers permissions for Salesforce Lightning.
Learn more about how to manage user permissions in Salesforce Lightning here.
Learn more about which Salesforce versions provide API access here.
Data is synced for the Metrics that are being used in your Account, so when you first use a new Pardot Metric, the maximum amount of historical data available is 36 months.
Certain Metrics may have more or less historical data available. For example, Metrics that represent the total Metric value (i.e. ''Total Visitors'', ''Total Campaigns'', ''Forms'', etc.) do not have historical data available when first used. We only pull in the total current value, but we will accumulate historical data for these Metrics in Databox over time and the metric value will be shown cumulatively.
For more information about the amount of historical data available for a specific Metric, please contact our Support Team at help@databox.com.
Pardot data is synced in UTC time zone.
- Navigate to Databoards > Public Templates
- In the Data Source drop-down list, select Pardot
- To view a preview of the Template populated with dummy data, click Preview
- To pull the Template into your Account and re-populate it with your own Pardot data, click Use Template
- Select the appropriate Pardot Data Source from the drop-down list to complete the process. The Databoard will be re-populated with data from the selected Pardot Account and can be found on the Databoards page
View a full list of Pardot Metrics available in Databox here.
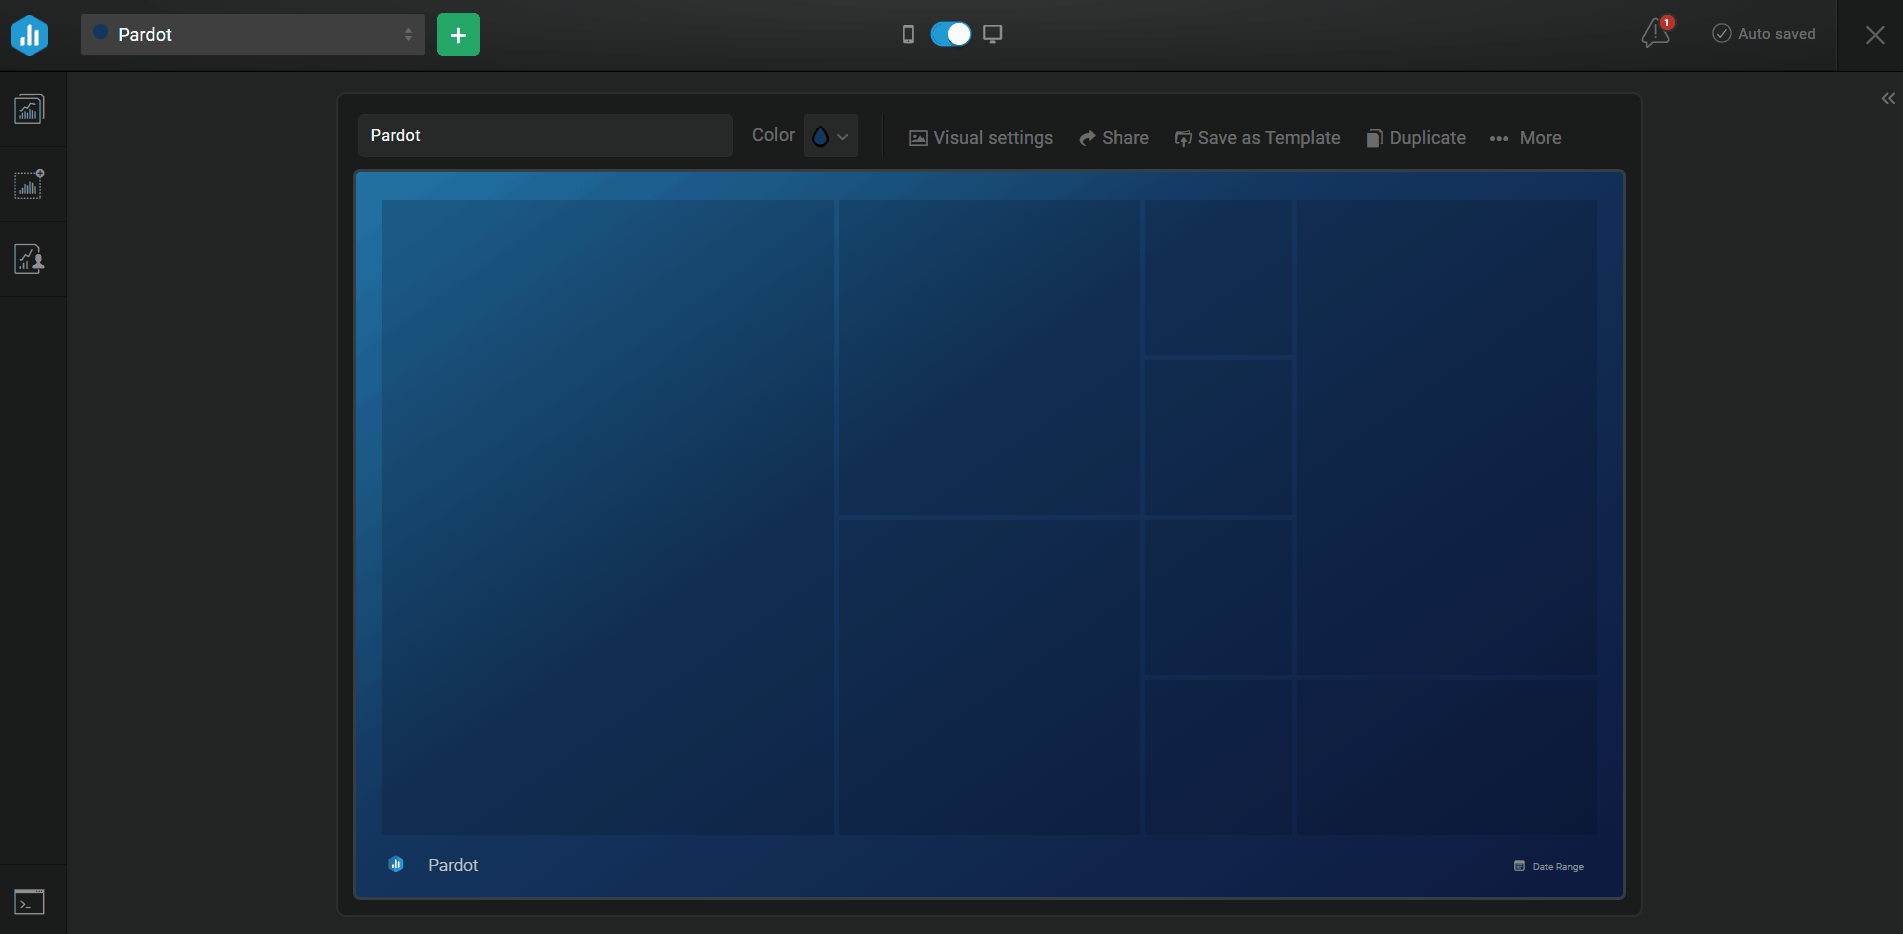
- Navigate to Databoards > + New Databoard > *Start Blank*
- Click on the Metric Library icon on the lefthand side of the Designer
- Select the appropriate Pardot Account from the Data Source drop-down list in the Metric Library
- View the list of pre-built Pardot Datablocks in the Metric Library. Drag and drop your selected Datablock onto your Databoard
- If a pre-built Datablock isn't available for your use case, click on the Visualization Types icon under the Metric Libraryicon
- View the list of Visualizations available in Databox. Drag and drop your selected Visualization onto your Databoard
- Click on the Datablock on the Databoard to open the corresponding Datablock Settingson the righthand side of the Designer
- Select the appropriate Pardot Data Source and Metric in the righthand Datablock Settings. This will update the Datablock and it will populate the Datablock with the corresponding data
- Complete steps 4-8 until your Databoard is complete
Due to technical limitations, the Date Range ''All Time'' will return a maximum 36 months of historical data.
However, Metrics that represents total values (i.e. 'Total Visitors'', ''Total Campaigns'', ''Forms'', etc.) will always show current total value when the ''All Time'' Date Range is selected.