Make (formerly Integromat) is a middleware tool that lets you transfer data between apps. If a platform isn't available on Databox's list of native integrations, you can use Make to connect to that platform and push data to Databox.
Make (formerly Integromat) has a long list of native integrations along with the ability to sync custom data via the API.
To see if a platform is natively supported by Make, check out Make's integrations page. If your platform is listed, you can follow the steps below to connect your data to your Databox Account.
- In Databox, navigate to the Data Manager and select + New Connection
2. Search for Integromat. Click the green Create Token ribbon.
- Click Create Token and enter a name for this Make (Integromat) Data Source. Click Create.
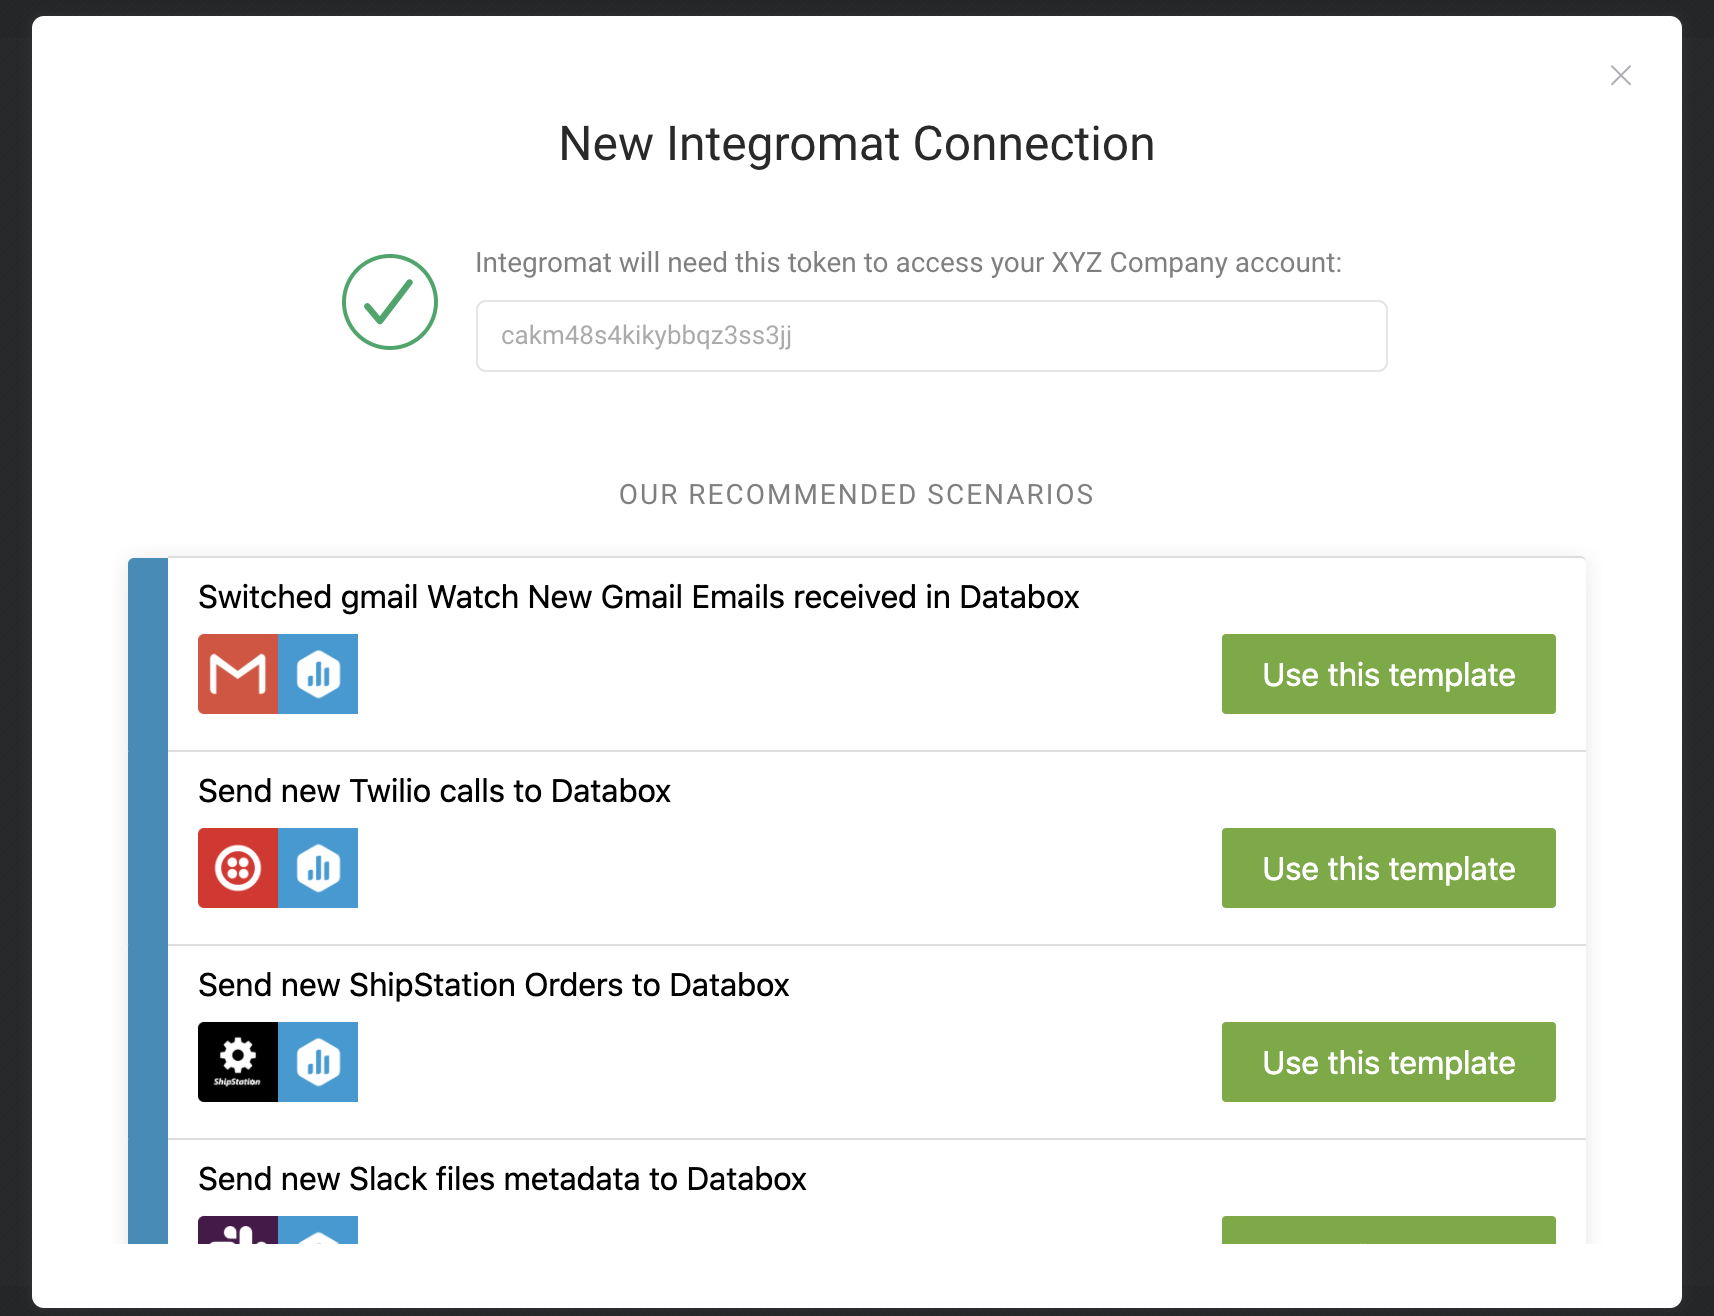 This will reveal the unique Token for this Make a connection. Copy this information to use in step #10 to connect Make with Databox.
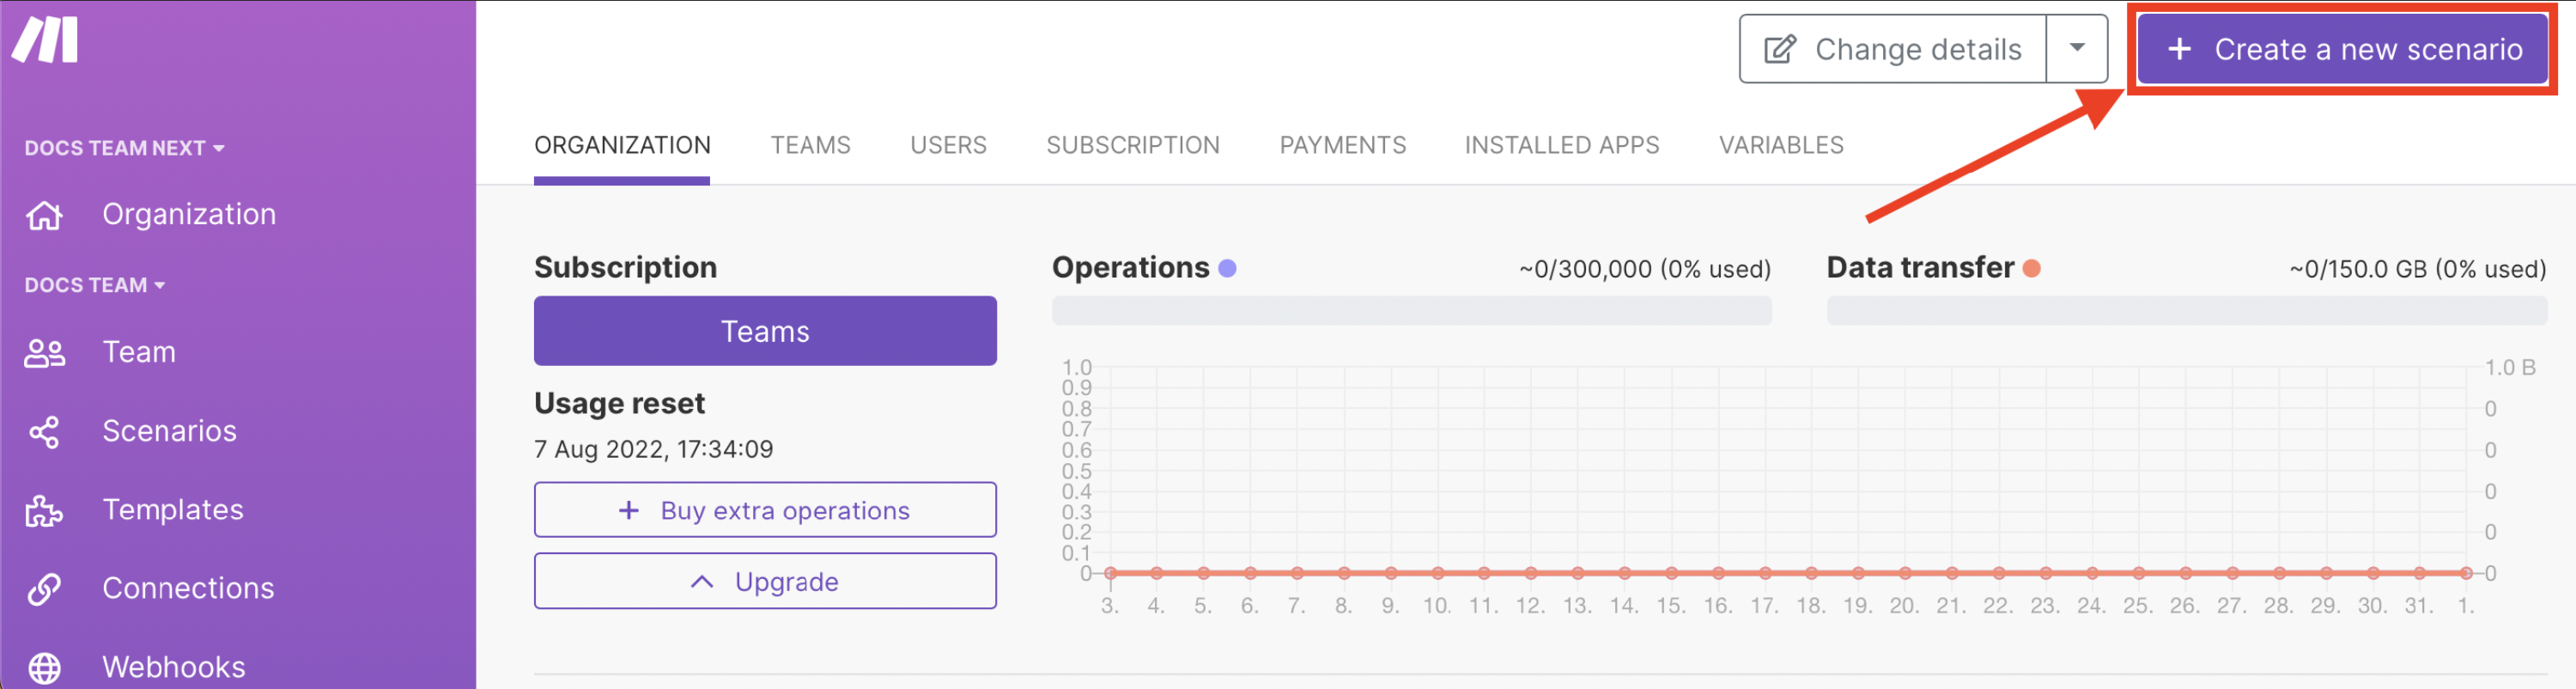
- Log in to your Make Account and click + Create a new scenario. A Scenario is a set of steps required to obtain, process, and push the data to Databox.
- Click on the **+**button in the middle of a screen and select the Data Source you'd like to sync data from and Action.
- Connect your Data Source to Make by clicking Add and enter your platform name and requested information in the Create a connection window. Click Continue and then OK to close the window.
- After you've connected your Data Source with Make, right-click on the round icon and select Run this module only. This step is very important because it will get data from the destination and allow you to map what you want to push to Databox.

- Select + Add Another Module and select Databox. The only Action option is to Submit Data. This will set Databox as the destination of the Scenario you're creating. Select this Action.
- Connect Databox to Make by clicking Add and pasting the Make Token that was shared in Databox in the Token textbox. Click Continue and then OK to close the window.
- Map out the values you want to be pushing to Databox. This is the same as pushing the data to Databox via the API, learn more here.

After you've created your Scenario in Make (Integromat), you need to test the connection and make sure your data gets pushed at regular intervals.
- In your Make Account, click on the name of the Scenario you created. Click Run once to manually run the Scenario in order to test that it's working as expected.

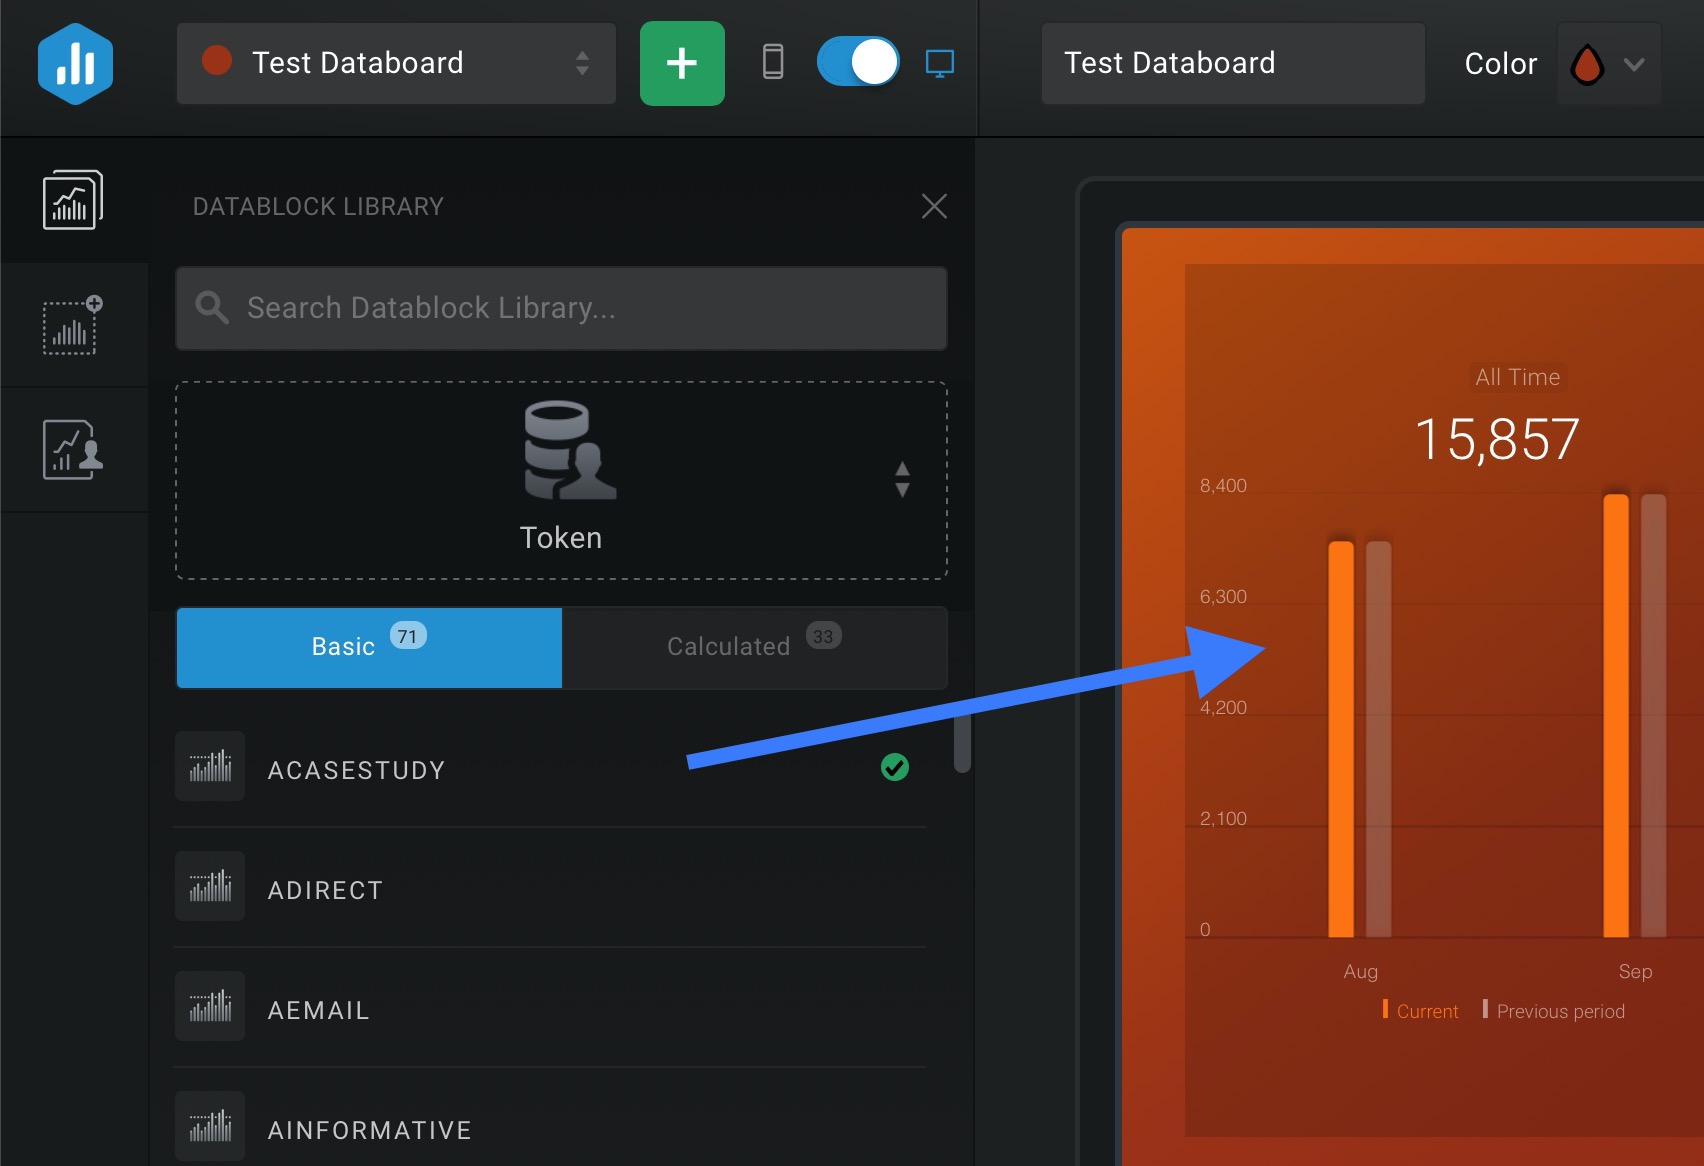
If no errors are returned in Make, the next step is to check your Databox Account to validate that the appropriate data was pushed. To do this, start by opening a Databoard in the **Designer,**or creating a new Databoard.
On the left-hand side, click on the first icon to open the Metric Library. From the Data Source drop-down list, select your Token Data Source.
If your data successfully synced with Databox, you will see your metrics listed as Datablocks. To verify that the appropriate data was synced, drag and drop these Datablocks onto your Databoard where they will repopulate with data.
- Now that you've validated the Scenario in Make and the data in Databox, it's time to set the Scenario, so it automatically syncs with Databox. To do this, navigate back to your Make Account and click on the clock icon. This will open the Schedule setting window.
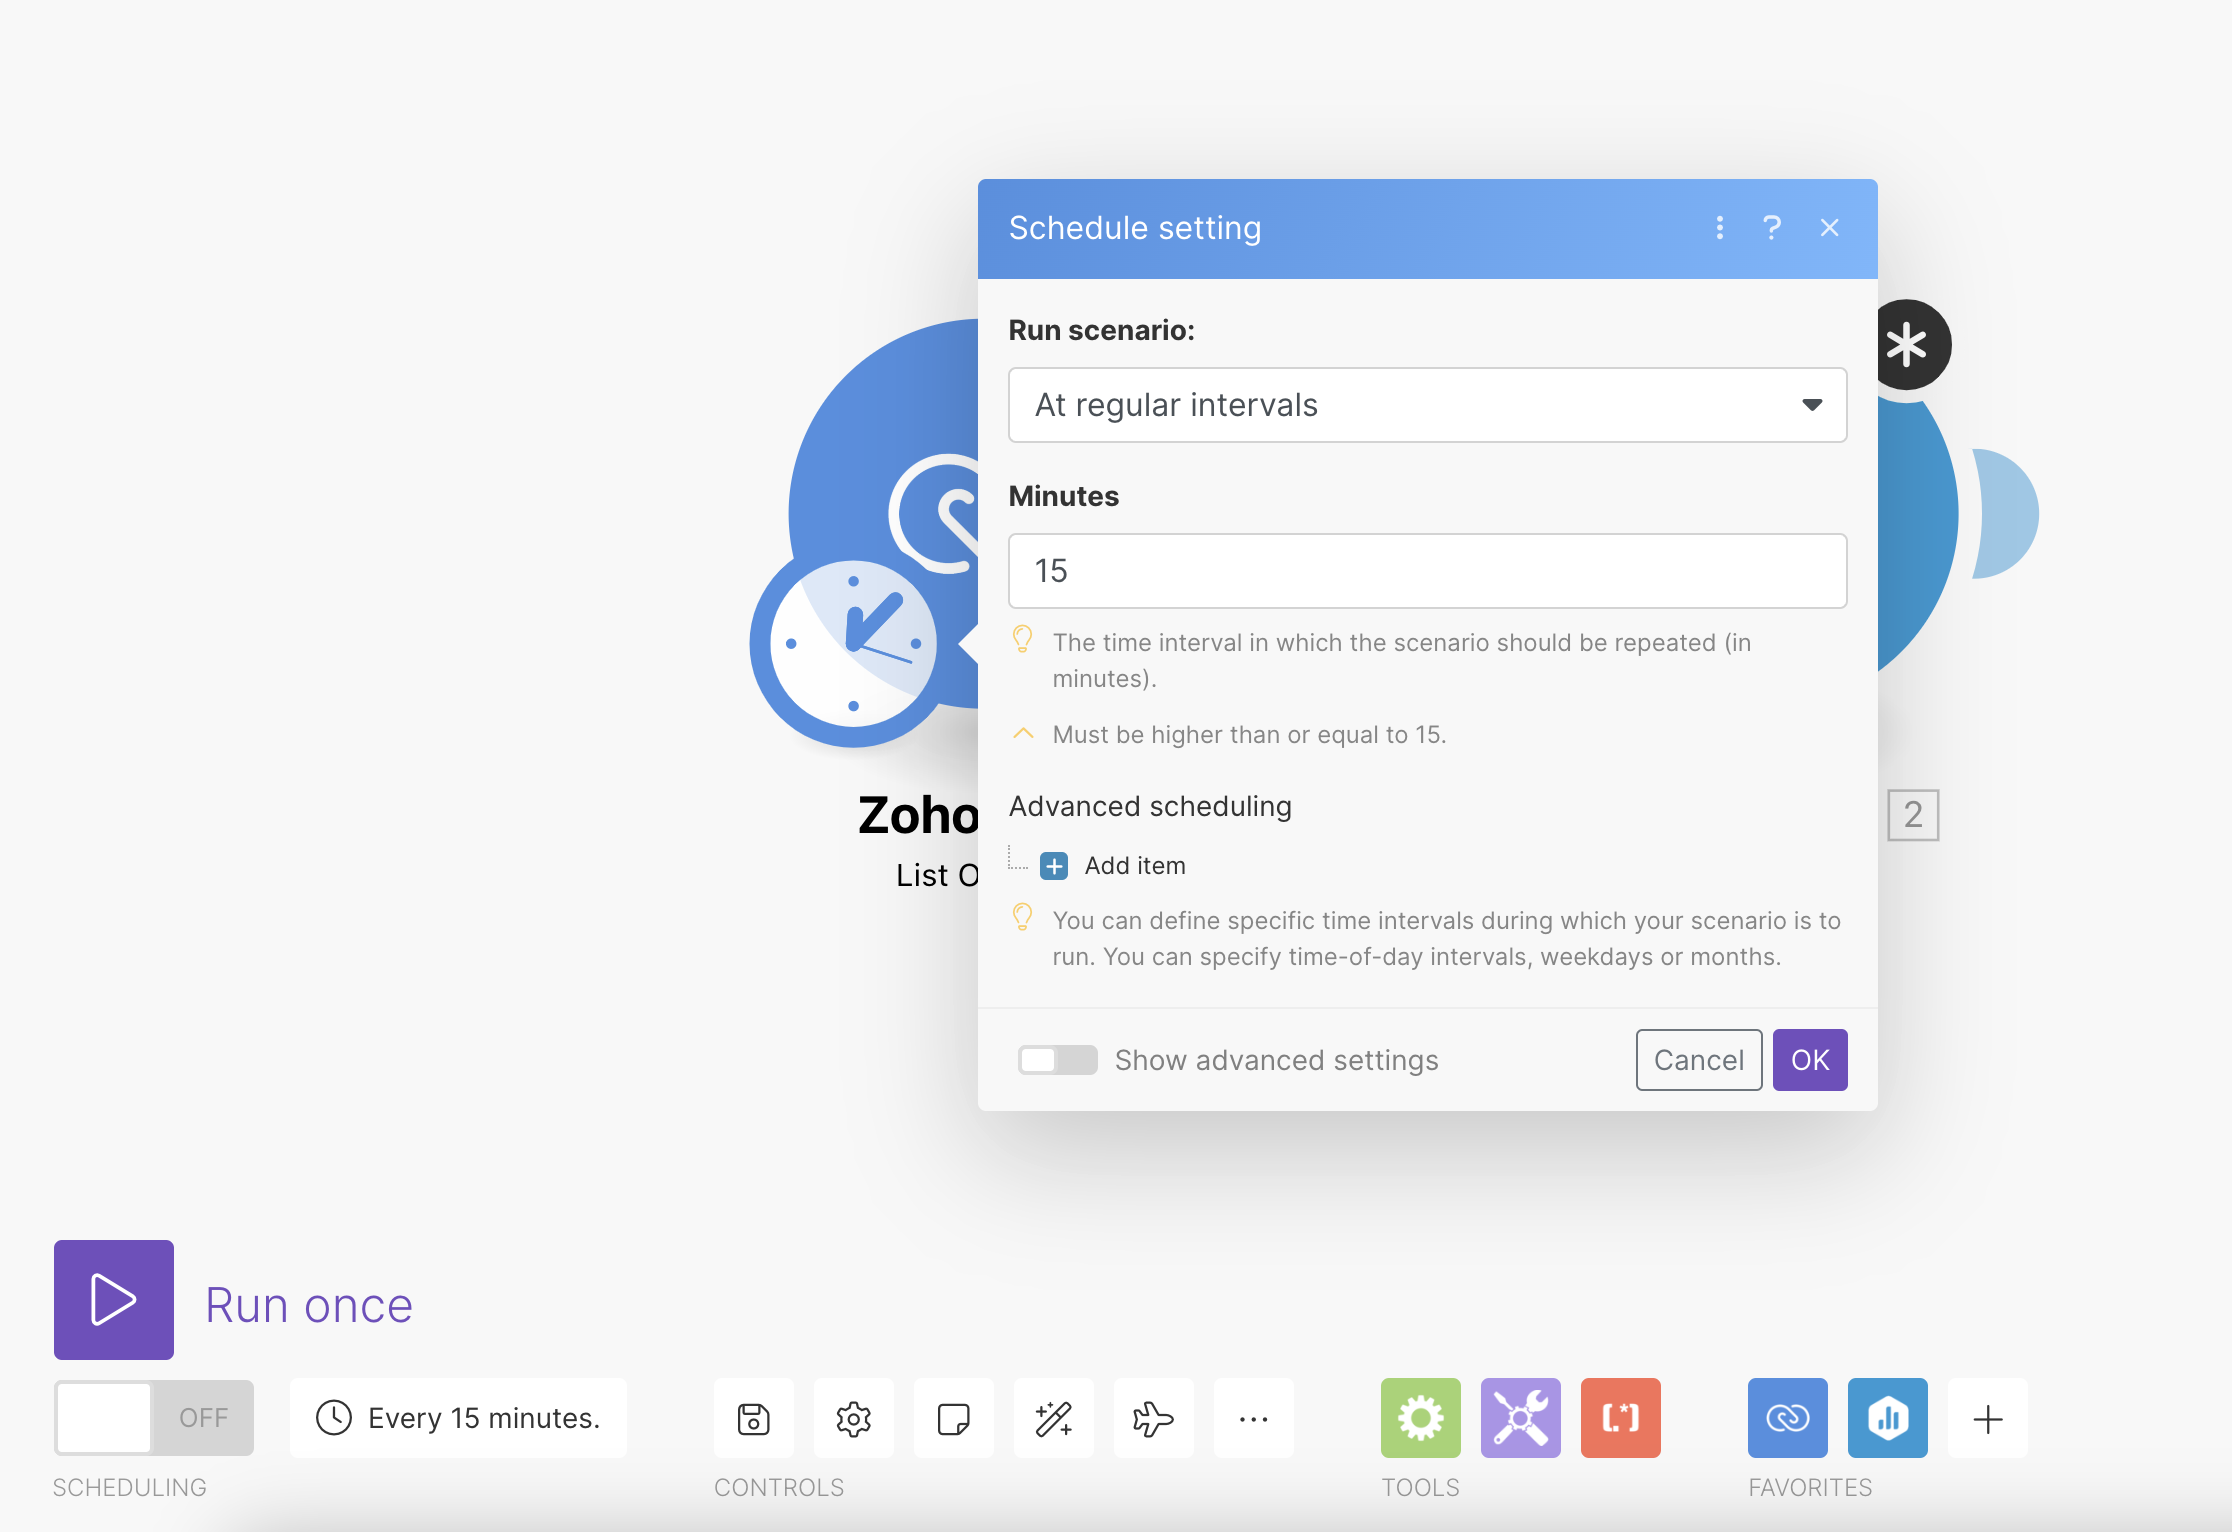
- In the Minutes textbox, enter the frequency that you'd like your Scenario to run and your data to sync with Databox. Click OK to schedule your Scenario.
- Depending on your use case, you might also need to set the Data Aggregation for your Metrics in Databox. This means you're giving the Databox system instructions on whether you want the values that are pushed for each Metric to be summed (like for "Ad Spend" when individual costs are summed together), or if the latest value should be displayed (like for "Current Balance" where the latest bank account balance is what matters). Data Aggregation for the Metric in being set in the Metric definition window. Learn more here.
If a platform isn't available on Make (Integromat's) list of native integrations, you can create your own integration that uses Make (Integromat) to sync data from your platform's API to Databox. Creating a custom API connection is relatively technical, so it's recommended that you have some experience with API calls before moving forward with this approach.
In order for this to be possible, the platform you're looking to sync data from must-have an open API and developer documentation available. This will confirm that you can obtain the data using the strategy outlined below.
Start by clicking + Create a new scenario:
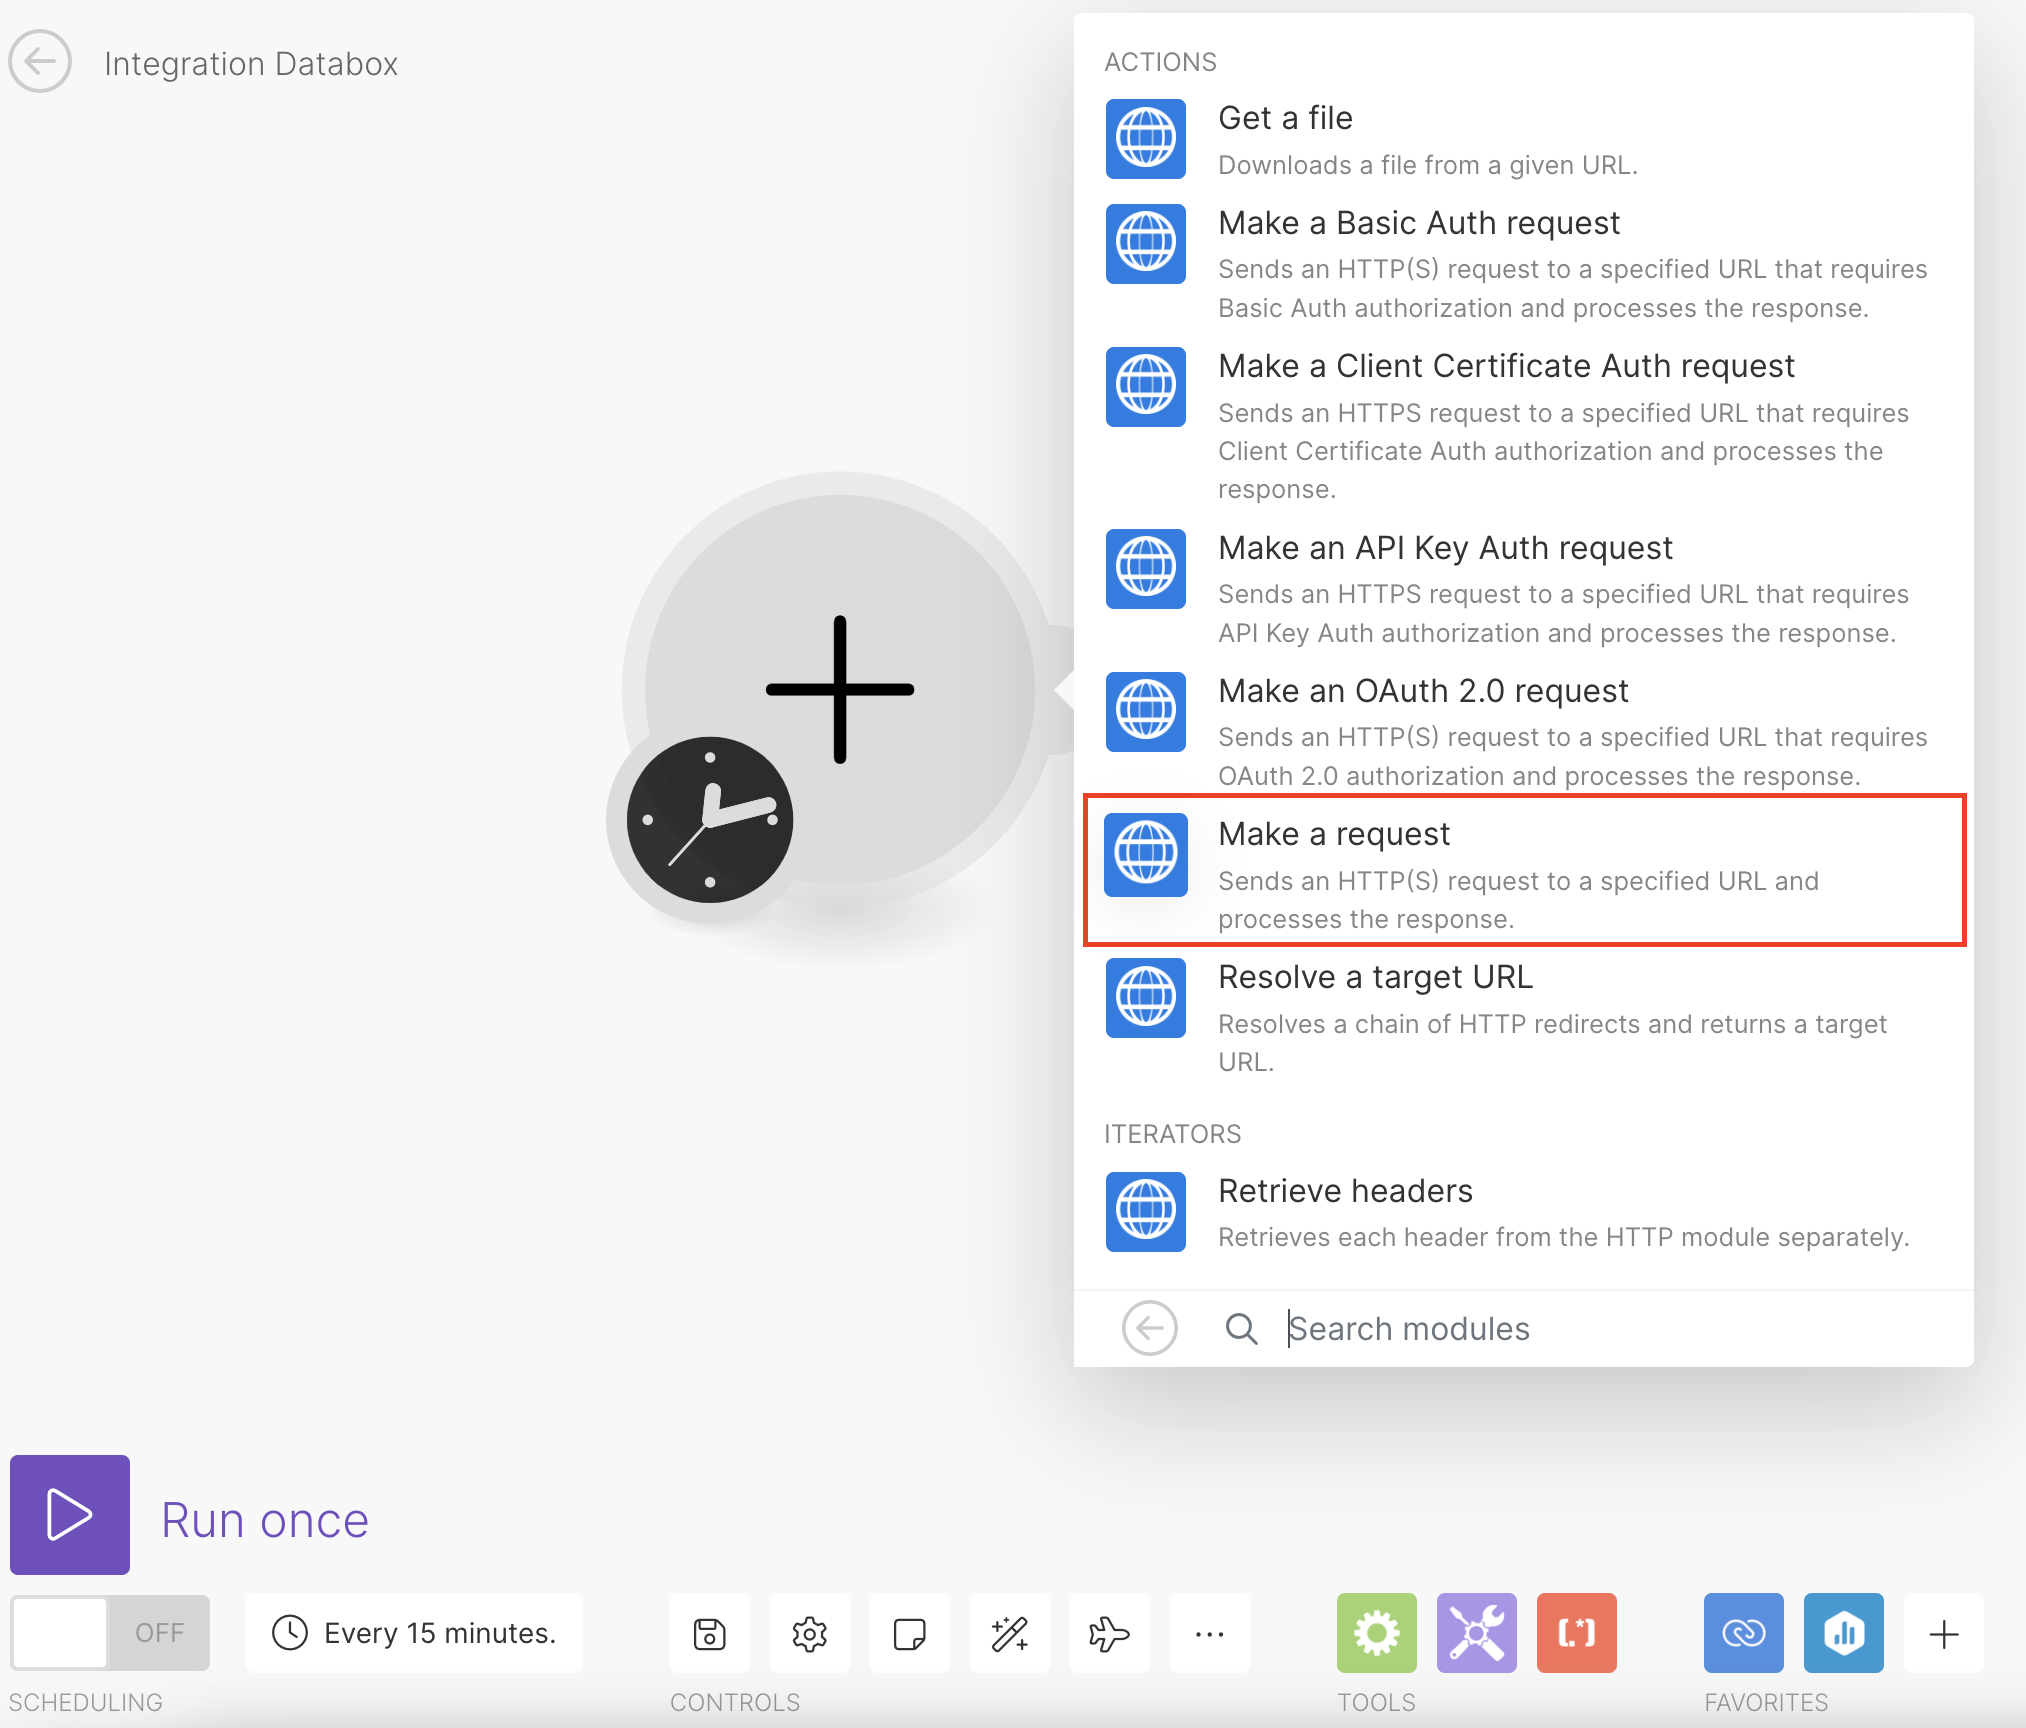
From the list of integrations, select HTTP module and select an Action to make the HTTP request. Typically, we recommend choosing Make a request. The HTTP module will allow you to make custom API calls.
Enter the API authentication parameters and the API request parameters. Sometimes this requires you to create Scenarios with multiple HTTP requests - one for obtaining an authentication token and one more where that token is passed along to make another request.
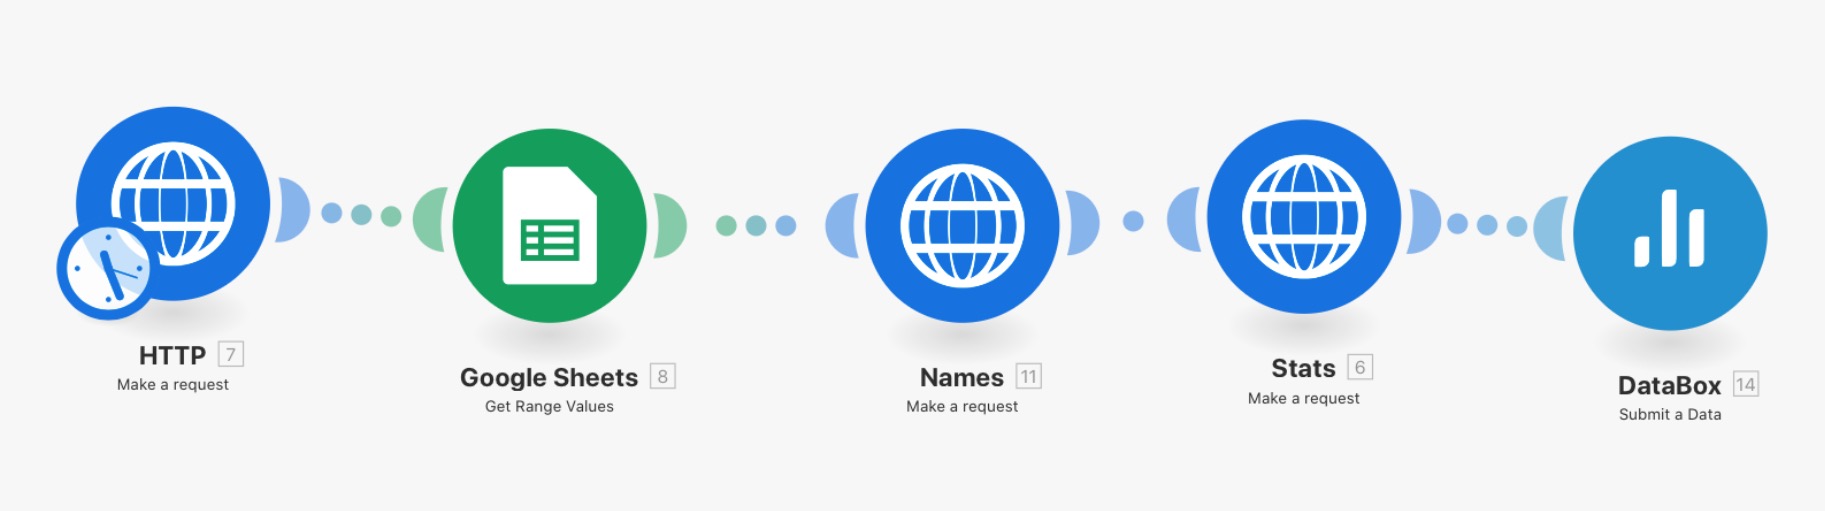
The next steps will vary depending on the API you're syncing data from, the data sets you're pushing, the date formats, data aggregations, etc. The objective of these steps is to determine the numerical (metric) values, dates, and (optional) dimensions that should be synced with Databox.
Click Run once to run your Scenario and test the HTTP request. This will pull in all of your data, so you can later map and push it to Databox.
Once you're getting the data you need, follow the above steps for mapping the data and pushing it to Databox.

If you don't have the time or resources to set this up yourself, check out Make's list of Registered Partners who can help create custom integrations for you.