
Availability
Organizations manage performance across many dimensions — such as teams, departments, clients, or regions — each requiring access to specific data. Spaces provide a streamlined way to organize and access relevant information, ensuring all members have visibility into the same key insights that drive success.
Databox provides dedicated spaces where you can create tailored pages to centralize critical data, streamline access, and enable efficient collaboration.
To create a space, follow these steps:
- On the navigation bar, click + Create a space to create your first space. Alternatively, click All spaces on the navigation bar, then + New Space on the Spaces page.
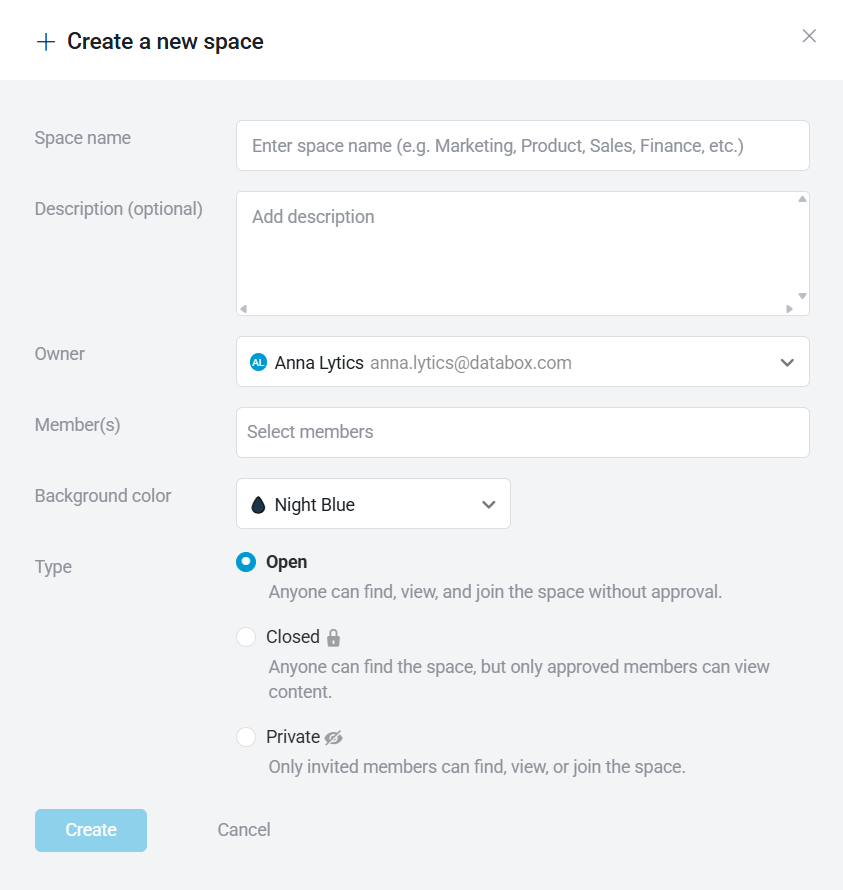
- Fill in the following information to configure your space:
- Space name: Enter a name or designation for the space.
- Description: Provide a brief description to help other users understand the space's purpose and content.
- Owner: Assign a user responsible for managing the space's settings.
- Member(s): Add users who should have access to the space's content.
- Background color: Choose a color to visually represent the space.
- Type: Select the space's visibility and access settings:
- Open: Any user can find, join and view the space's content.
- Closed: Any user can find the space, but only approved members can view its content.
- Private: Only invited members can find, join and view the space's content.
- Click Create to save your new space.
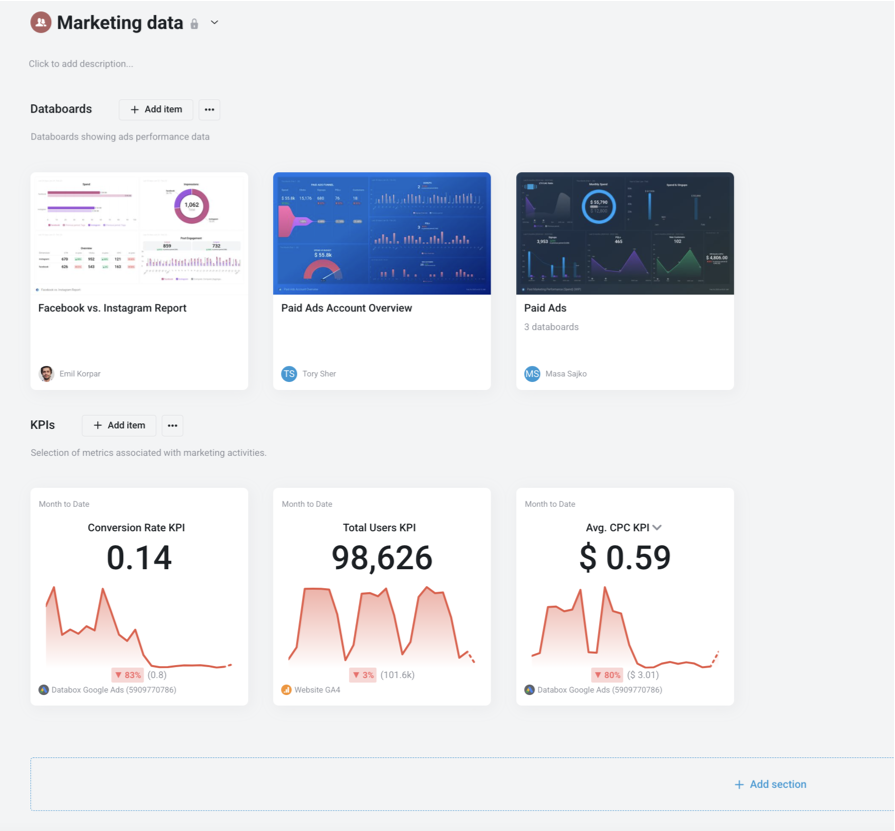
Spaces are organized into sections, each with its own name and content. Sections make it easy to further divide information — whether by department, project, client, or any other criteria that fit your needs.
By default, a new space includes one section, but you can add more as needed.
To add a section to a space:
- Go to the Spaces page.
- Click on View on the space where you want to add a section.
- Click + Add section at the bottom of the screen.
- Enter a title and description for the new section.
Items represent the key reporting content you want to track. You can add the following types of items to individual sections:
- Metrics
- Databoards
- Reports
FAQ
Can external users be added to a space?
No, only existing Databox users within the account can be added to a space.
Who can approve new users joining a space?
Any existing space member can approve new users.
Who can change the space type?
Only the space owner can change the space type.


