HOW TO
- Connect Intercom to Databox
- Access pre-built Intercom Templates
- Build a Databoard using Intercom data
- Additional Information
How to connect Intercom to Databox
IN THIS SECTION
- What’s the maximum amount of historical data initially available when you use a new Intercom Metric in Databox?
- What time zone does Intercom data sync in?
How to connect Intercom to Databox
To connect a Intercom Workspace in Databox, go to Data Manager > + New connection. Type Intercom in the search bar and click on the green Connect button. Next, click the green Connect now button.
This will open the Authorization window, which is where you will be prompted to enter your Intercom login credentials and authorize the Databox app.
Pro Tip: Each Intercom Workspace must be connected as a separate Data Source in Databox (1 Workspace = 1 Data Source). Learn more here.
What Intercom permissions do you need to connect to Databox?
In order to sync Intercom data with Databox, you must have access to the respective data in Intercom directly.
Learn more about Intercom permissions here.
What's the maximum amount of historical data initially available when you use a new Intercom Metric in Databox?
When you connect a new Intercom Data Source in Databox, limited historical data is initially synced. Data is synced for the Metrics that are being used in your Account, so when you first use a new Intercom Metric, data will start to sync.
Certain Metrics may have more or less historical data available. For example, Current metrics that represent the total metric value (i.e. Users, Leads, etc.) do not have historical data available when first used. We only pull in the total current value, but we will accumulate historical data for these Metrics in Databox over time and the metric value will be shown cumulatively.
Pro Tip: In order to start syncing data for a Metric, you can add it to your Metrics screen, use it in a Scorecard, set a Goal around it, create an Alert for it, or add it to a Databoard. Learn more here.
The amount of historical data you're able to access in Databox is dependent on your Databox plan. Learn more here.
Intercom data is synced in UTC. However, the values in Intercom are reported in the user's timezone. As a result, you may note differences between Databox and Intercom reports if your timezone is not UTC.
Access pre-built Intercom Templates
- Navigate to Databoards > Public Templates
- In the Data Source drop-down list, select Intercom
- To view a preview of the Template populated with dummy data, click Preview
- To pull the Template into your Account and re-populate it with your own Intercom data, click Use Template
- Select the appropriate Intercom Data Source from the drop-down list to complete the process. The Databoard will be re-populated with data from the selected Intercom Account and can be found on the Databoards page
Pro Tip: Once the Databoard is available on the Databoards page, it is completely disconnected from the public Template. Therefore, you can further customize this Databoard to meet your specific needs using the Designer.
Popular Intercom Templates
| Intercom (Account Overview) | Intercom: Customer Support Performance |
|---|---|
|
|
|
|
This Intercom account overview databoard template gives you insights about new and closed conversations, active and slipping away users, and more.
|
This Customer Support Dashboard uses the Intercom Customer Messaging platform to give you a full view of your Help Desk performance
|


How to build a Databoard using Intercom data
IN THIS SECTION
Popular Intercom Metrics
|
Users |
Leads |
New Vs. Closed Conversations |
|---|---|---|
|
|
|
|


View a full list of Intercom Metrics available in Databox here.
How to Build a Databoard
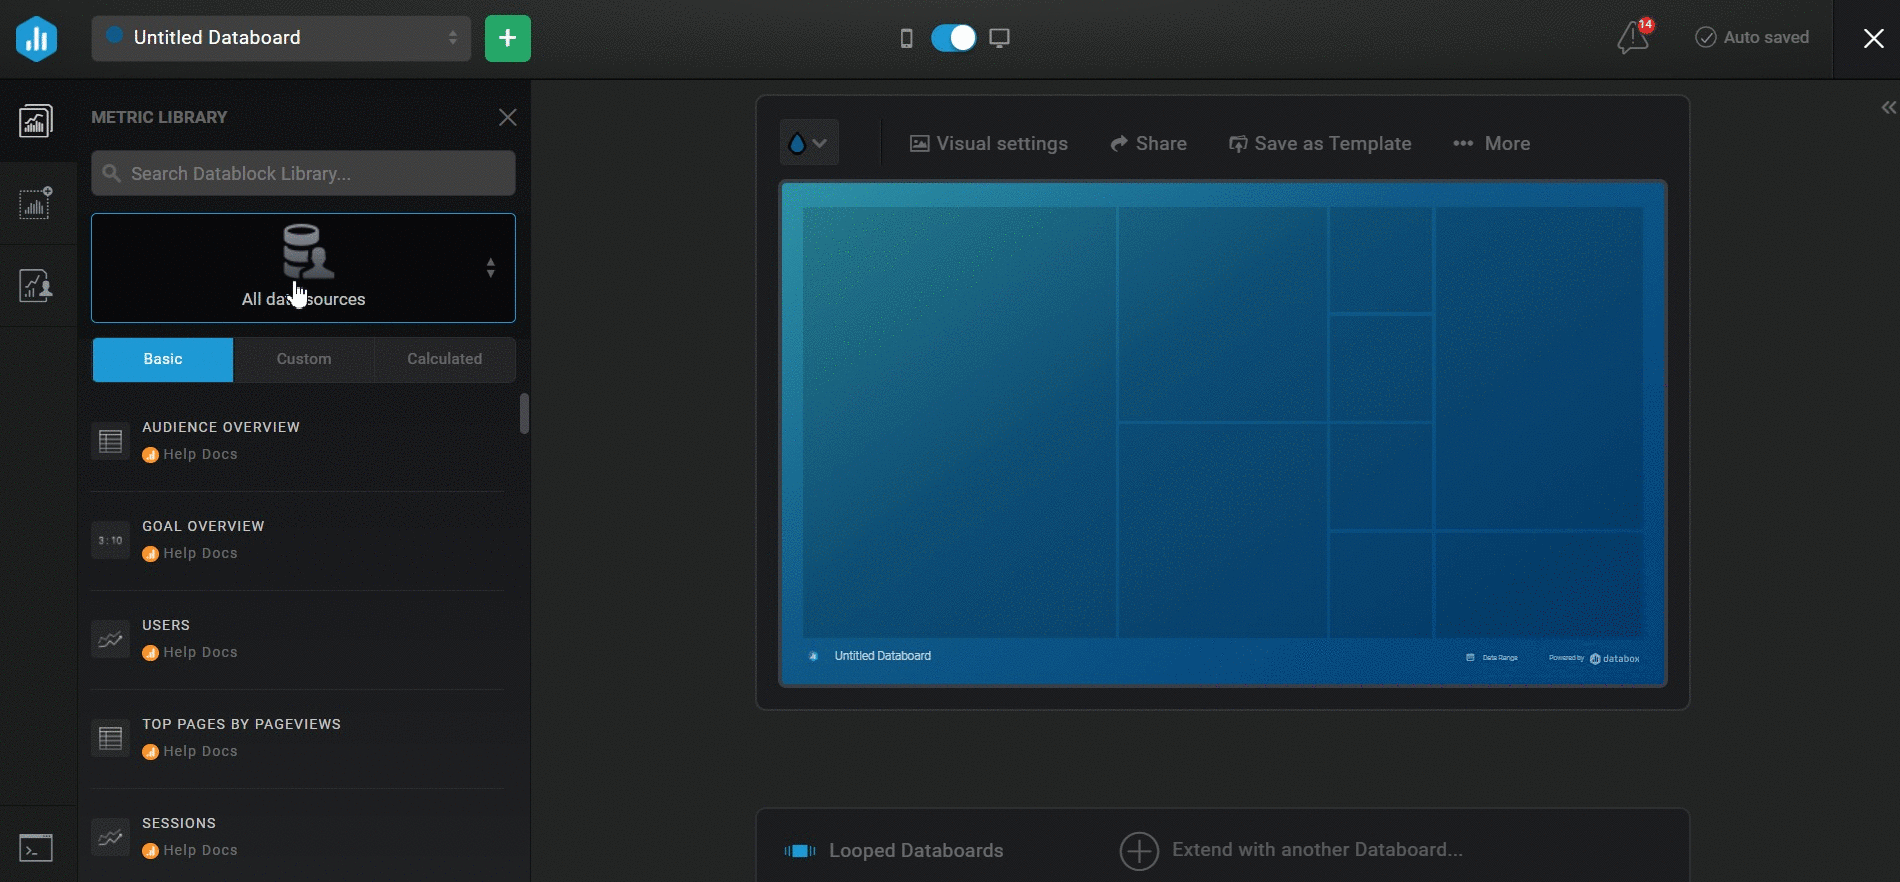
- Navigate to Databoards > + New Databoard > Start Blank
- Click on the Metric Library icon on the left-hand side of the Designer
- Select the appropriate Intercom Account from the Data Source drop-down list in the Metric Library
- View the list of pre-built Intercom Datablocks in the Metric Library. Drag and drop your selected Datablock onto your Databoard
- If a pre-built Datablock isn't available for your use case, click on the Visualization Types icon under the Metric Library icon
- View the list of Visualizations available in Databox. Drag and drop your selected Visualization onto your Databoard
- Click on the Datablock on the Databoard to open the corresponding Datablock Editor on the right-hand side of the Designer
- In the Metrics drop-down, click Data Source to select the appropriate Data Source. This will filter out metrics from the specific Data Source.
- In the main Metrics drop-down, select the metric you'd like to display on the Datablock, using the Search bar if needed. This will update the Datablock, and it will populate with the corresponding data
- Complete steps 4-9 until your Databoard is complete
Additional Information
IN THIS SECTION
Metric Considerations
- Historical data is available for the following event metrics:
- New Conversations
- New Closed Conversations
- New Closed Conversations by Teammates
- Tags by Tag Name
- Due to API Limitations, certain metrics may have more or less historical data available. For example, for “Current” metrics (i.e. Users, Leads, etc.), no historical data is available from before the initial connection, and you will be able to granulate data after enough historical data is collected.
Granularity Restrictions
- Due to API limitations, hourly granularity is not supported. This may affect visualization options for Charts in Databox.
For example, if an Intercom Metric is used on a Line or Bar Chart with ''Yesterday'' Date Range selected, hourly data won't be displayed on the Chart. However, the big number above the Chart will accurately reflect the Metric value for the selected Date Range
Learn more about Granularity here.