
Availability
Google Analytics 4 (GA4) is Google's analytics platform for measuring user interactions across websites and mobile apps using an event-driven data model. Every interaction — from page views and scrolls to purchases and custom events — is captured as an event, giving marketing, product, and growth teams a granular view of how users engage with their digital properties. Connecting GA4 to Databox brings your web and app analytics alongside data from your marketing, sales, and support tools, so you can monitor traffic sources, track conversion performance, and share progress in a unified view.
If your credentials don't include full access to the data source, make sure your access level meets any permission requirements listed in the Specification section of the integration's page in the Metric Library.
To connect Google Analytics 4 to your Databox account for the first time:
- Click Connect to open the Google sign-in dialog.
- Sign in with the Google account you want to connect.
- Review the permissions Databox is requesting and click Allow.
If you've already established a connection, you can reuse it to add new properties, as long as those properties are accessible with the existing connection's credentials.
Select the GA4 property you want to use as the data source.
The Google Analytics 4 integration allows you to create custom metrics using the metric builder, ideal for visualizing data not included in the basic metrics offered by the integration.
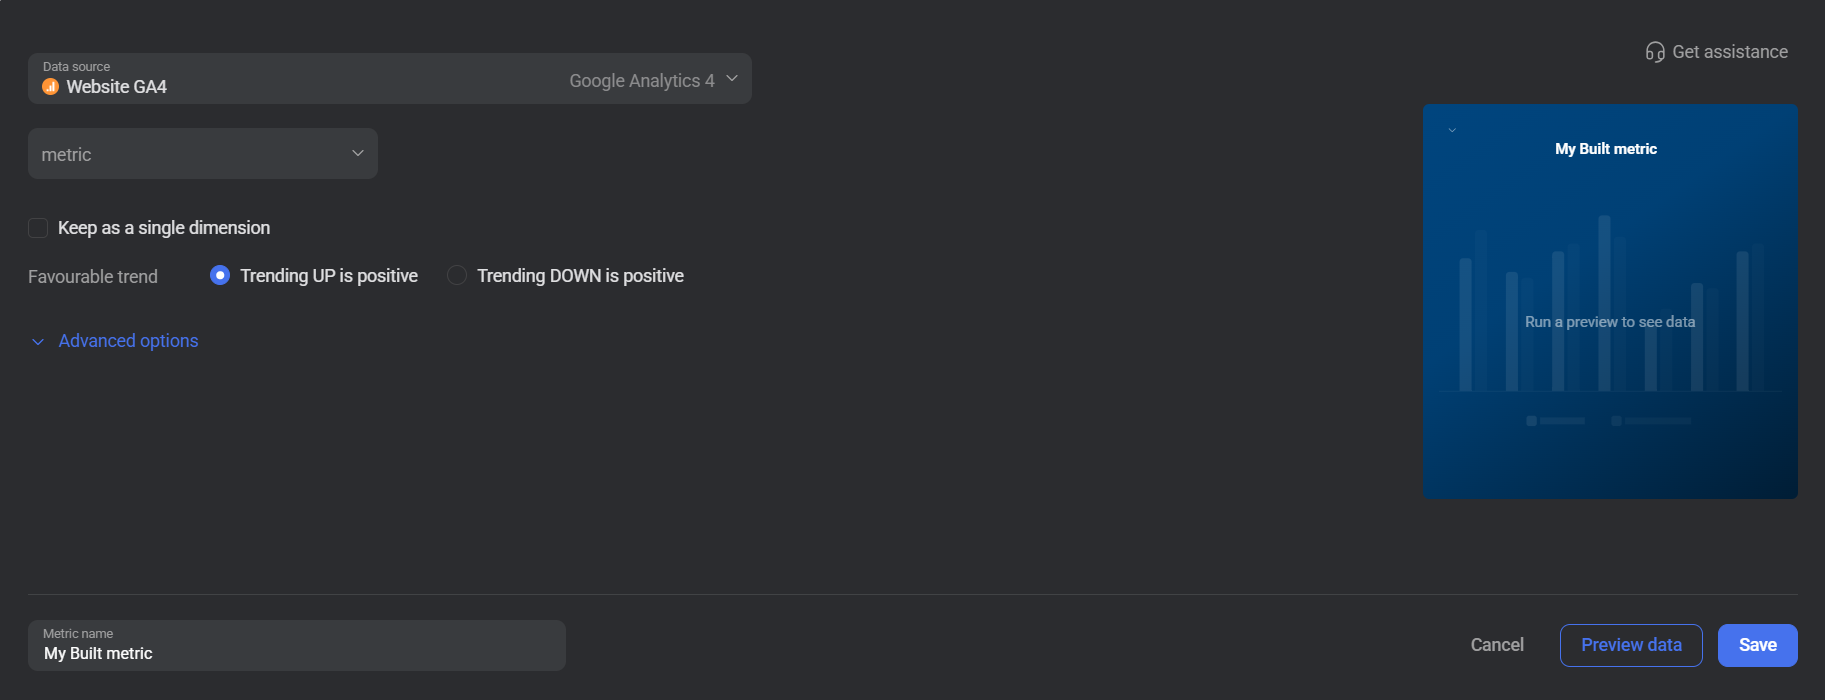
To create a custom metric, start by selecting a metric from the Metric selector. Next, customize your metric by optionally adding one or more dimensions and applying filters under Advanced options. The available options depend on the selected metric and the data in your GA4 property.
Expand Advanced options to add one or more filters to restrict the data included in the metric. You can filter by Dimension or by Metric:
- Filter by Dimension — select a Dimension, an Operator (such as Exact match), and a Value to include only rows where the dimension matches the condition.
- Filter by Metric — select an Operator and enter a Value to include only rows where the metric value meets the condition.
 In Google Analytics 4: Go to Reports > Engagement > Events to explore the events, dimensions, and metrics available in your property. For more detailed information, refer to the official Google Analytics documentation.

The Google Analytics 4 integration supports the creation of datasets, which allow you to structure and format your Google Analytics 4 data for more flexible reporting in Databox. By organizing your data into a tabular format, datasets make it easier to filter, segment, and visualize key metrics across projects, clients, and team members.
The entity relationship diagram (ERD) below illustrates how data is organized within the Google Analytics 4 integration, displaying the available views and columns, as well as the relationships between them (primary and foreign keys). This diagram represents the schema, or structure, of the data and helps you understand the underlying data model. With this context, you can create datasets using the relevant views and columns to build custom metrics tailored to your reporting needs.
For comprehensive details on metrics, data availability, templates, specifications, usage guidelines, and other key information, refer to the resources listed below.


FAQ
Why are certain entities or properties unavailable in the metric builder?
The metric builder pulls analytics data from Google Analytics' APIs. If an entity or property is missing, it is likely due to limited API support or technical implementation restrictions. If there's something you'd like to see included, feel free to submit a request, so we can consider it for future updates to the integration.


