
Zapier is a tool that allows non-technical users to connect Data Sources that Databox doesn't natively integrate with.
A connection between two apps is called a Zap. A Zap is made up of a trigger and action(s). Whenever the trigger happens in one app, Zapier will automatically perform the action(s) in another app.
When we set up Zaps to sync data with Databox, Databox is set as the app where the action is performed.
To create a new Zapier token, go to Data Manager > + New connection. Type Zapier in the search bar and click on the green Create Token button, then select Create Tokenin the popup window.
Enter a name for your new token and click the Create button. This will create a unique push token that will allow Zapier to send data to your Databox Account.
When you create a new token, you will have the ability to choose from pre-built Zaps. This can simplify the process of using Zapier to sync your data.
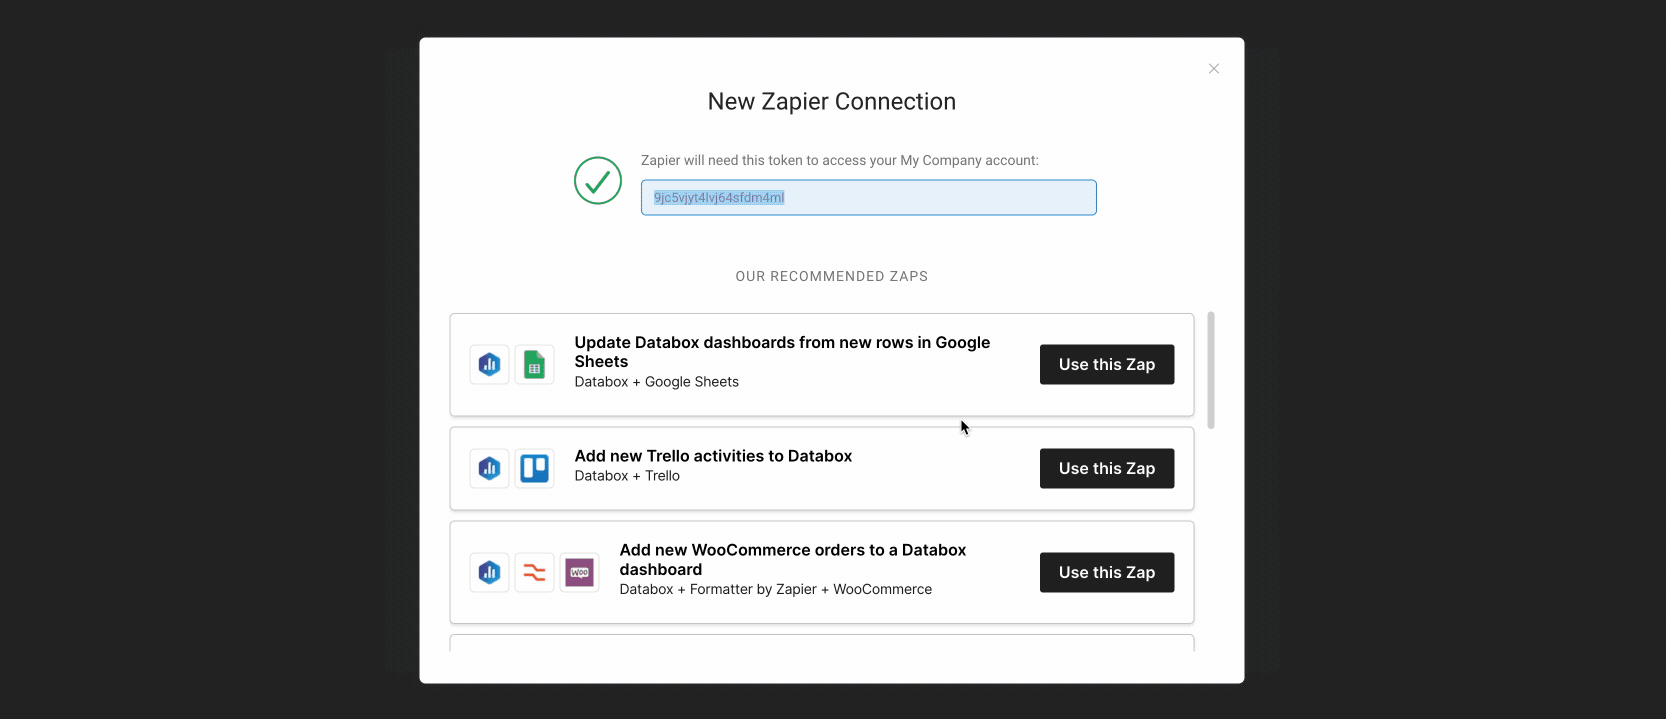
After the initial connection process, you can access pre-built Zaps directly from the Home page in Zapier by using the search field. Enter "Databox" in the search field or click here to access Popular Zaps drop-down to view pre-built Zaps.
Let's say we want to use Zapier's built-in Email service for email tracking. To do this, we'll create a Zap that's triggered every time we forward an email to a custom "@zapiermail.com" address.
We will forward emails from Client 1 to this address to get a better understanding of how often we receive messages from them.
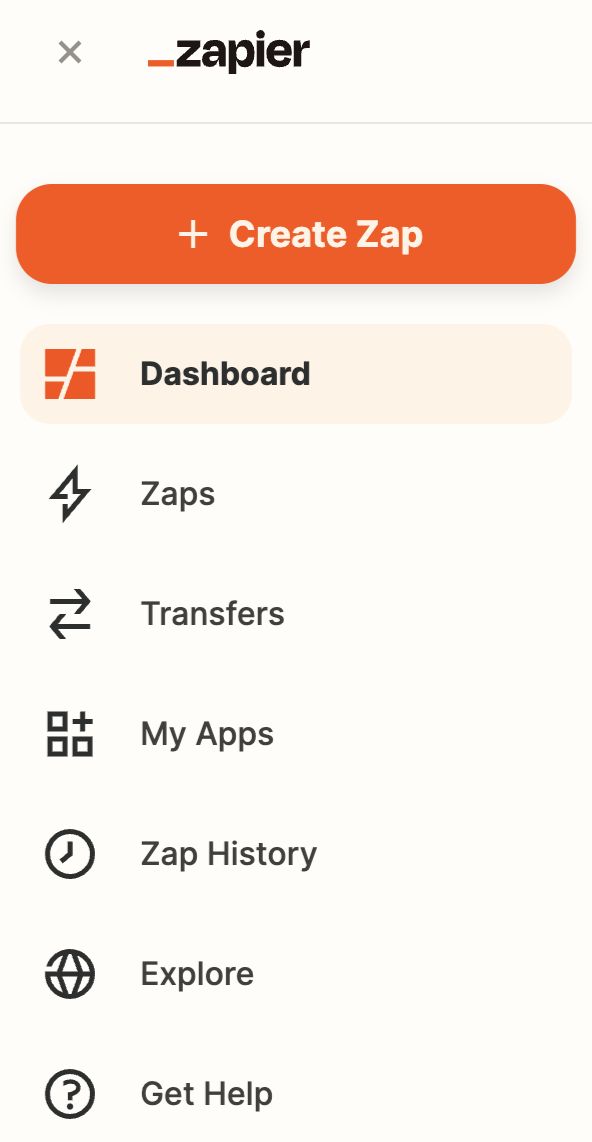
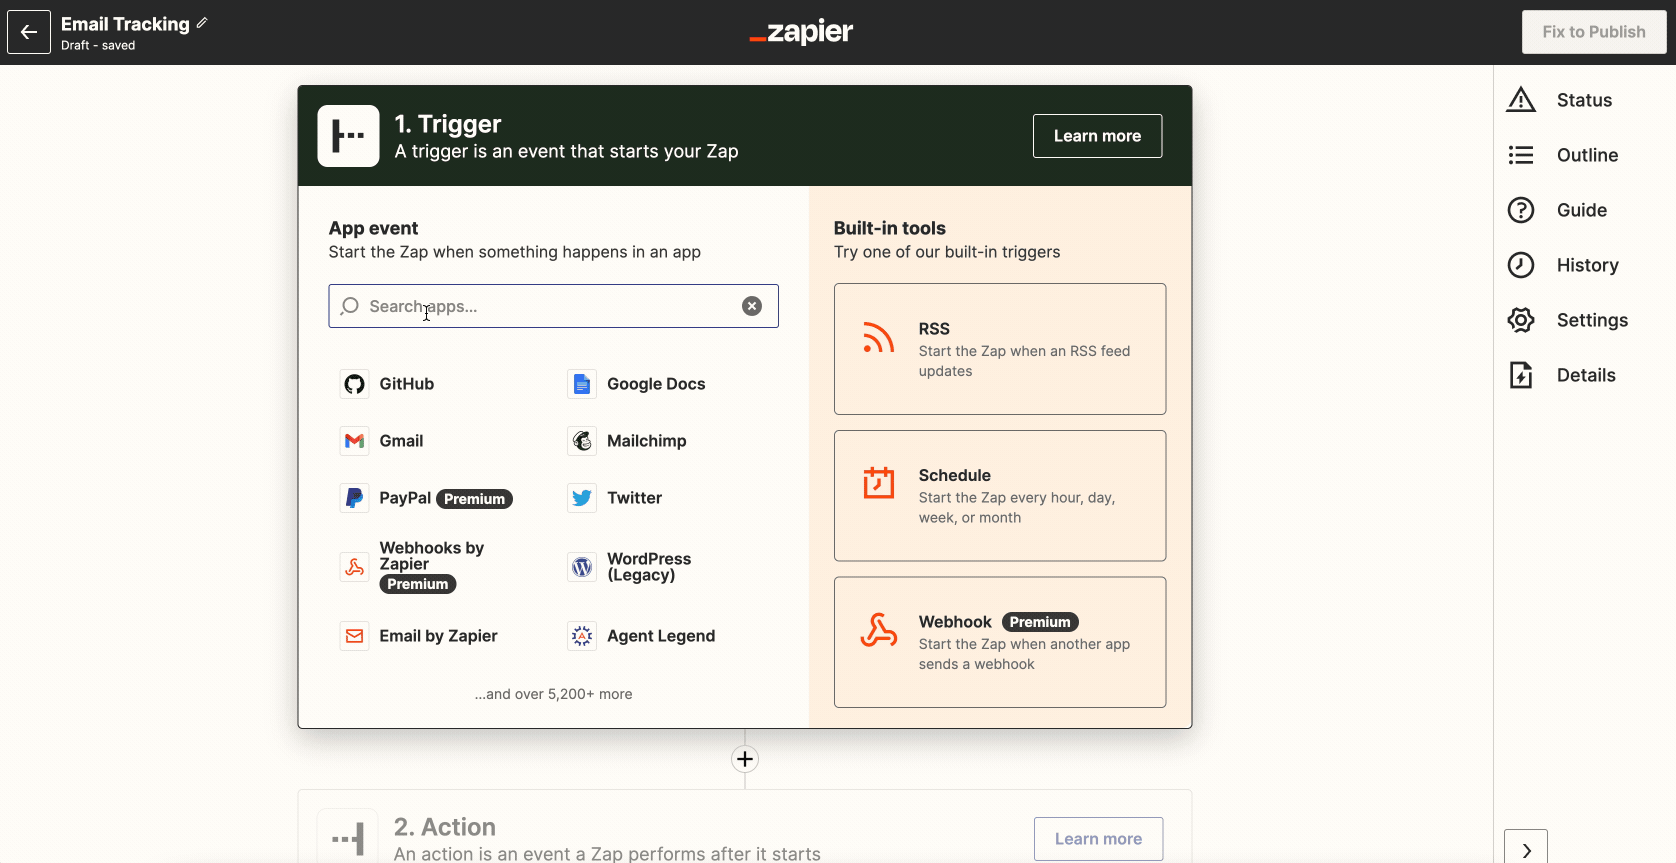
- Navigate to your Home page in Zapier. Click the orange + Create Zap button
In order to give your Zap a name click on "Untitled Zap" in the upper leftand enter a new name for your Zap.
2.CHOOSE APP & EVENT: Since we're using a built-in Zapier app, we'll select Email by Zapier from the App eventlist
- We want this Zap to be triggered when an email is forwarded to our zapiermail.com email address. So, we'll select New Inbound Email for the Event(selection is automatically saved).
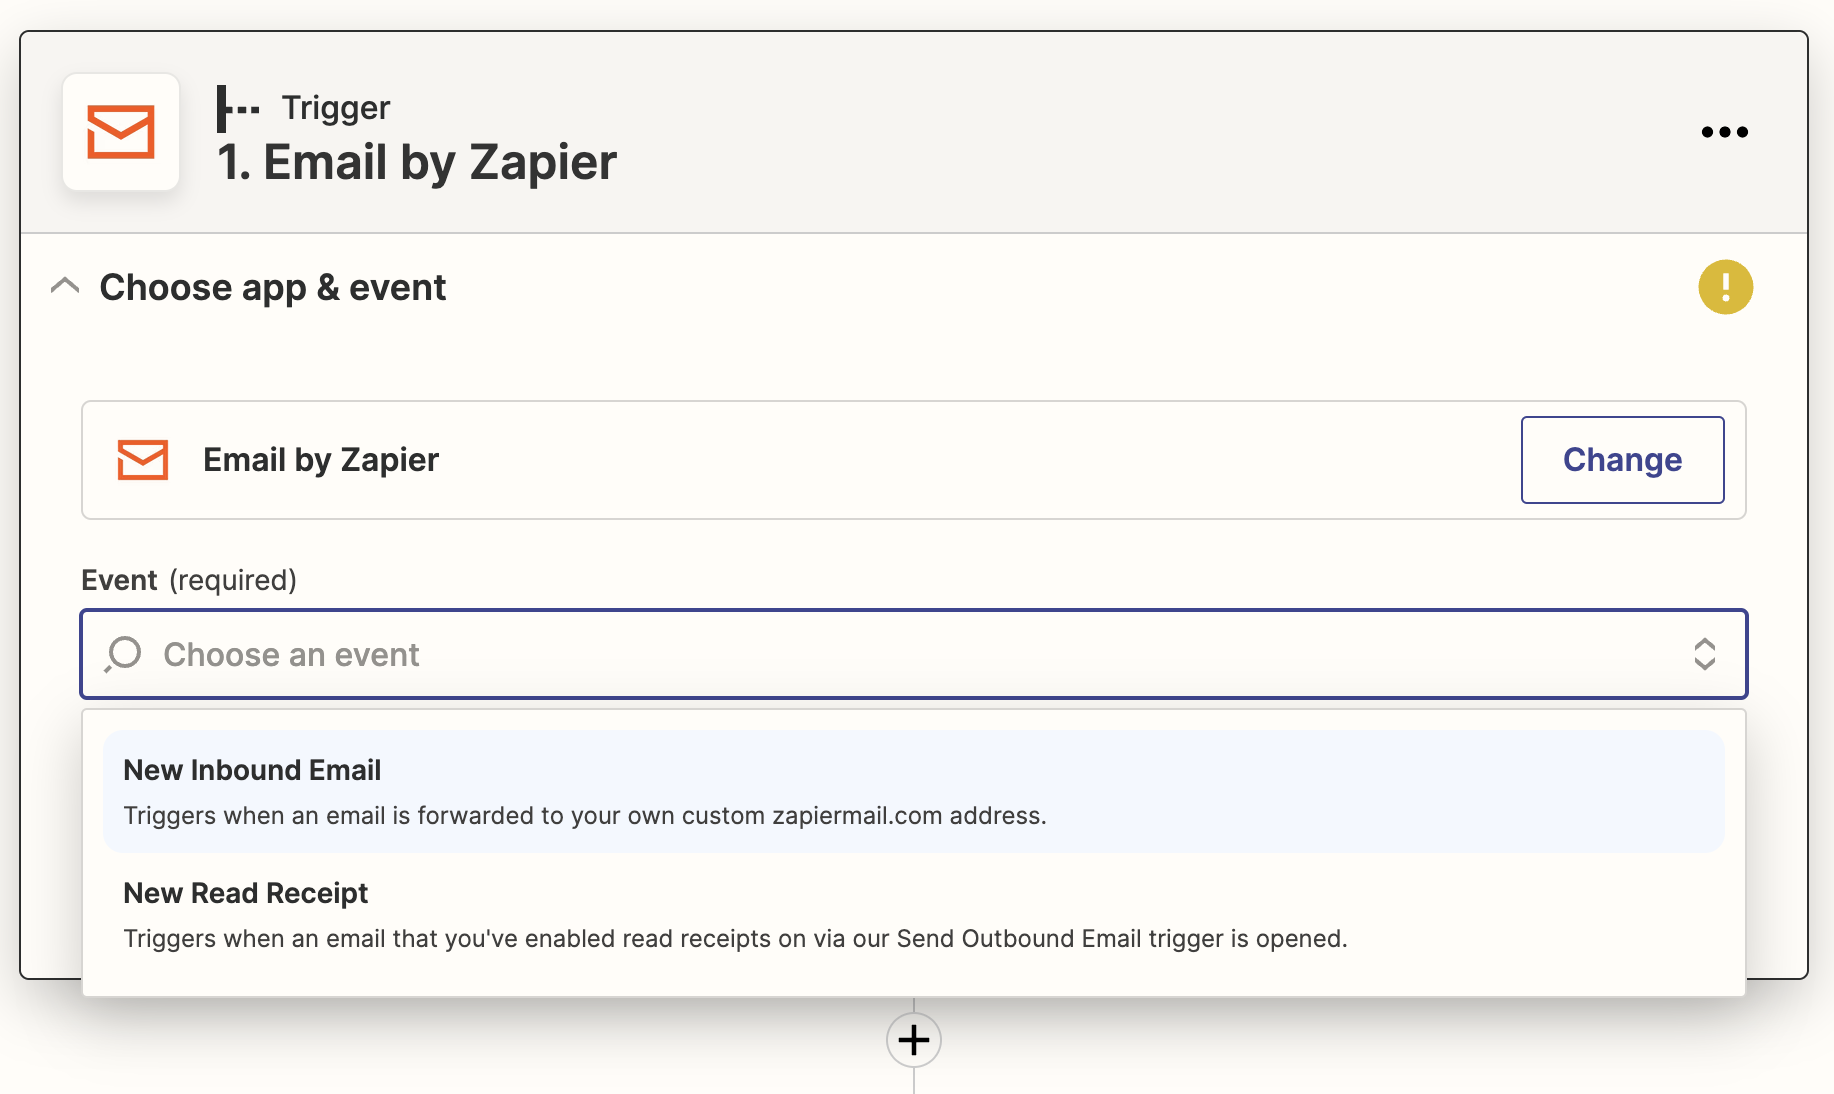
Click the blue Continue button.
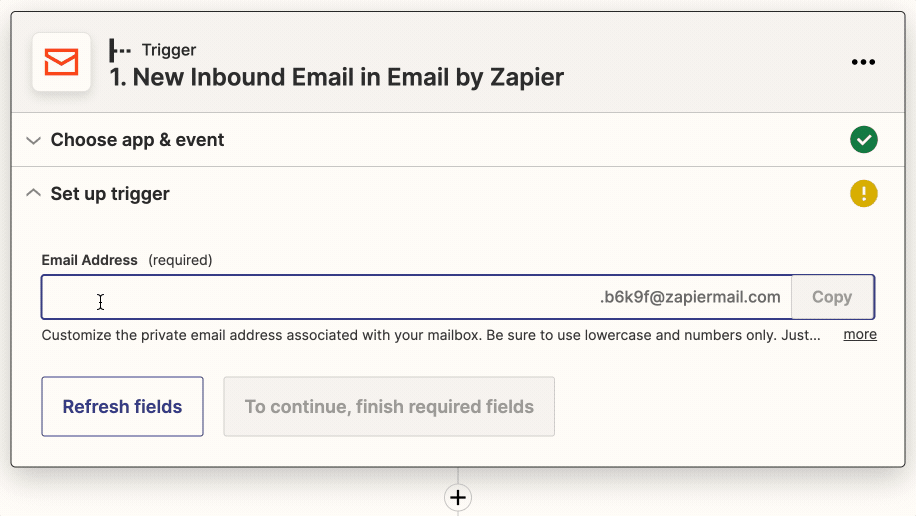
- **SET UP TRIGGER:**Next, we need to customize our @zapiermail.com email address. Enter a string in the text field and click Copy to Clipboard to copy the custom @zapiermail email address. This is the email address where we will forward messages from Client 1.
Click the blue Continuebutton.
TEST TRIGGER: At this point, it's best practice to Test trigger and our current setup
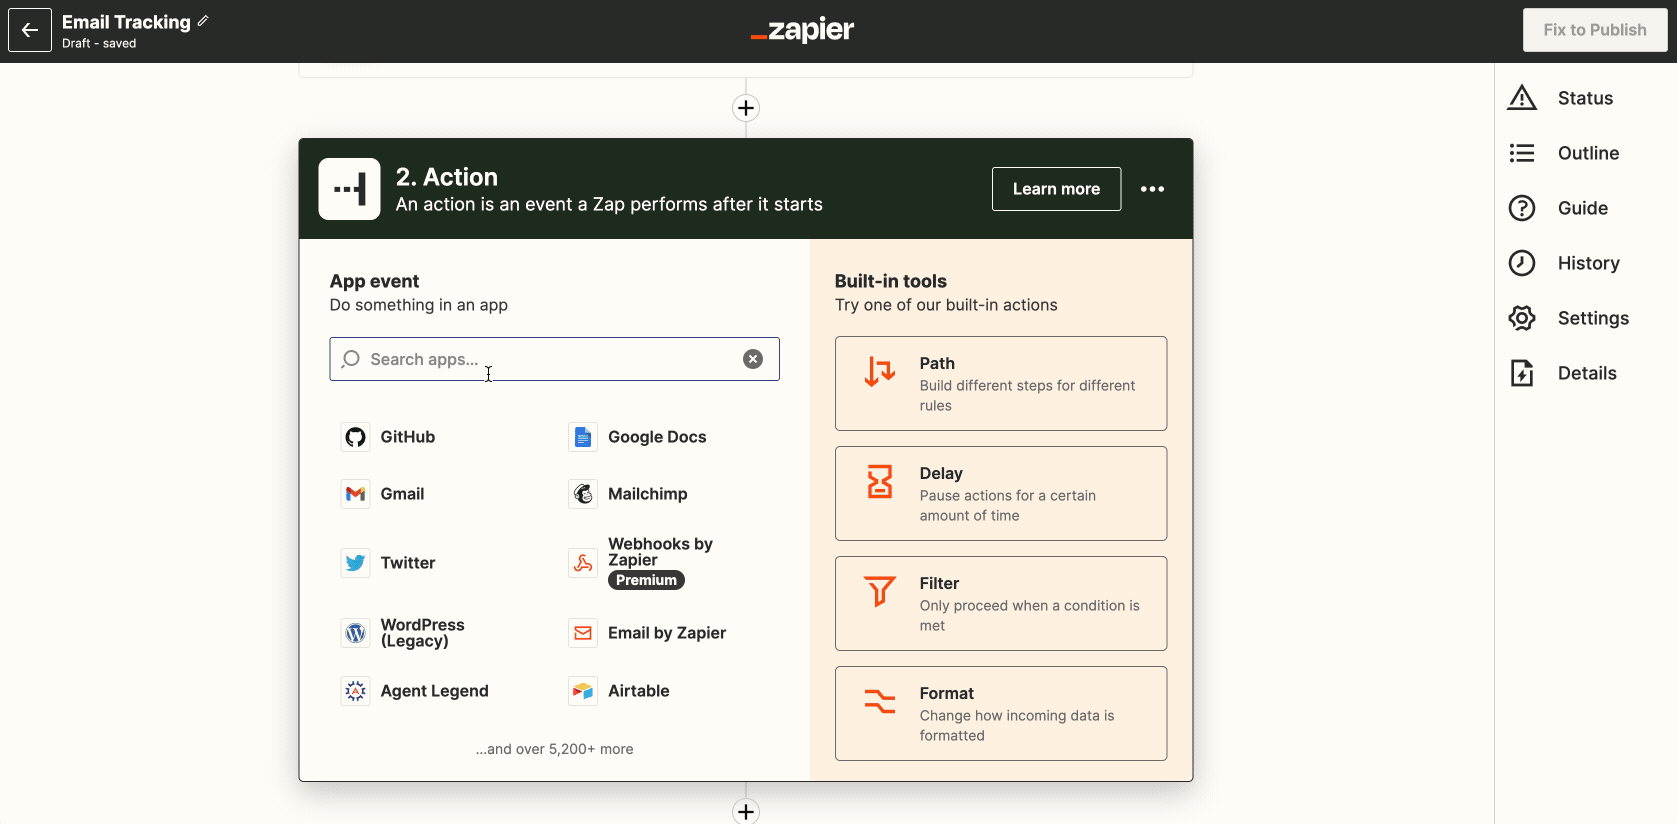
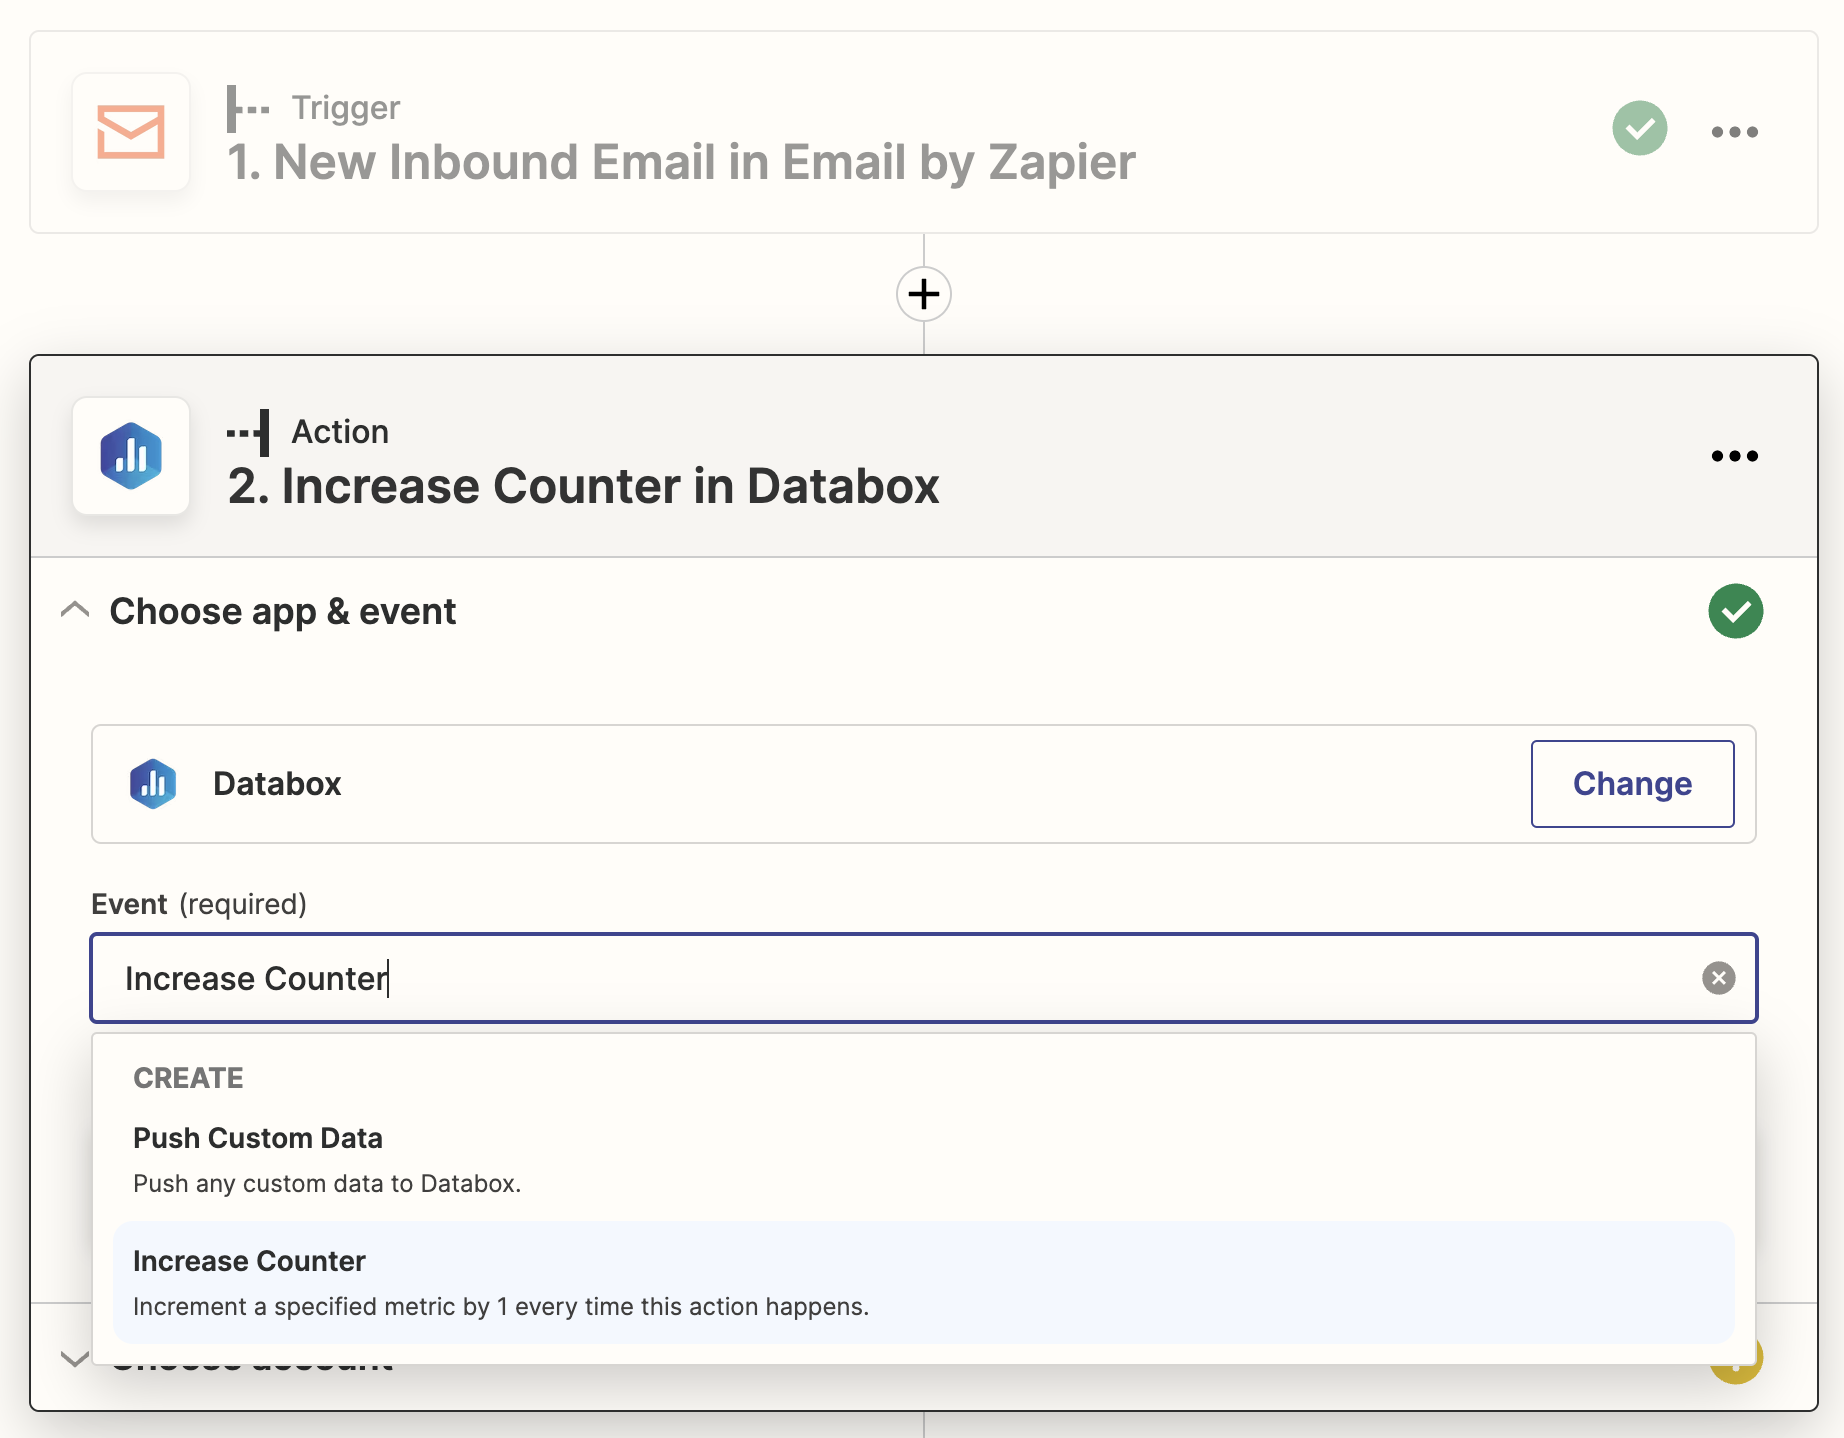
CHOOSE APP & EVENT: Next, we'll need to define an Action that follows the trigger. To start, we'll choose Databox as the Action Appfrom the App event list.
- Now we must select a Databox Event(action). Databox Event define how the data is tracked.
- Increase Counter: Every Action that is triggered in a Zap will count as 1 event. This means that Databox will increment the current value by 1 each time the Zap is triggered.
- Push Custom Data: Every Action that is triggered in a zap will sync as custom data with Databox.
For our example, we'll select **Increase Counter,**so we can easily see the total number of emails we're receiving from Client 1.
Click the blue Continuebutton.
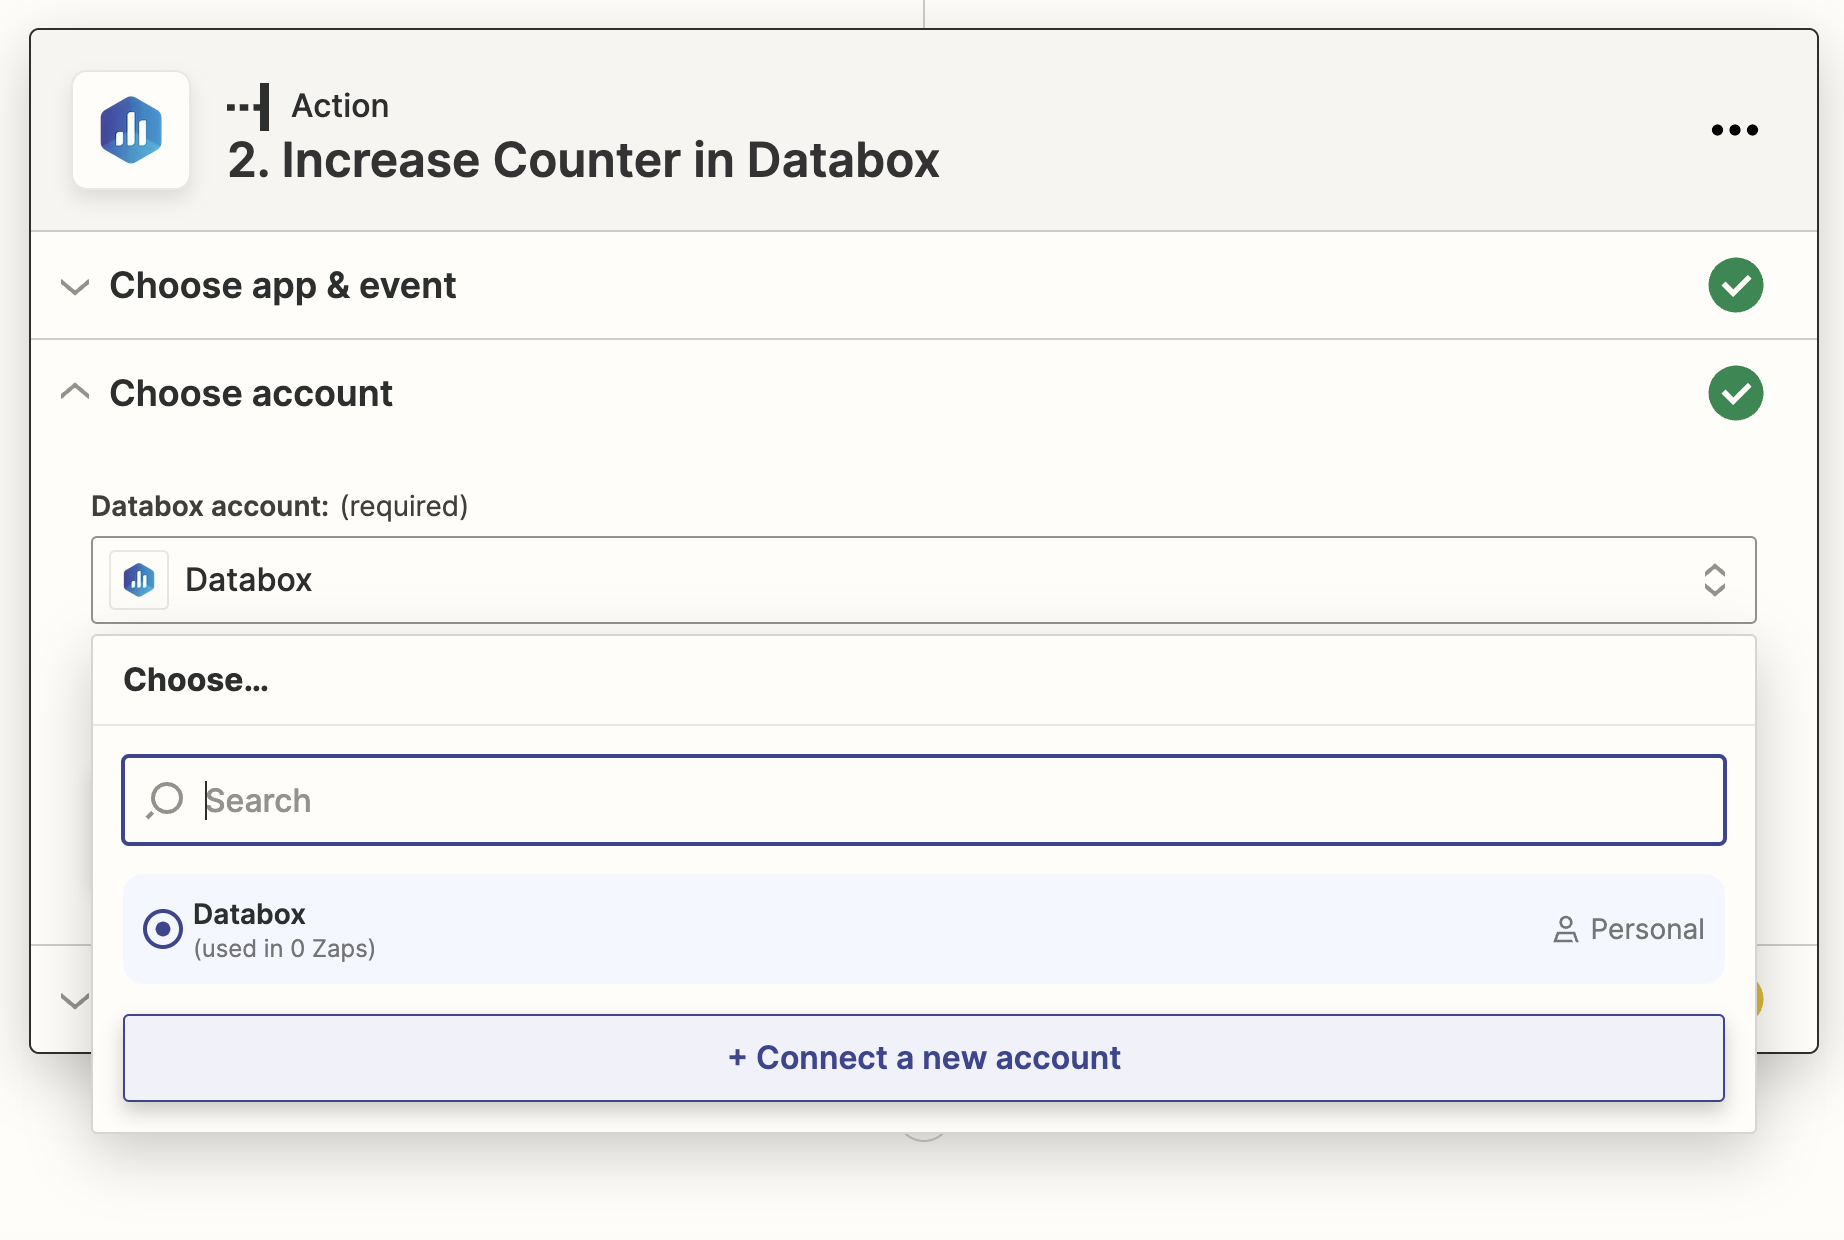
8.**CHOOSE ACCOUNT:**Here we must select a Databox Account. If you don't have Databox connected, click + Connect a new account. This will open a window where you can enter the push token that was generated for Zapier
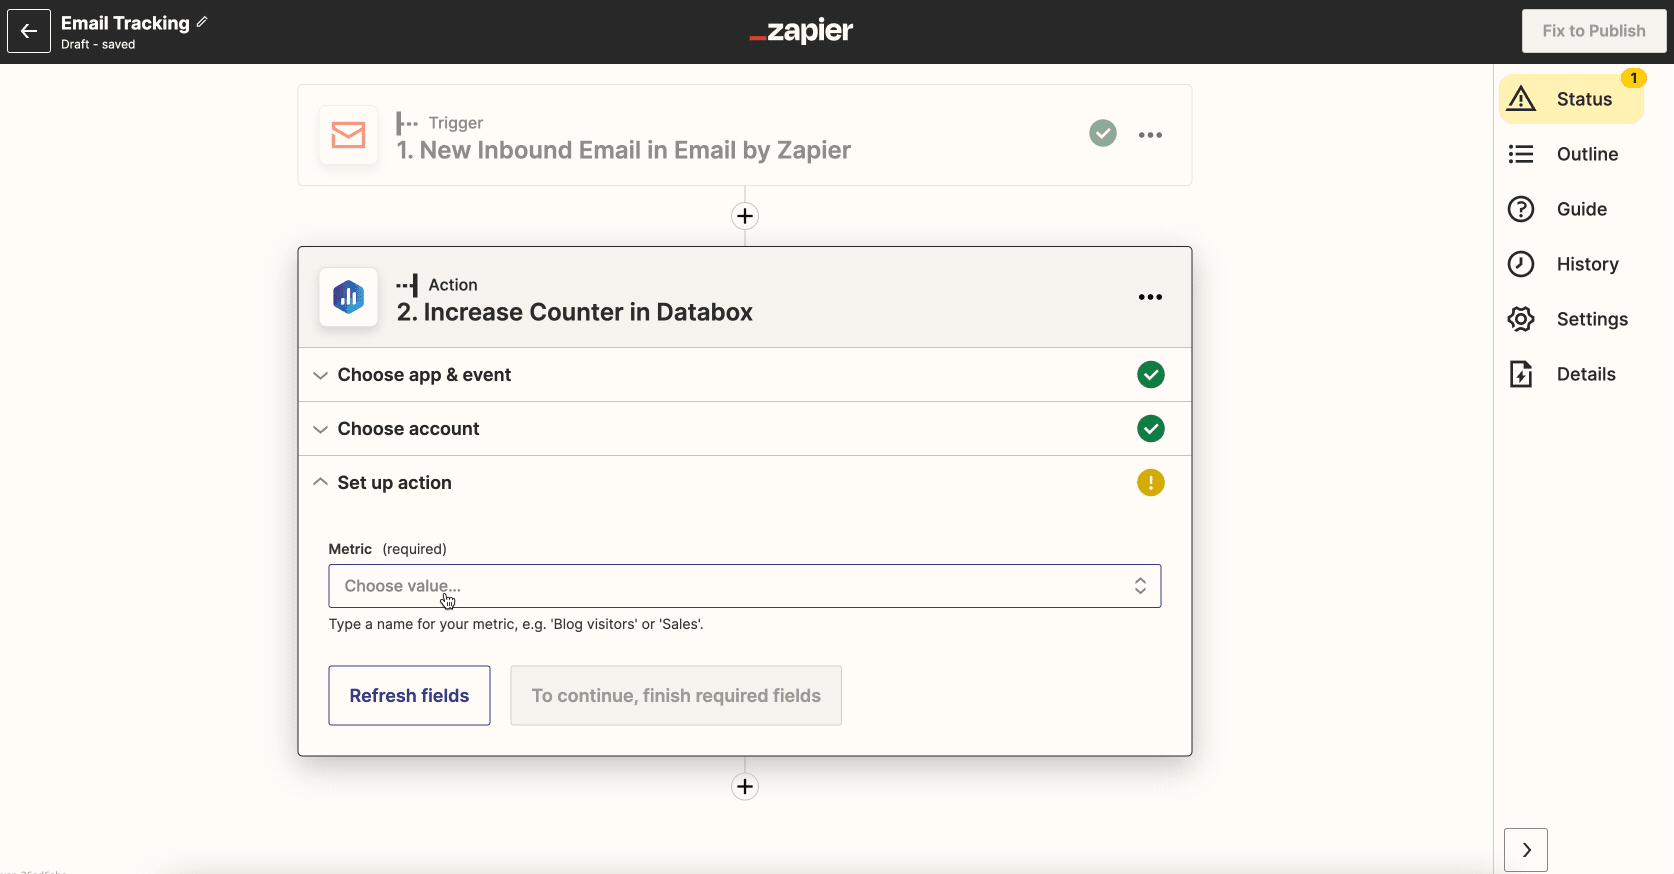
- SET UP ACTION: Rather than increasing the counter for a Metric that already exists in our Databox Account, we want to create a completely new Zapier Metric that's tracking this data.
To do that, we'll select Customfrom the Metric drop-down list. Now we will be able to enter the name for our Metric to the Metric field. This is the Metric name that we'll select in the Designer in Databox.
For our example, we'll enter Emails Received From Client 1 as the Metric.
10.**TEST ACTION:**We can now send a test counter to Databox to confirm everything is working as expected
- Click Publish Zap to complete and activate the Zap
- Navigate to Databoards > + Create New Databoard > Start Blank
- Click on the Visualization Types icon under the Metric Library icon on the left-hand side of the Designer.
- View the list of Visualizations available in Databox. Drag and drop your selected Visualization onto your Databoard.
- Click on the Datablock on the Databoard to open the corresponding Datablock Editoron the right-hand side of the Designer.
- In the Metrics drop-down, click Data Source to select the appropriate Zapier Data Source. This will filter out metrics from the specific Data Source.
- Select the metric you'd like to display on the Datablock, using the Search bar if needed. This will update the Datablock, and it will populate with the corresponding data.