How to create a custom domain to host your Account
You can create a custom domain (like "data.company.com") that can be used to login to your White-Labeled Databox Account, host your Sharable Links, and more.
Custom Domains are available as part of the White-Label add-on. Learn more about the White-Label add-on here
HOW TO
- Access the White-labeling page
- Create a Custom Domain
- Set up a CNAME using popular DNS services and name servers
- Verify that a CNAME record is active
How to access the White-labeling page

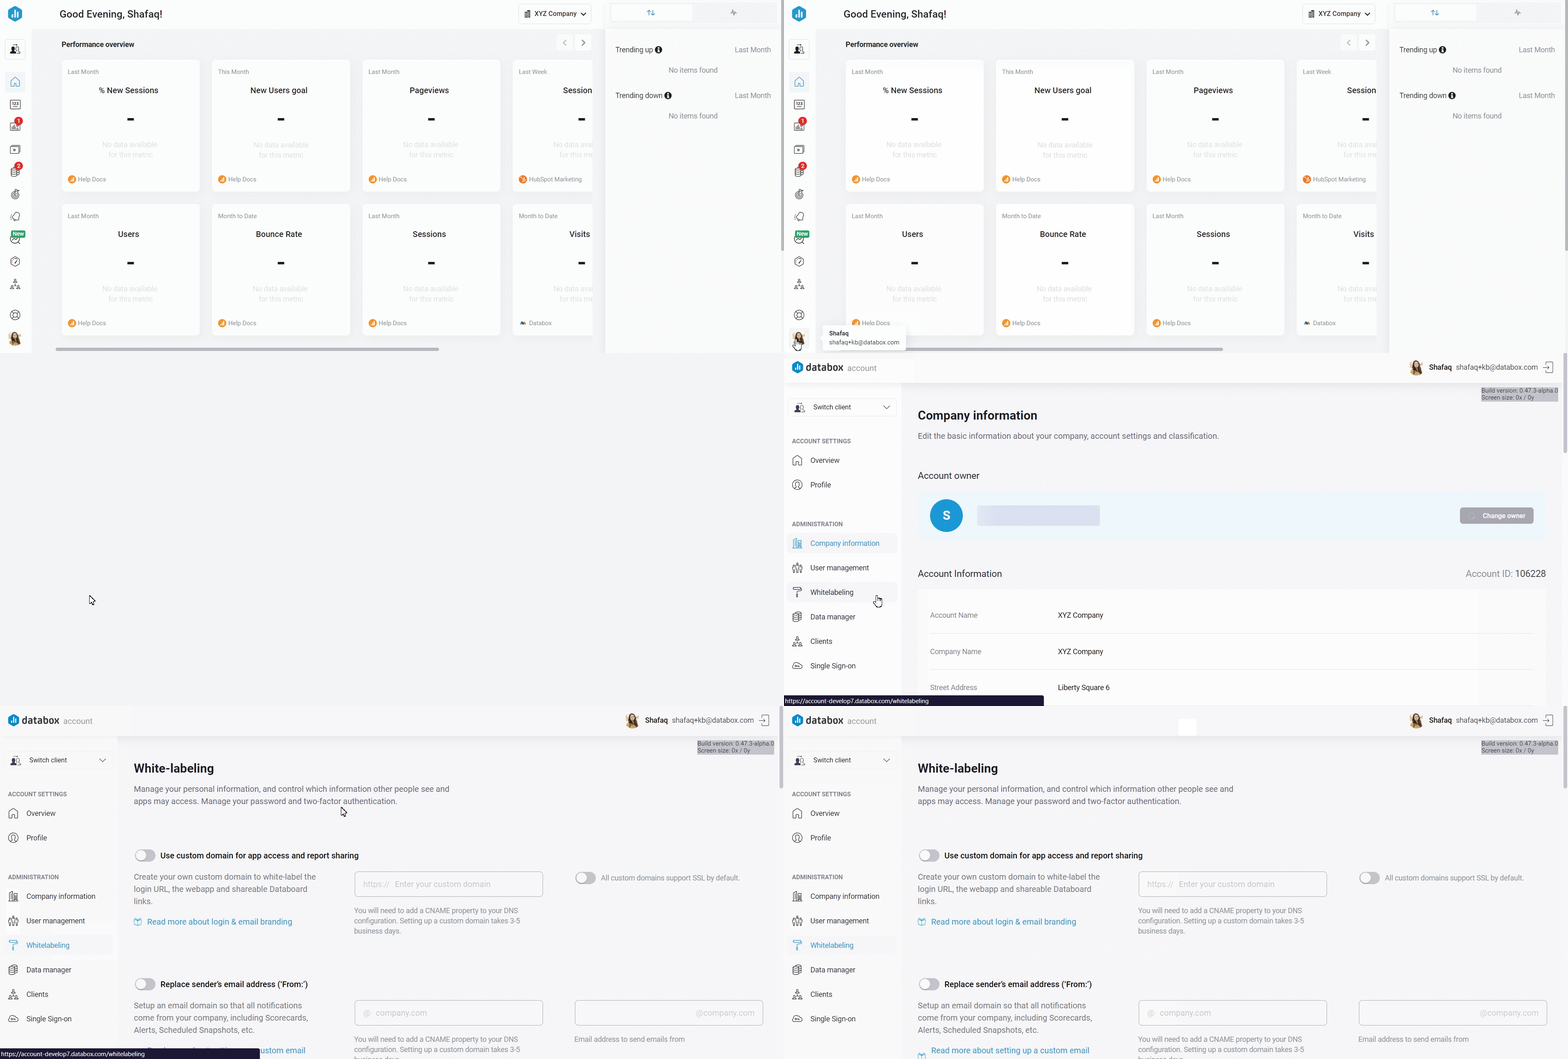
Open your Databox Analytics Account and navigate to Account > Account Management to open your Account Management Application.
Navigate to the Administration section and click on White labeling.
How to create a Custom Domain
- To create a custom domain, you must create a new CNAME record that will be used to access your Account. This is done in a DNS zone for the domain that you wish to use.
- Set your chosen CNAME record to point to “clients.databox.com”.
-
On the White Labeling page enter your CNAME in the text box in the Use custom domain for app access and report sharing section
- Pro Tip: It can take up to 72 hours for the CNAME to propagate and properly point to the Databox app.
- Click Save at the bottom of the page.
We will add your CNAME to our system configuration and will notify you when this is complete. Please email help@databox.com with any questions.
At this point, you can log in from your custom domain, and it will replace "app.databox.com" in your Sharable Databoard Links.
Once your custom domain is set up, Agency users should always use this domain to login to your Databox Account. Otherwise, you will be forced to re-login when navigating to a Client Account.
Pro Tip: When logging into your Databox Account via custom domain, the URL will be temporarily redirected to dbx-auth.fusionauth.io until your login is complete. FusionAuth is a certified authorization service provider. Once you're logged into your Databox account, users will see your custom domain in the URL.
Pro Tip: If you are an Agency User, the custom domain can be automatically applied to new Client Accounts by selecting the Apply all settings to all Clients checkbox on the White-Label page. Learn more here.
How to set up a CNAME using popular DNS services and name servers
HOW TO
How to set up a CNAME in Cloudflare

- Select your desired domain name and choose DNS from the menu at the top

2. Click + Add record
3. Select CNAME from the Type drop-down list
4. Enter your desired custom subdomain in the Name textbox
5. Enter "clients.databox.com" in the Target textbox
6. Select Auto from the TTL drop-down
7. Uncheck the Proxy, so the Proxy status is set to DNS only
8. Click Save
How to set up a CNAME in GoDaddy
- Login to your GoDaddy Account
- Select your domain name from the Domain Settings page
- Pro Tip: The custom domain "data.company.com" has "company" as the domain name and "data" as the Host (set is step #4).
- Choose Manage DNS from the Additional Settings page
- At the bottom of the record, click Add and select CNAME from the Type drop-down list
- Enter your new CNAME in the Host field, like "dashboard" or "data." This will be the first part of your custom domain.
- Enter "clients.databox.com" in the Points To textbox
- Set the TLL field based on your preferences (for example, "14400").
- Click Save
Learn more about setting up a CNAME record in GoDaddy here.
How to set up a CNAME in Bind nameserver
- Edit the DNS zone for your primary nameserver
-
Add your CNAME in the following format:
dashboard14400 IN CNAME clients.databox.com.
In this example, "dashboard" is our CNAME record and 14400 is our TTL. These can both be customized based on your needs.
Be sure to include the final period after "clients.databox.com."
-
After you have added the entry, increase the zone serial and reload the bind:
rndc reload
Pro Tip: It can take some time for the record to propagate, especially if you’ve used that subdomain before for another purpose.
How to verify that a CNAME record is active
If you're using Linux or MacOS, you can use the Terminal command line tool called “dig” to verify that a CNAME record is active.
- To do this, execute the following command:
dig dashboard.your_domain.com CNAME +short
clients.databox.com.
Be sure to include the final period after "clients.databox.com."
2. Replace "dashboard" with the CNAME record you created, and "your_domain" with your domain. This will let you known whether the CNAME is live and if it correctly points to clients.databox.com.
Alternatively, you can use the online dig interface on any OS to verify a CNAME record.