
Availability
Jira is a widely used project management and issue tracking platform designed to help teams plan, track, and manage work efficiently. It allows users to create and organize tasks, monitor project progress, manage backlogs and sprints, and collaborate across teams. With customizable workflows, detailed reporting, and support for agile methodologies, Jira provides visibility into team performance and project status, making it a central tool for software development and business operations.
If your credentials don't include full access to the data source, make sure your access level meets any permission requirements listed in the Specification section of the integration's page in the Metric Library.
Databox uses an API token to securely authenticate your Jira connection.
Follow Atlassian's official guide to create an API token.
After generating the token, copy and store it securely. You will need to paste it into Databox in the next step.
- In Databox, enter your Jira Domain. Your domain should look like
https://your-instance.atlassian.net/ - Enter the email you use to log in to Jira.
- Paste the API Token you created in Step 1.
- Click Connect.

The Jira integration allows you to create custom metrics using the metric builder, ideal for visualizing data not included in the basic metrics offered by the integration.
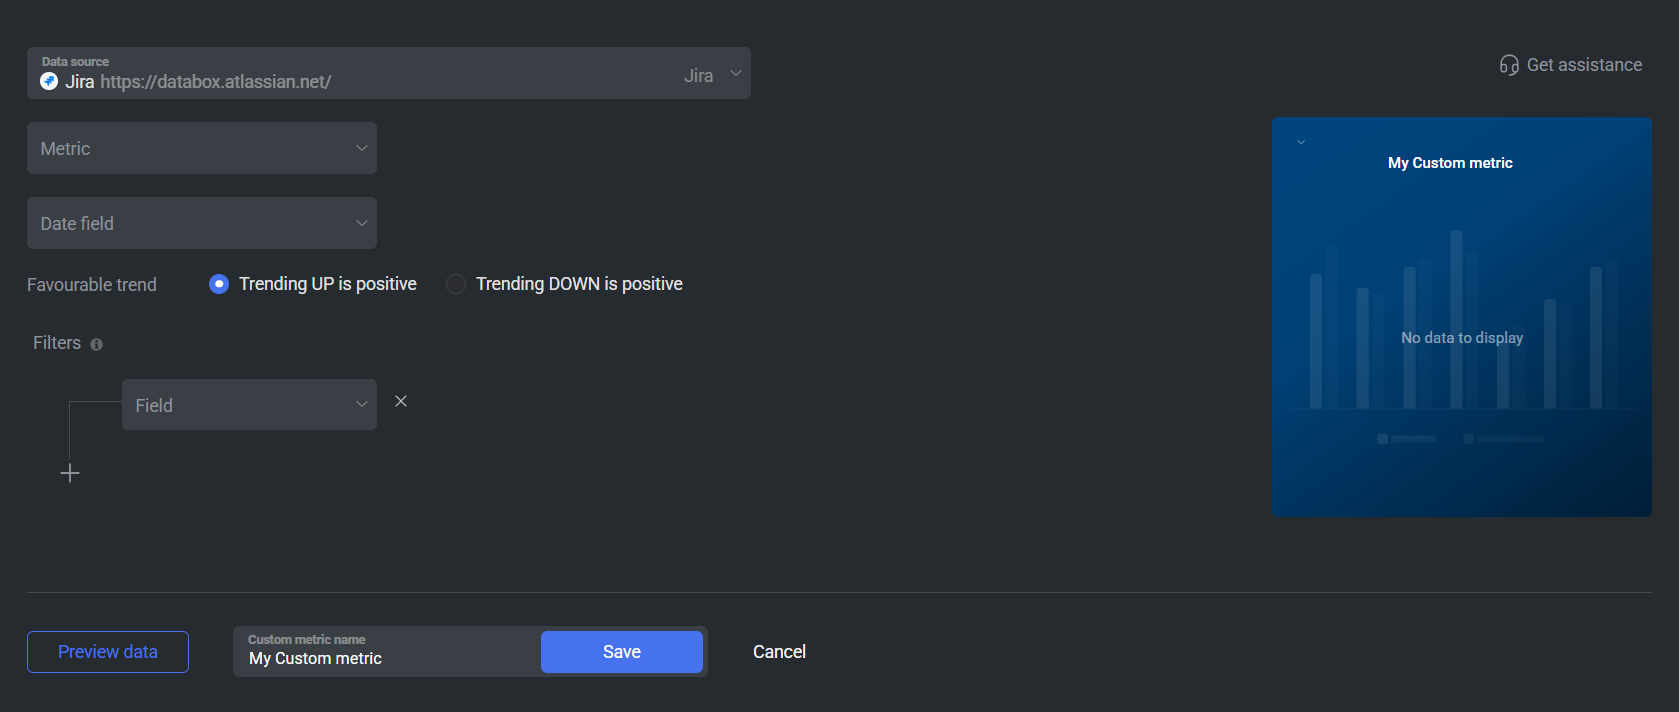
To create a custom metric, start by selecting a metric from the "Metric" selector. Next, customize your metric by optionally adding a dimension and applying one or more filters. The available options depend on the selected entity and data type (e.g., number, text, etc.).
The available selector values are pulled directly from your Jira instance to mirror what you can use in JQL. When you open the builder, Databox requests Jira's JQL autocomplete metadata to list the fields that can be used for building and filtering metrics, including Jira system fields and any visible custom fields, along with their supported types. For dimensions and date fields, Databox retrieves your Jira field catalog and then surfaces the fields that can be used to group results or define time-based reporting. When you add a filter and start selecting values, Databox calls Jira's suggestions endpoint to return valid values for the chosen field, so filter pickers show relevant options based on Jira's own JQL suggestions.

The Jira integration supports the creation of datasets, which allow you to structure and format your Jira data for more flexible reporting in Databox. By organizing your data into a tabular format, datasets make it easier to filter, segment, and visualize key metrics across projects, clients, and team members.
The entity relationship diagram (ERD) below illustrates how data is organized within the Jira integration, displaying the available views and columns, as well as the relationships between them (primary and foreign keys). This diagram represents the schema, or structure, of the data and helps you understand the underlying data model. With this context, you can create datasets using the relevant views and columns to build custom metrics tailored to your reporting needs.
For comprehensive details on metrics, data availability, templates, specifications, usage guidelines, and other key information, refer to the resources listed below.


FAQ
Why are certain entities or properties unavailable in the metric builder?
The metric builder pulls raw and analytics data from Jira's APIs. If an entity or property is missing, it is likely due to limited API support or technical implementation restrictions. If there's something you'd like to see included, feel free to submit a request, so we can consider it for future updates to the integration.


