
The more content you create, the harder it can become to find what you need. Tags let you label anything by team, client, initiative, or whatever makes sense for your workflow — so you can filter your way to the right content in seconds instead of scrolling through everything.
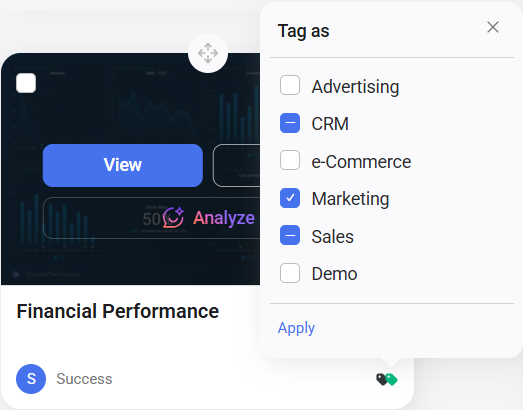
- In grid view, hover over the item and click the tag area in the bottom right corner. In list view, click the tag icon in the Tags column.
- In the Tag as panel, select or deselect the tags you want to apply.
- Click Apply.
- After clicking Apply, tags appear as colored icons at the bottom right of each card in grid view and in the Tags column in list view.


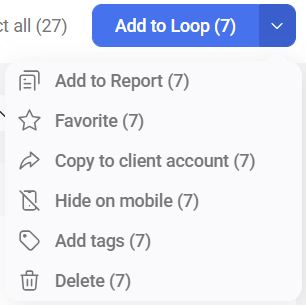
- Select the items using the checkboxes in the top left of each card in grid view, or the row checkboxes in list view.
- Click the down arrow (
 ) next to the main action button and select Add tags.
 - In the Tag as panel, select or deselect the tags you want to apply.
- A checkmark means the tag is already applied to all selected items.
- A dash (–) means the tag is applied to some but not all selected items. Selecting it applies it to all; deselecting it removes it from all.
- Click Apply.
- Hover over any item and click the tag area to open the Tag as panel.
- Click + Create new.
- Enter a tag name and confirm.
You can also create tags from the Manage tags modal — see Manage tags below.
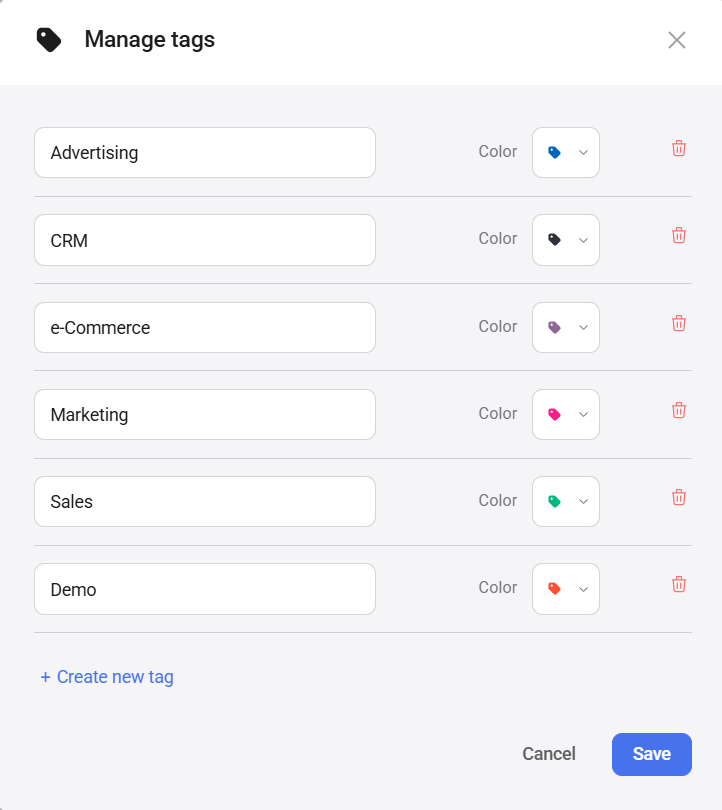
Use Manage tags to rename tags, change their colors, add new tags, and delete tags you no longer need. Changes apply account-wide and take effect immediately.
- Hover over any item and click the tag area to open the Tag as panel.
- Click Manage tags.
- Edit the name field to rename a tag, or click Color to change the tag's color.
- To add a new tag, click + Create new tag.
- To delete a tag, click the trash icon next to it.
- Click Save.
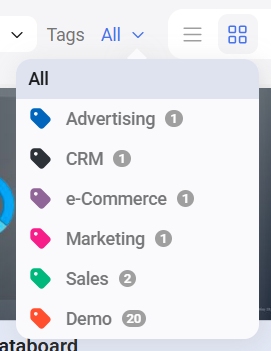
Wherever tagged content appears — including pages and metric selector modals — a Tags filter lets you narrow down what's shown.
- Open the page you want to filter.
- Click the Tags dropdown.
- Select a tag from the list.
The page updates to show only items with the selected tag. The number next to each tag shows how many items carry it.
FAQ
Can I apply more than one tag to an item?
Yes. There is no limit to the number of tags you can apply to a single item. Select all the tags you want in the Tag as panel and click Apply.
Can I filter by more than one tag at a time?
Yes. Open the Tags dropdown and select as many tags as you need — the page updates to show items that match any of the selected tags.
What happens to a tag when I delete an item?
The tag remains in the account and stays applied to any other items it was assigned to. Deleting an item does not delete its tags.


