
Learn how to create a new Zapier token here.
To create Zaps based off of data in a Google Sheet, your Sheet must be configured in a specific way. If your Google Sheet is incorrectly configured, your Zaps may be compromised.
Zapier's documentation outlines the way you will need to format your Google Sheet in order to work with Zapier.
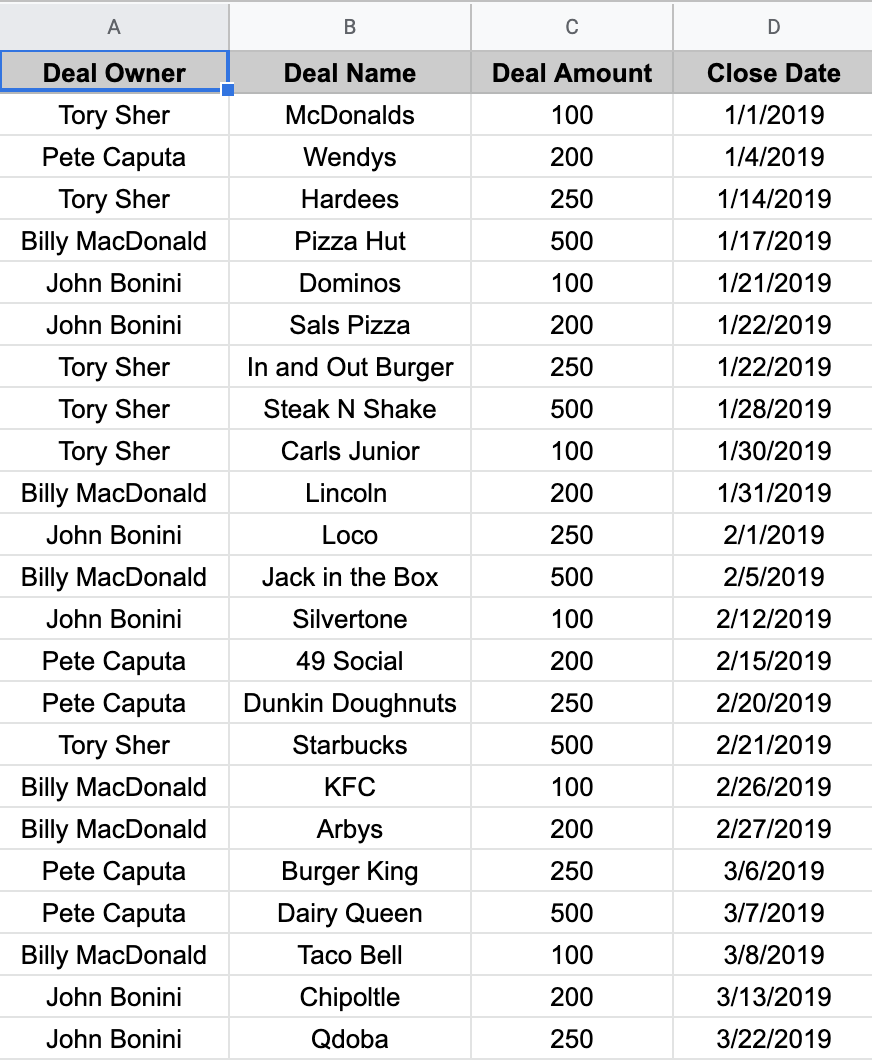
The first row of your Sheet must have column headers in any column you want to sync data from with your Zap.
The second row of your Sheet must have data entered in any of the columns that you want to be able to sync data from with your Zap.
All other rows should be copied to another Worksheet and deleted from the original Worksheet. When creating up a Zap, only the first two rows of the Google Sheet should be populated. All other rows can be copied back to the original Worksheet once the Zap is successfully configured.
You must have a Date column that specifies the date the data should be synced to. This will determine the Date Ranges when the data will be visible in Databox. A timestamp can be added in these cells, but it is not required.
To format your Date column in your Google Sheet, click Format > Number > Date Time.
Each entry in the Date column must be unique. If you have multiple entries with the same date, it will be necessary to include a timestamp to differentiate between these entries.
When you copy and paste data from another program into a Google Sheet, the original formatting is saved, which may cause an issue with your Zap(s).
To ensure your Zaps are able to successfully execute, it's recommended that you either manually enter your data in the Sheet or copy your data to an unformatted program before adding them to your Google Sheet.
Editing your Google Sheet while a Zap is already live is not recommended. To edit your Google Sheet, it's recommended that you turn off your Zap first.
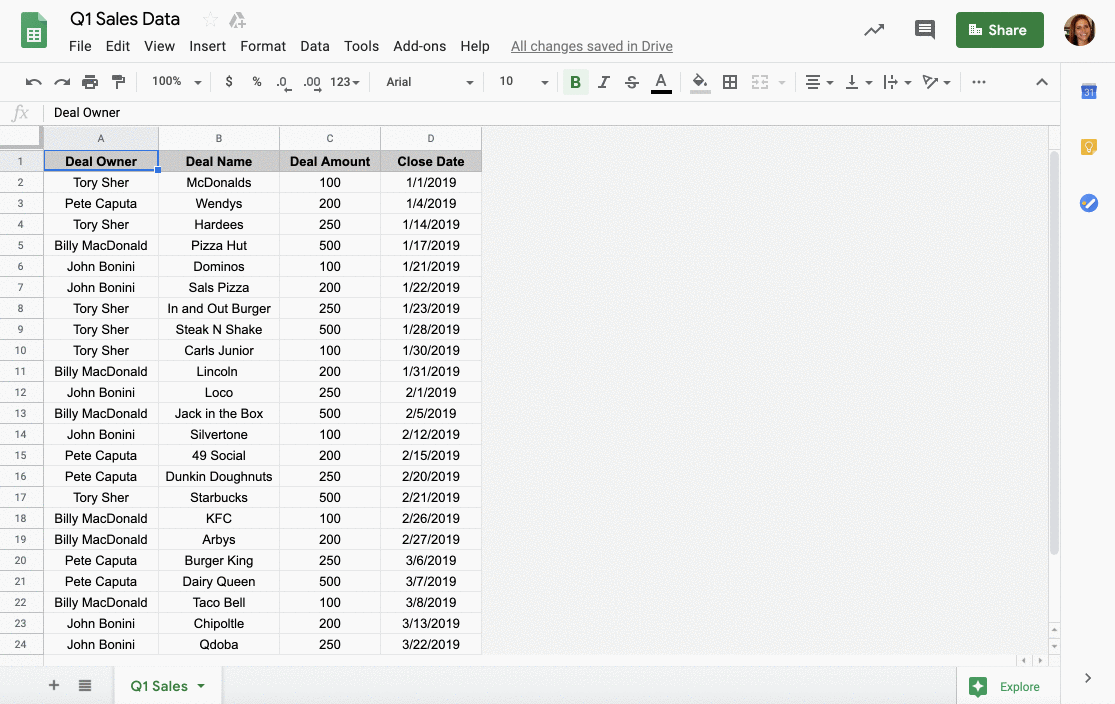
In our example, we will create a Zap to access data from our Google Sheet to track Closed Won Amount.
Each unique Metric that we want to sync with Databox will need to be accessed through a different Zap. Once we have one Zap built, we can duplicate it and make minimal changes to update it to sync different data from the Google Sheet.
To start, we want to create a Zap that syncs "Closed Won Amount" from our Google Sheet to Databox.
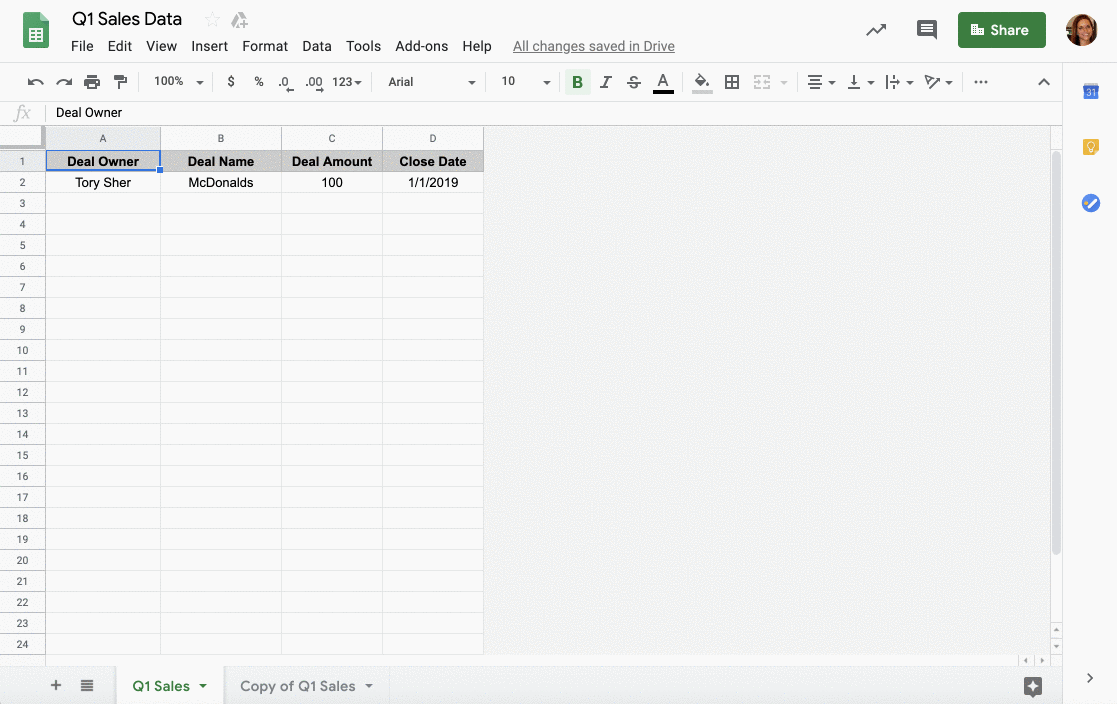
When creating new Zaps, our Google Sheet must be formatted in a specific way. To start, we can only have the first two rows of the Sheet populated.
To ensure we don't lose any data that is already on our Sheet, we'll copy the original Worksheet and store the duplicated version for future use. Now we can delete all entries below row 2 from our original Worksheet and create our first Zap.
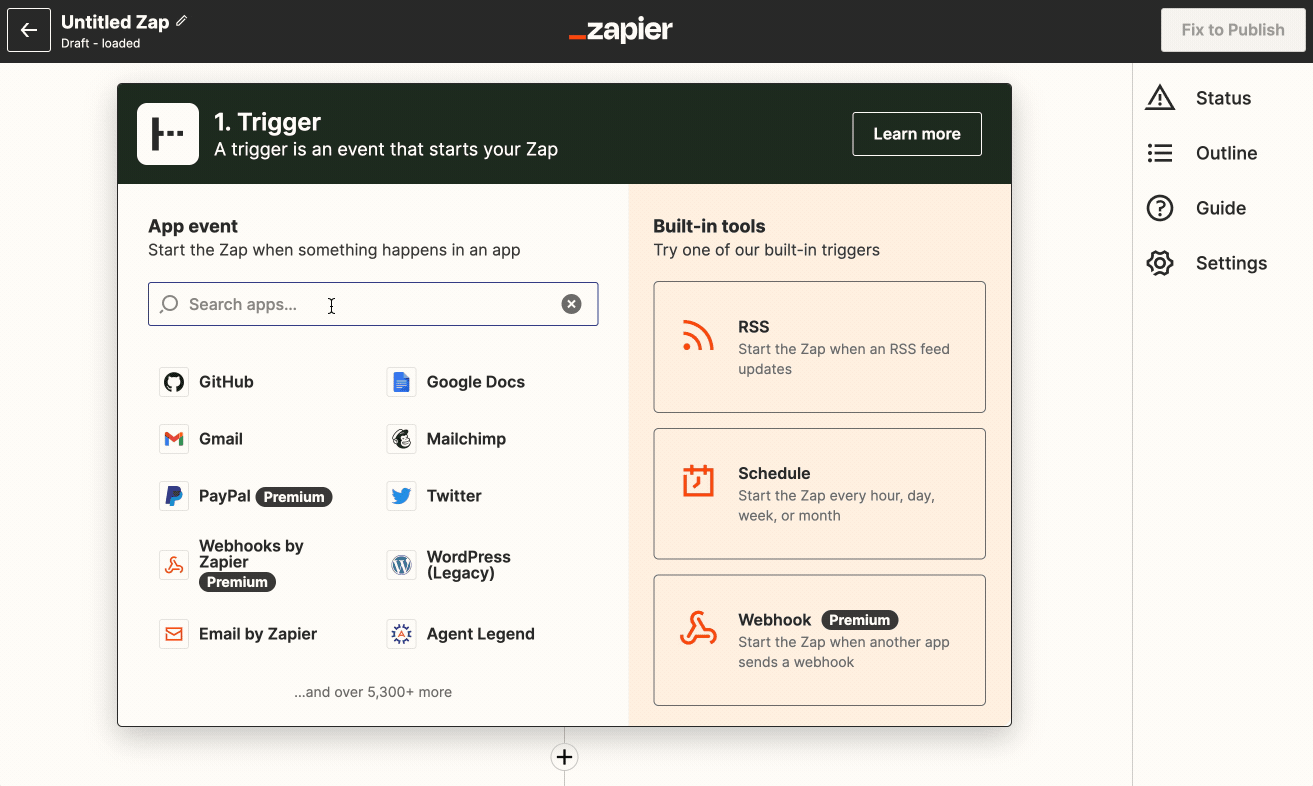
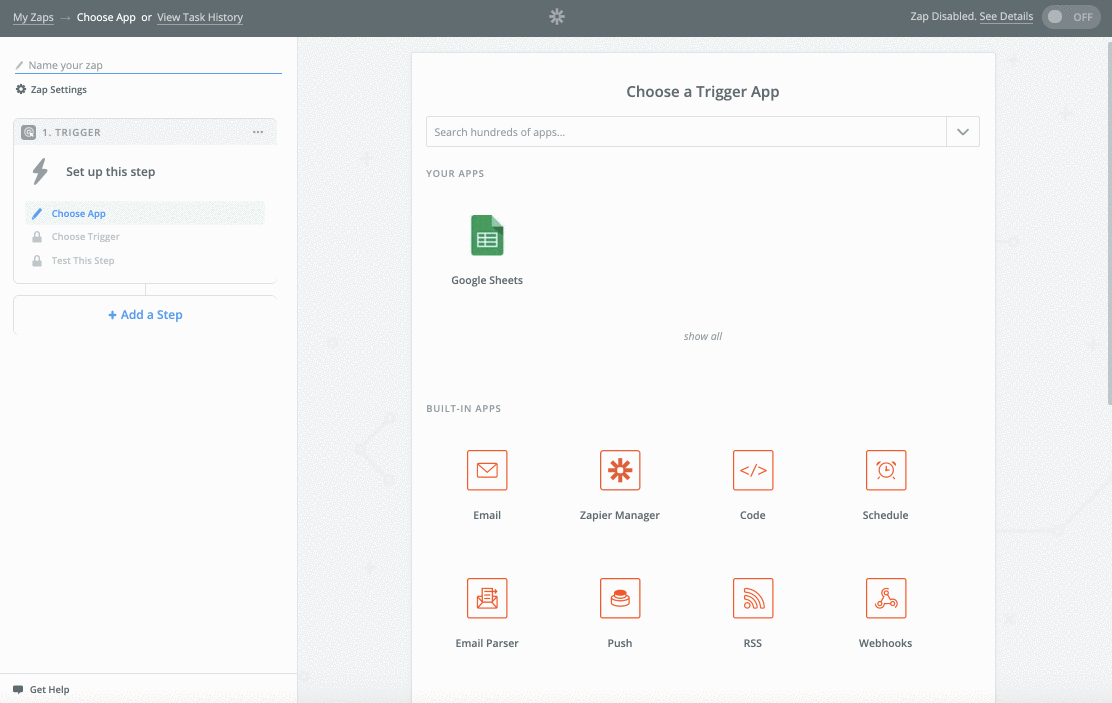
- Navigate to your Home page in Zapier. Click the orange**+ Create Zap**button
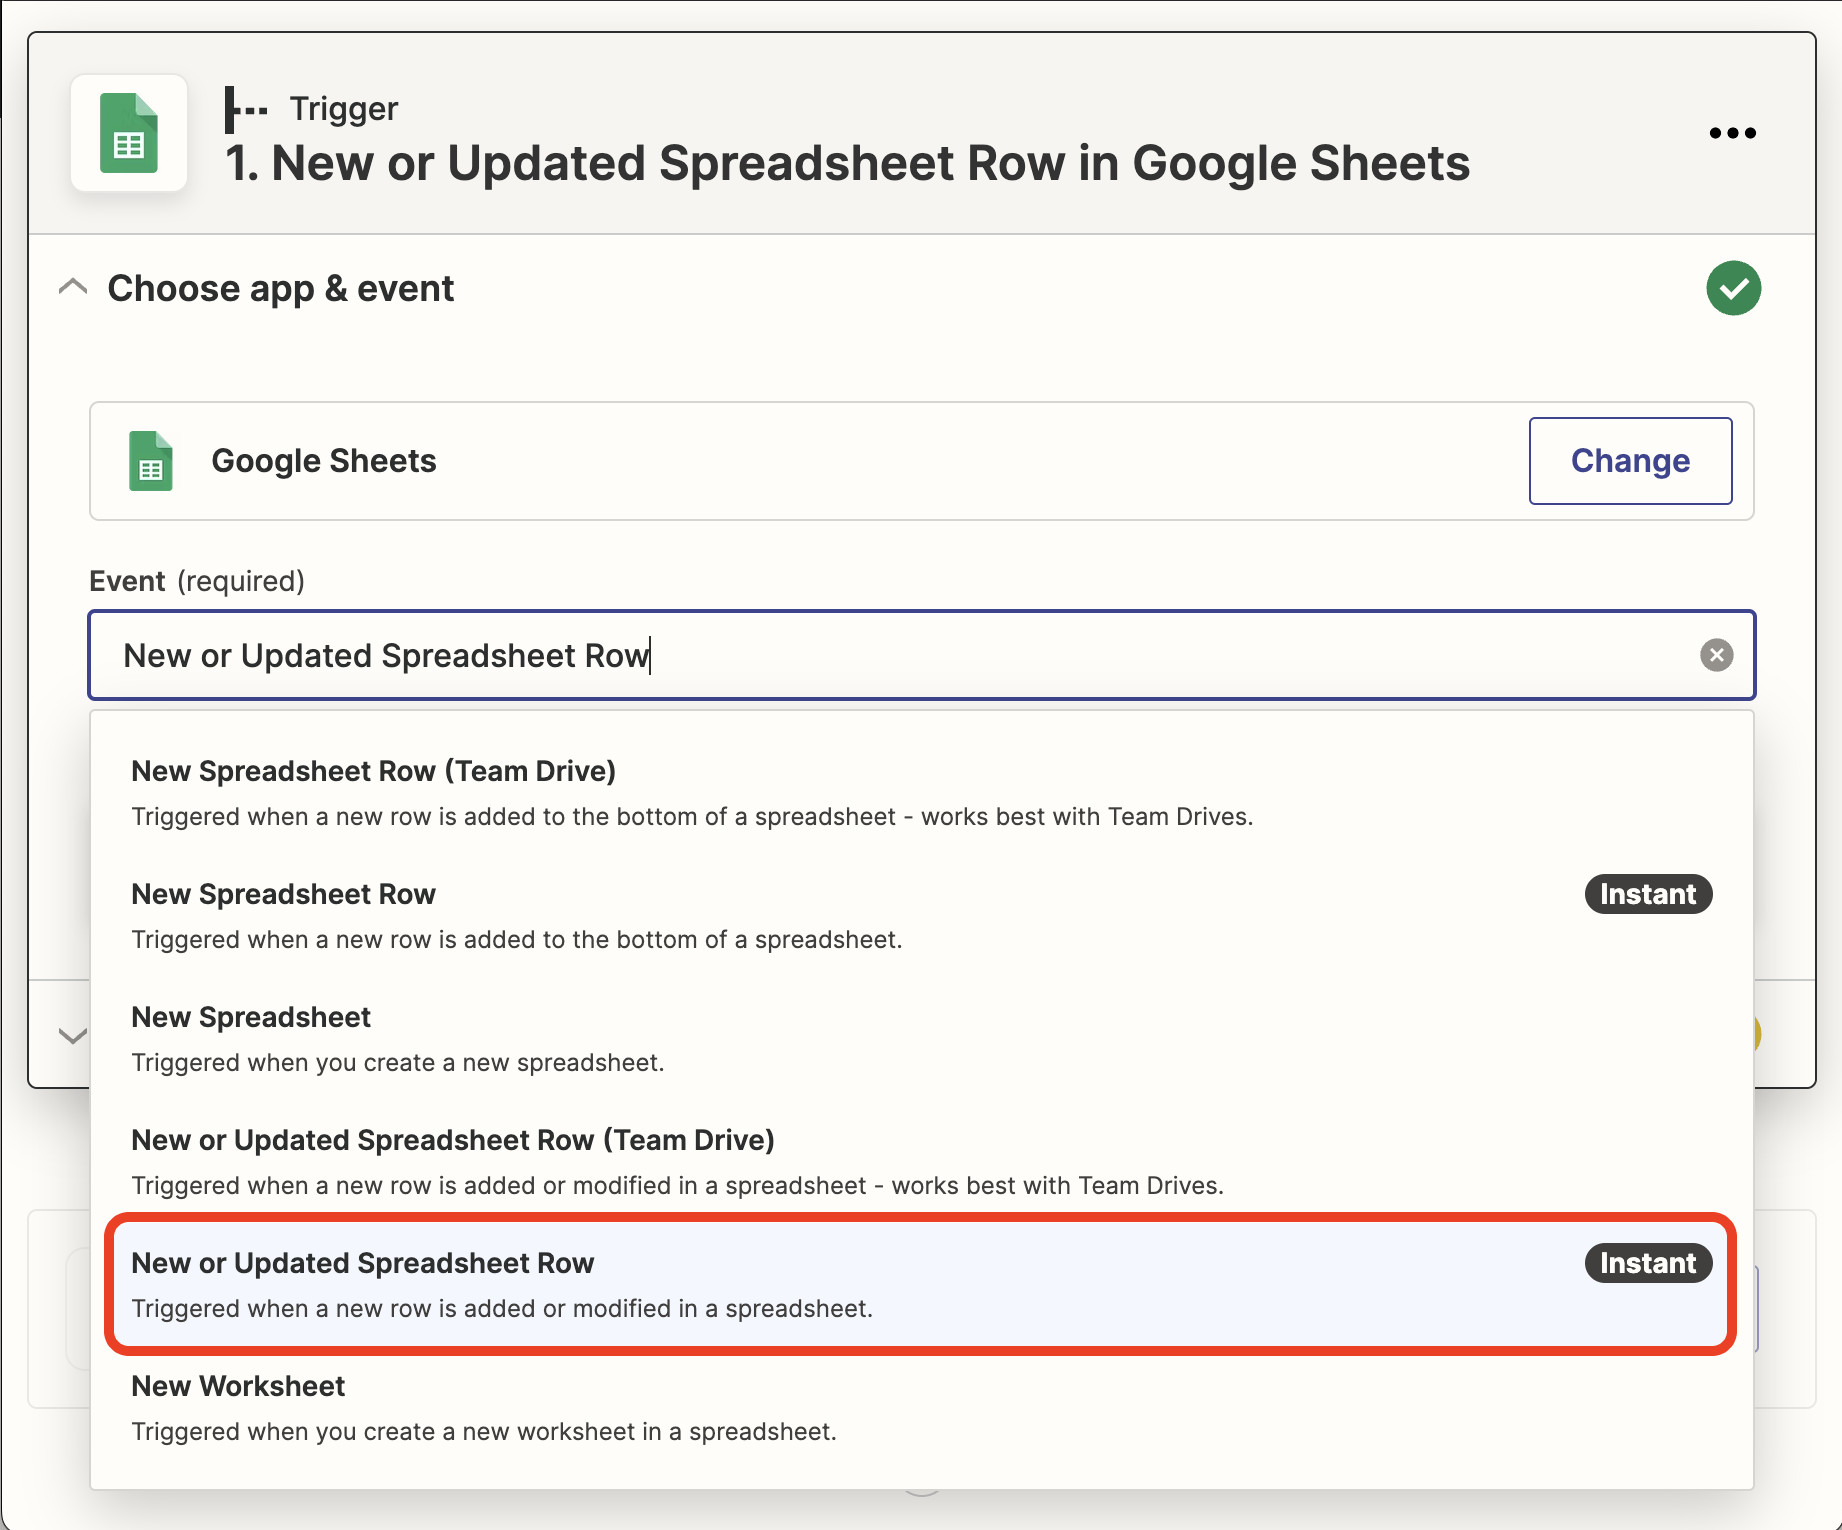
- CHOOSE APP & EVENT: Select Google Sheets from the App event list
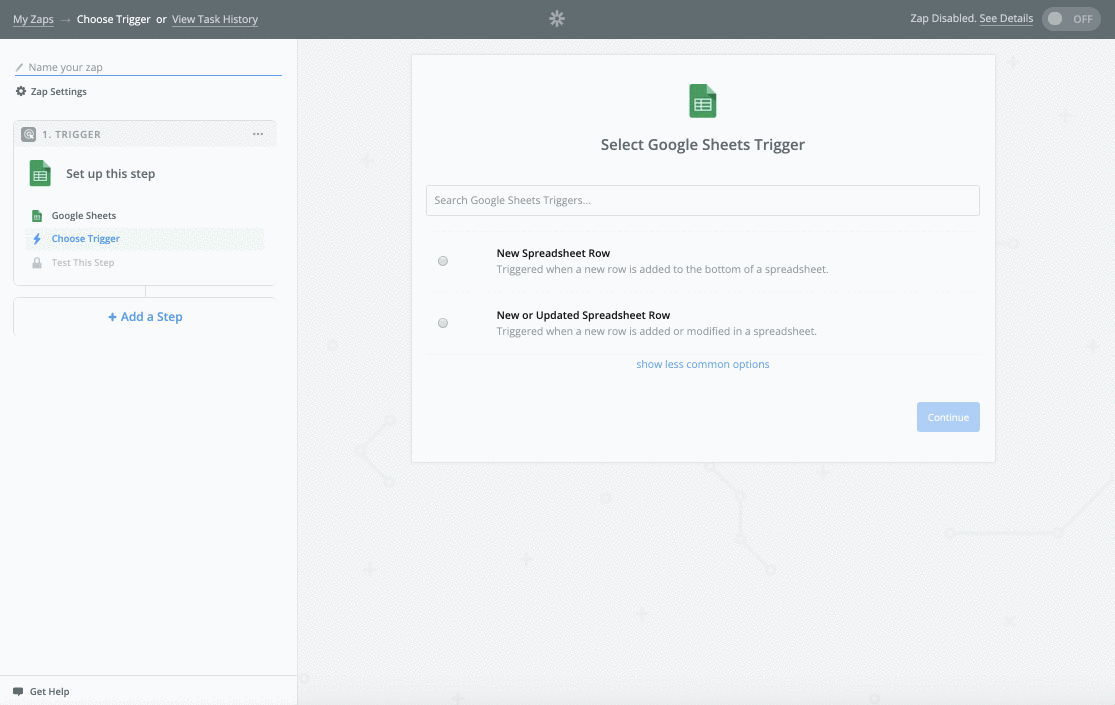
- Select an Event (Trigger ) from Google Sheets. The Event determines what will initiate a data sync with Databox.
- New Spreadsheet Row: The trigger will be initiated when a new row is added to your Google Sheet.
- New or Updated Spreadsheet Row: The trigger will be initiated when a new row is added or an existing row is updated in your Google Sheet.
For our example, we'll select New or Updated Spreadsheet Row as the Event. This gives us more flexibility and ensures that any changes made to our Google Sheet will be reflected in Databox.
Click the blue Continue button.
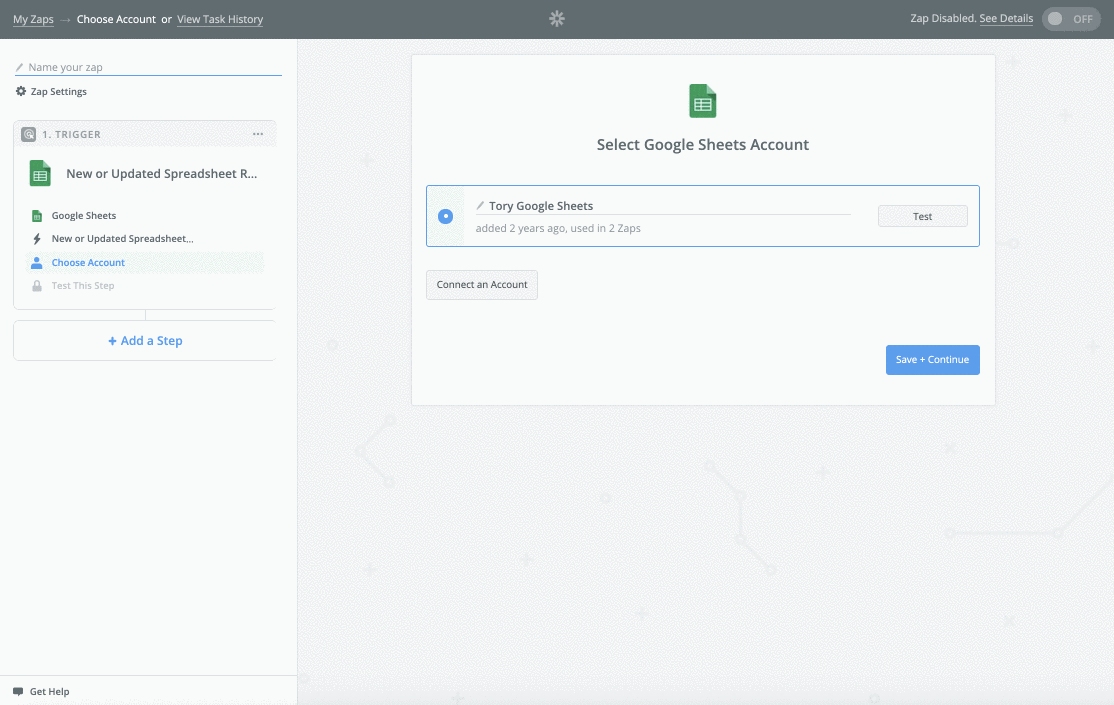
- **CHOOSE ACCOUNT:**Here we must select a Google Sheets Account.
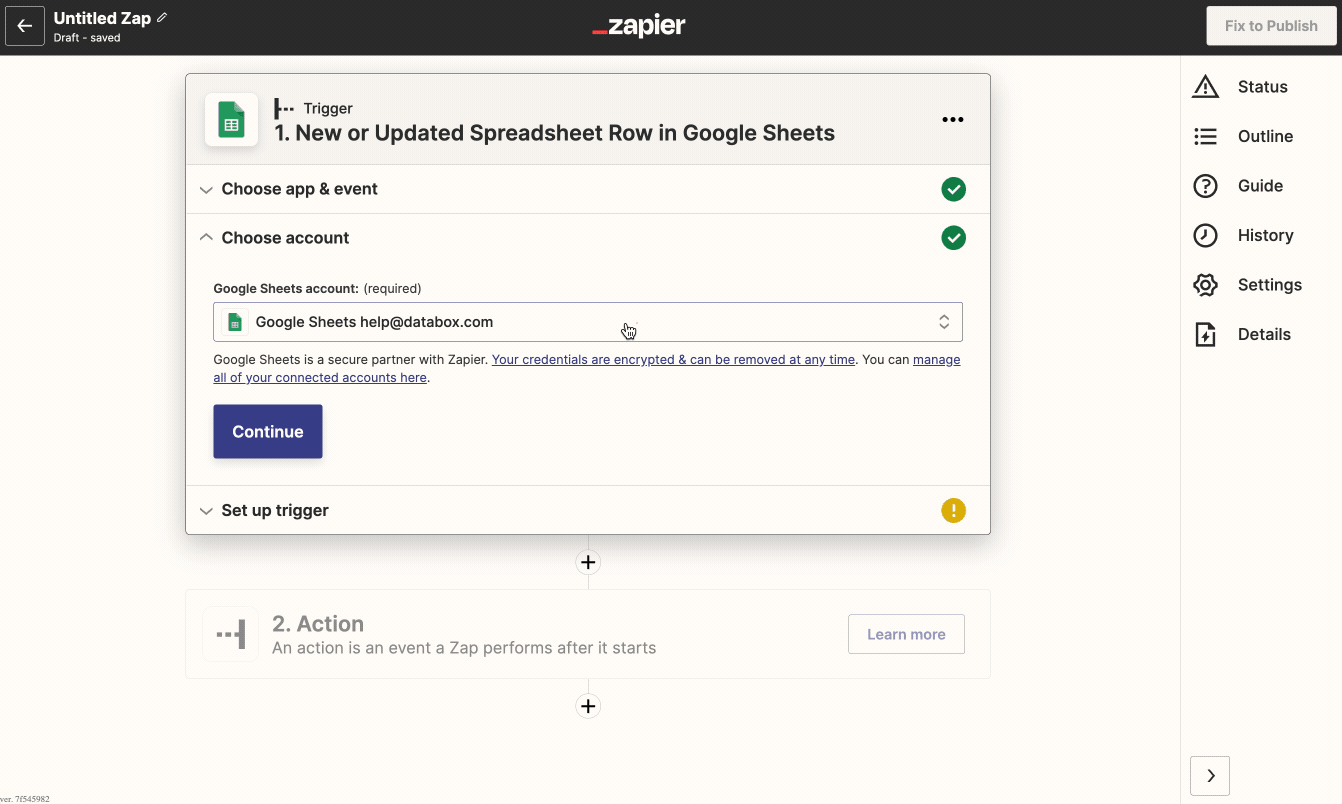
Click the blue Continue button.
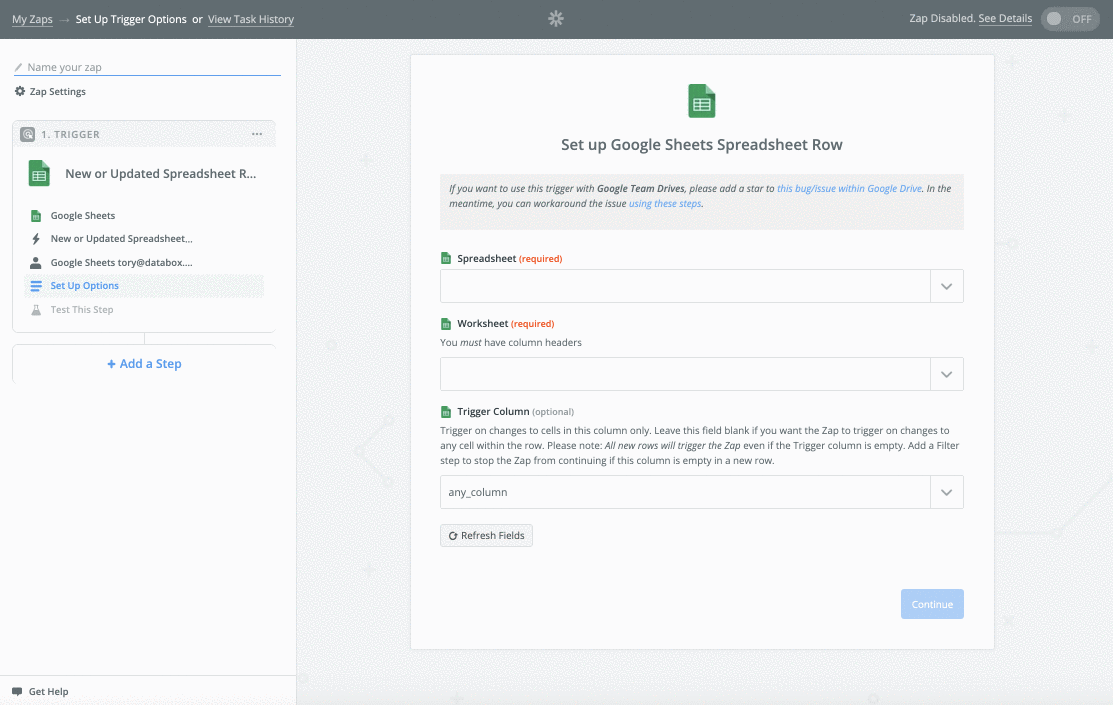
- Next, we have to tell Zapier exactly which Google Sheet, Worksheet, and Trigger Column to sync data from.
For our example, we'll choose Q1 Sales Data as the Google Sheet, Q1 Sales as the Worksheet, and Deal Amounts as the Trigger Column.
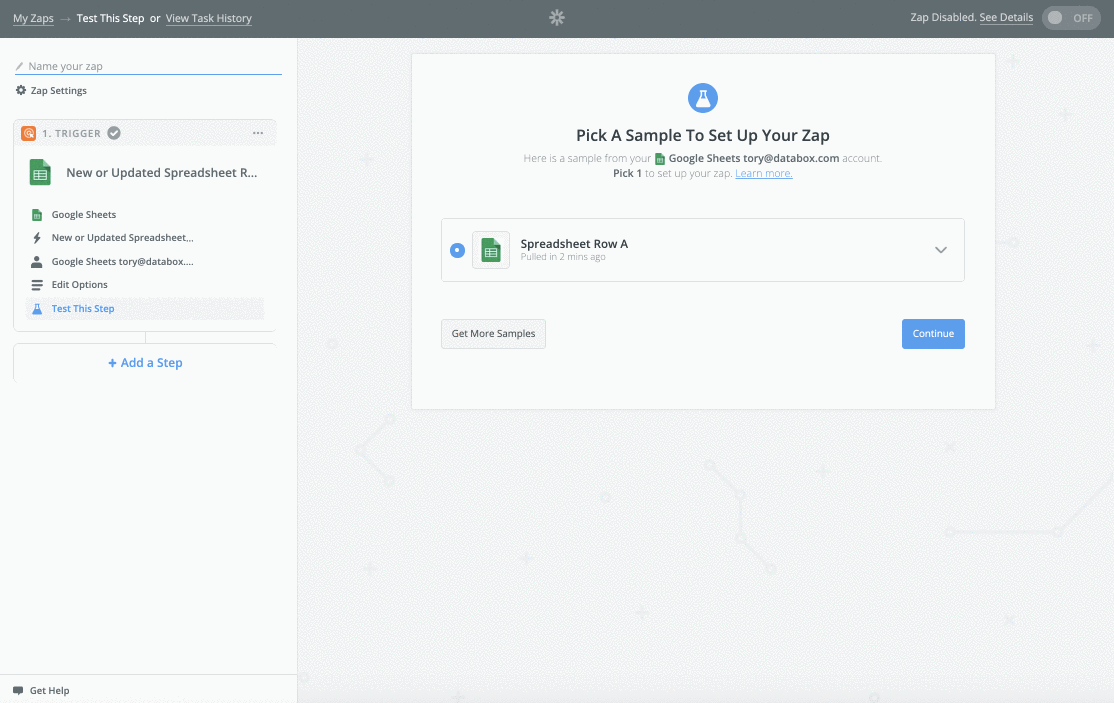
- It's best practice to test our current setup. When we click on the drop-down arrow, we can validate that we're seeing data from the correct cell in our Google Sheet.
- We now have to define the Action that will happen as a result of the Trigger. To start, we'll select Databox as the Action App
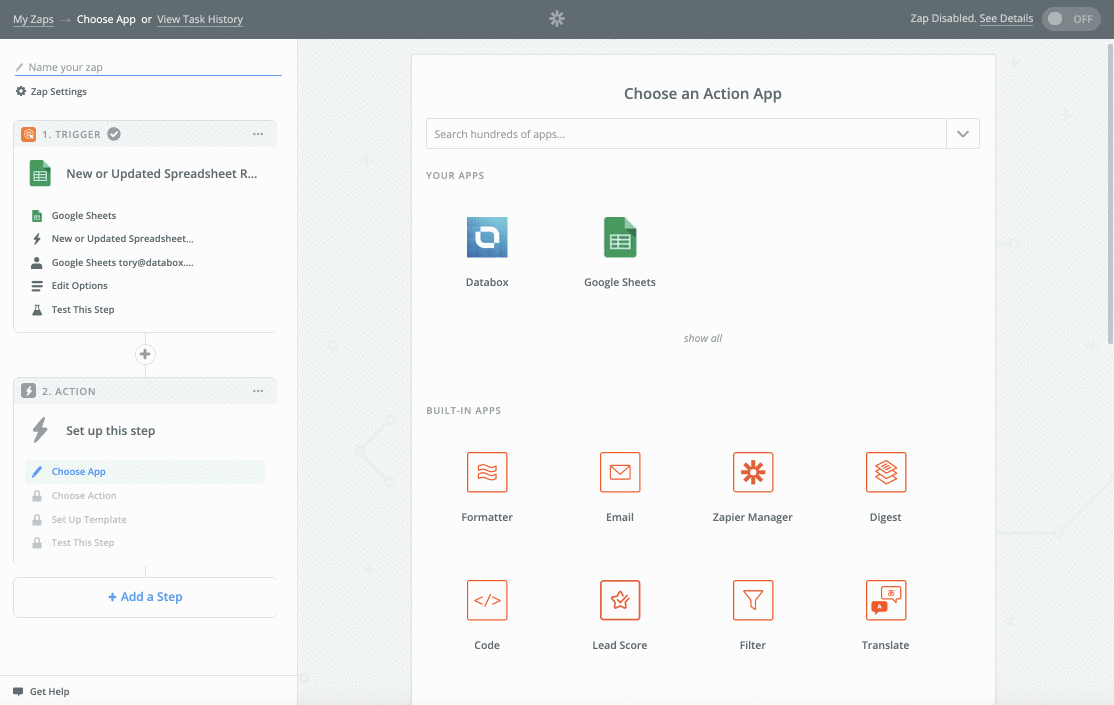
- We must select a Databox Action. Databox Actions define how the data is tracked.
- Increase Counter: Every Action that is triggered in a Zap will count as 1 event. This means that Databox will increment the current value by 1 each time the Zap is triggered.
- Push Custom Data: Every Action that is triggered in a zap will sync as custom data with Databox.
We want to track the specific Deal Amounts that are entered in our Google Sheet, so increasing a counter will not be sufficient for our use case. Instead, we'll select Push Custom Dataso the Deal Amounts are synced with Databox.
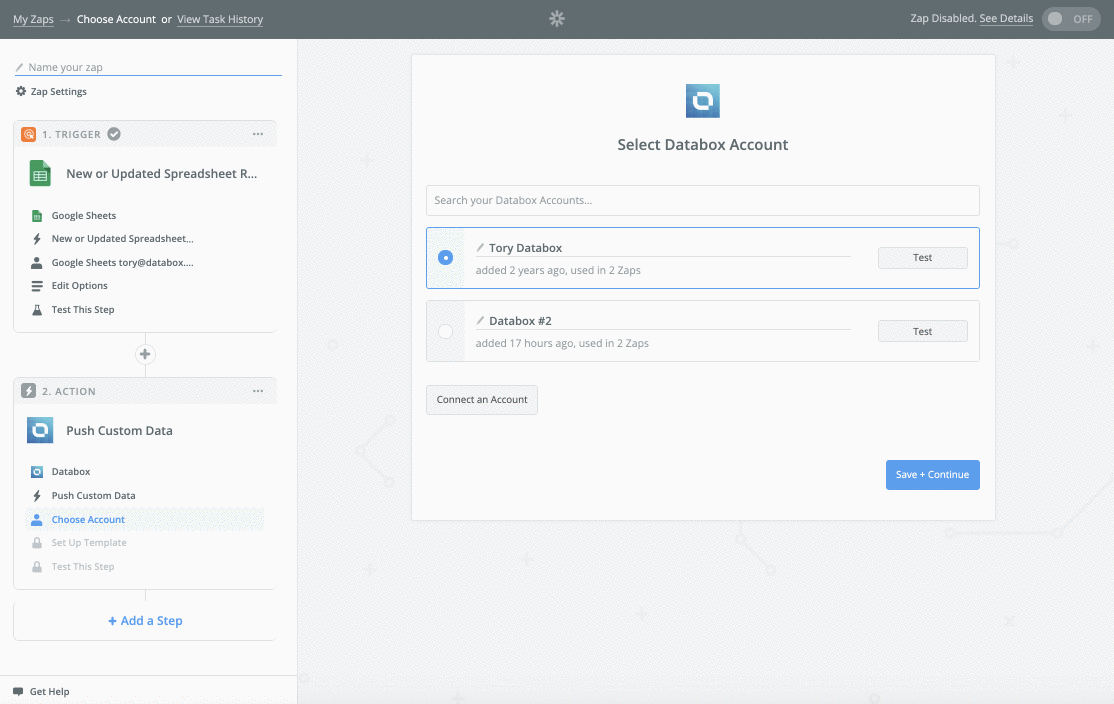
- Here we must select a Databox Account. If you don't have Databox connected, click Create an Account. This will open a window where you can enter the push token that was generated for Zapier.
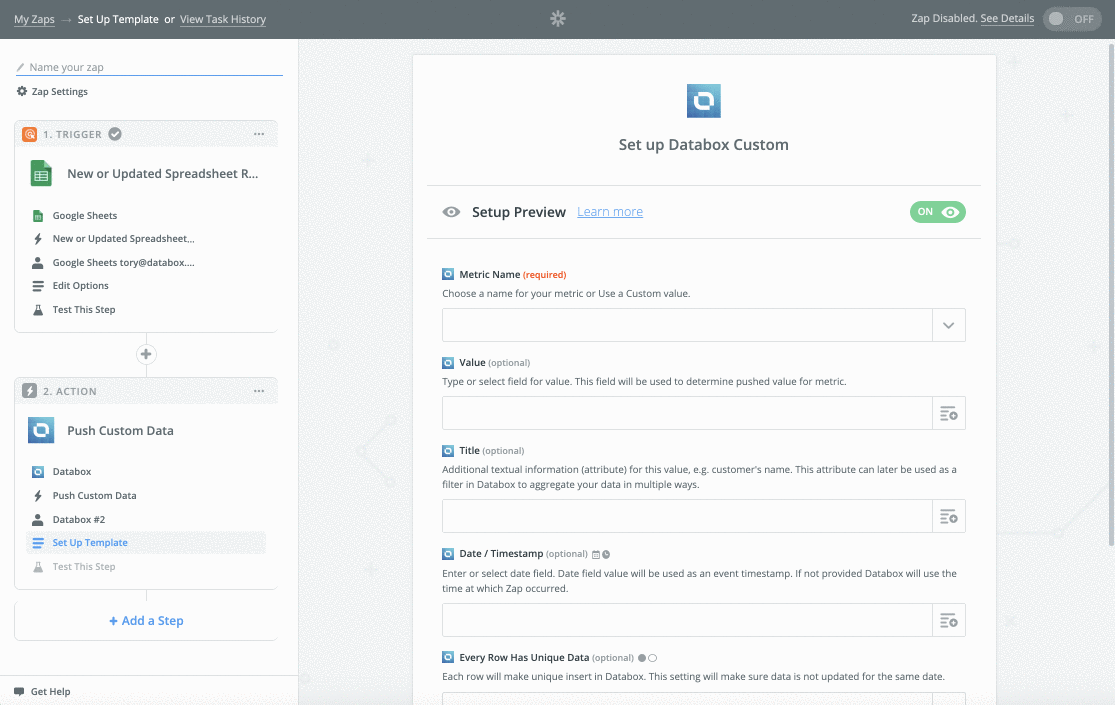
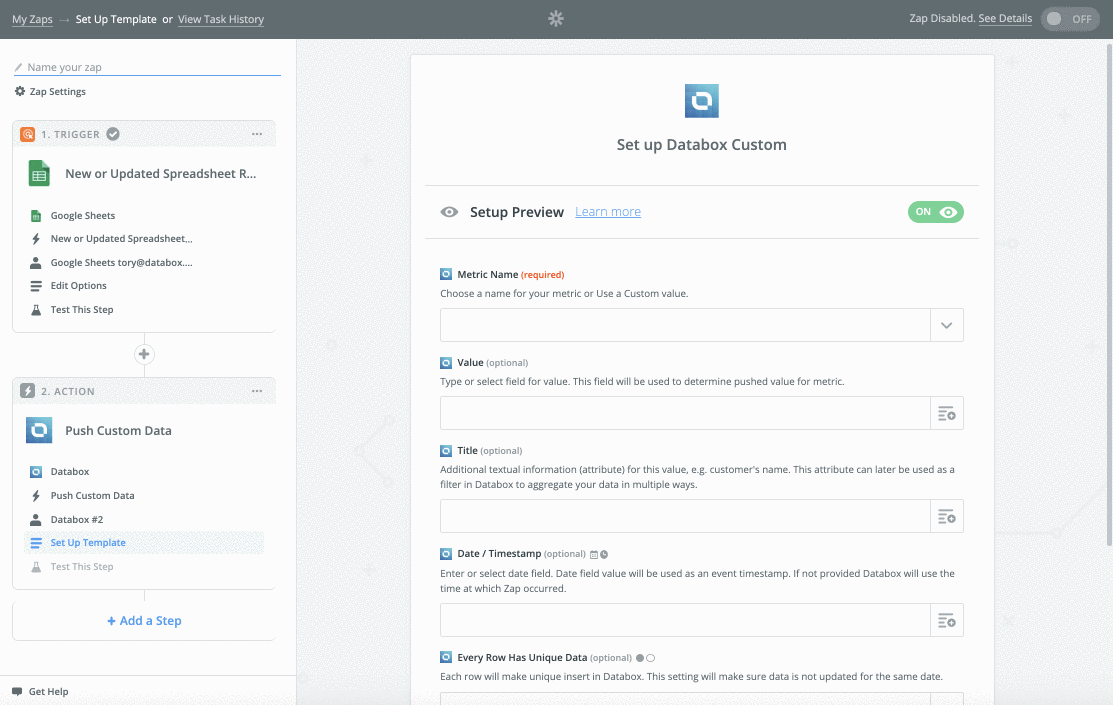
- Rather than pushing custom data to a Metric that already exists in our Databox Account, we want to create a completely new Zapier Metric to track this data.
To do that, we'll select **Use a custom value (advanced)**from the Metric drop-down list. This will reveal another field called Custom Value for Metric ID. This is where we'll enter the name for our Metric. This is the Metric name that we'll select in the Designer in Databox.
For our example, we'll enter Closed Won Amountas the Custom Value for Metric ID.
On the same page, we'll select Deal Amount from the Value drop-down list.
Titles are the same as Dimensions, and essentially recategorizes the selected Metric Value based on a specific field. When creating a Zap for a Standard Metric, we do not select a Title.
From the Date/ Timestamp drop-down list, we'll select the Date column from our Google Sheet. After confirming that each row is unique, we'll click Continue.
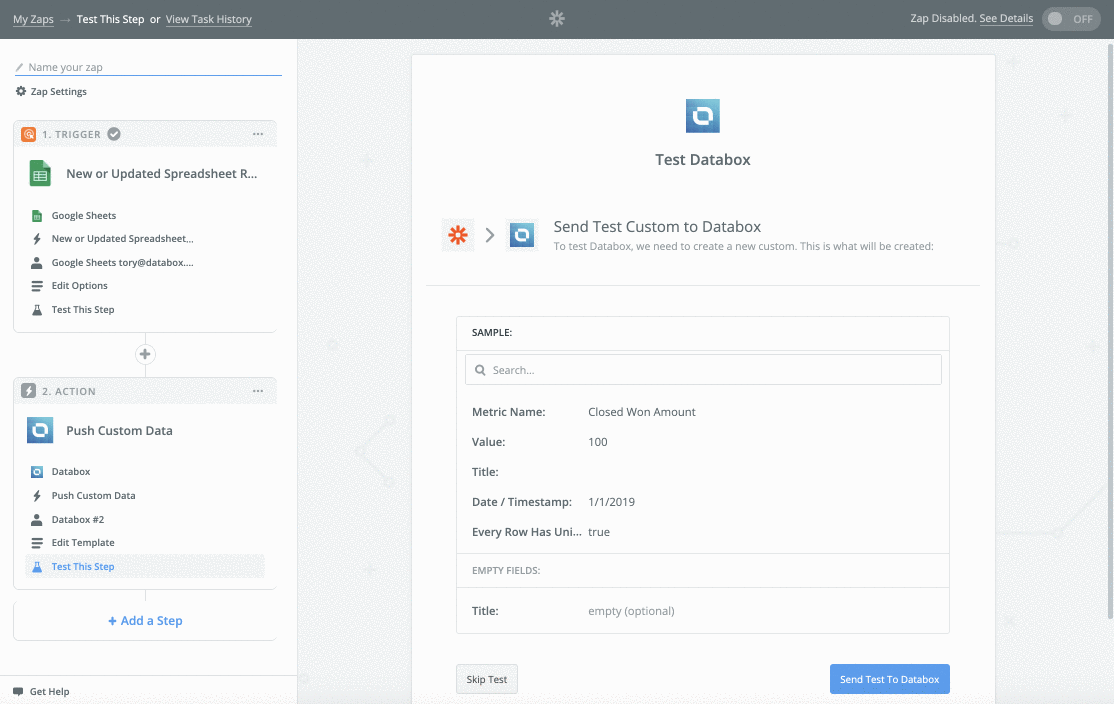
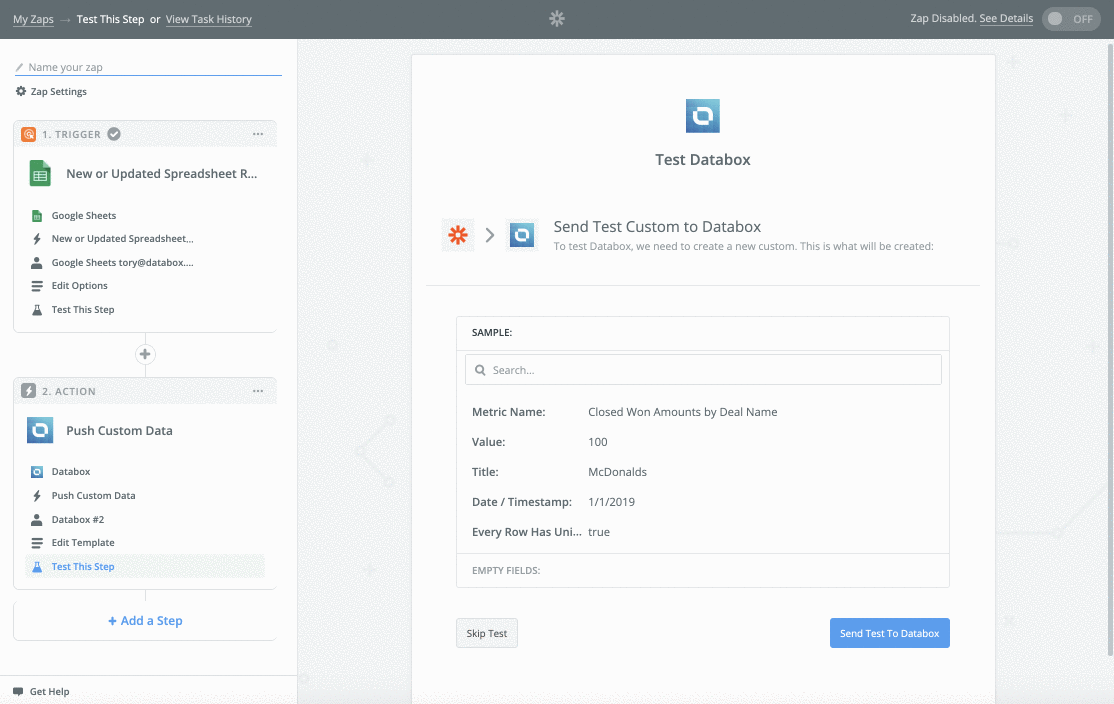
- We can now send test data to Databox to confirm everything is working as expected
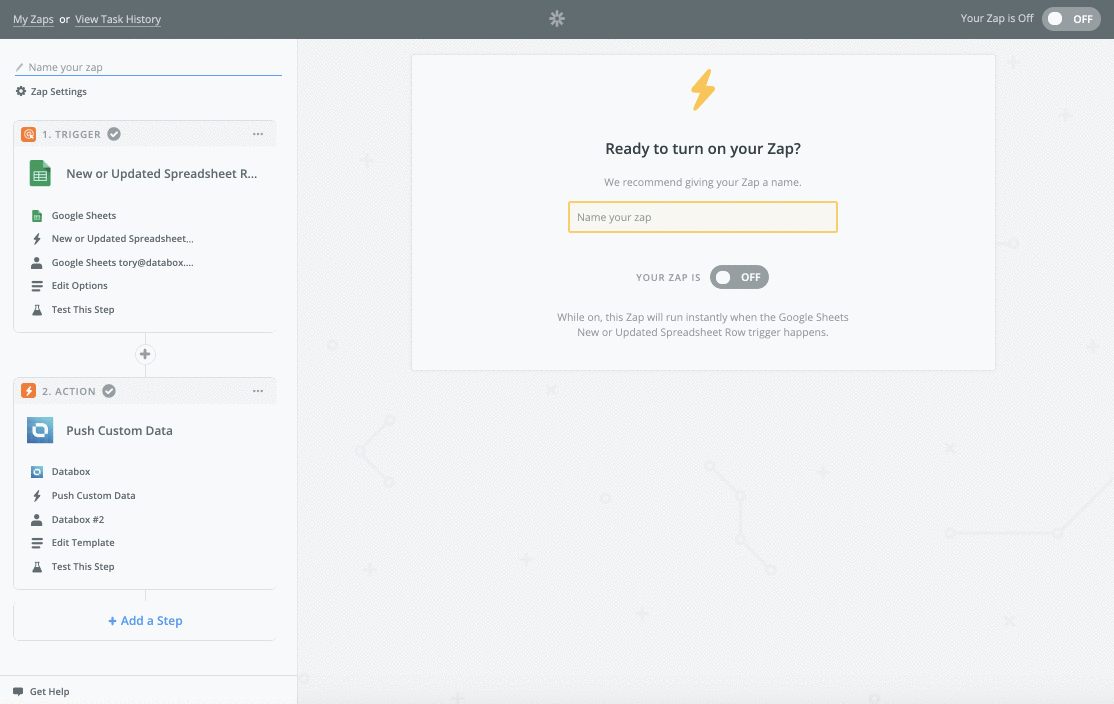
- Click Finish to complete the Zap
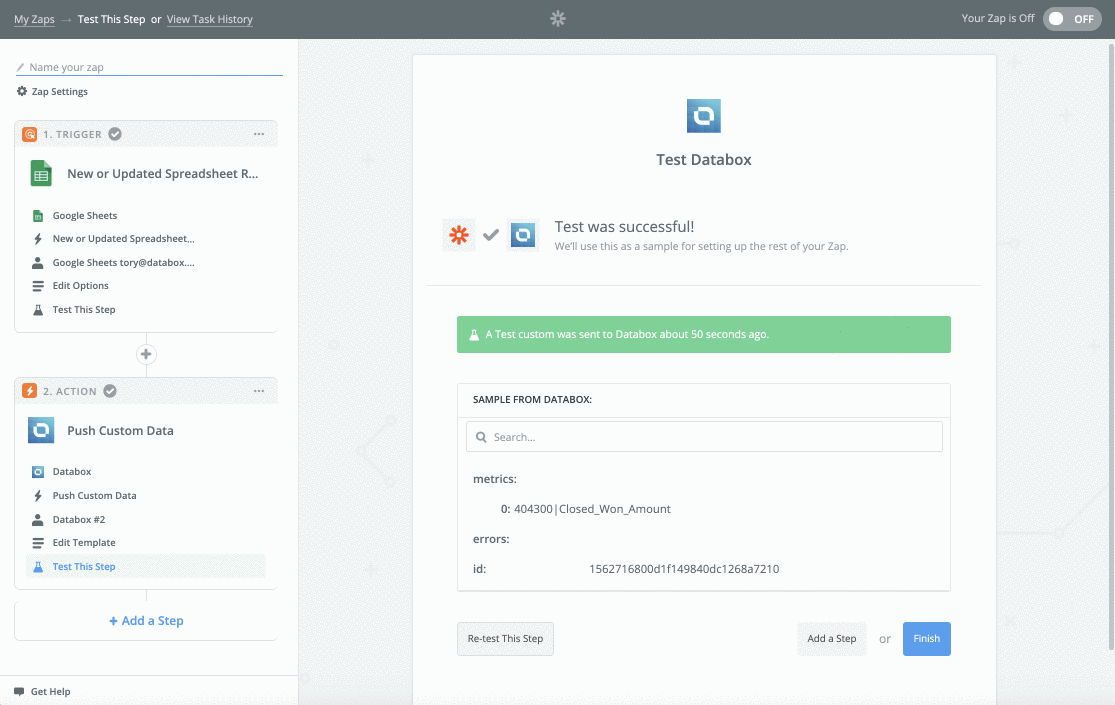
- Enter a name for the Zap. We'll name our Zap **Q1 Sales: Closed Won Amount.**Click the toggle to turn the Zap on.

- Finally, we must trigger the Zap so the Action is performed. We can do this by adding the rows from our duplicated Worksheet back to our original Worksheet.
Copy all rows with data into the original Worksheet, including the first row with data (row 2). In your Google Sheet, the entries in rows 2 and 3 will be identical. Only row 3 will be synced with Databox, since row 2 was used while creating the Zap for testing purposes.
In our example, we will create a Zap to access data from our Google Sheet to track Closed Won Amount by Deal Name.

Each unique Metric that we want to sync with Databox will need to be accessed through a different Zap. Once we have one Zap built, we can duplicate it and make minimal changes to update it to sync different data from the Google Sheet.
To start, we want to create a Zap that syncs "Closed Won Amount by Deal Name" from our Google Sheet to Databox.
When creating new Zaps, our Google Sheet must be formatted in a specific way. To start, we can only have the first two rows of the Sheet populated.
To ensure we don't lose any data that is already on our Sheet, we'll copy the original Worksheet and store the duplicated version for future use. Now we can delete all entries below row 2 from our original Worksheet and create our first Zap.

2. Navigate to your Homepage in Zapier. Click the orange Make a Zap! button
- Select Google Sheets as the Trigger App.
Select a Trigger from Google Sheets. The trigger determines what will initiate a data sync with Databox.
- New Spreadsheet Row: The trigger will be initiated when a new row is added to your Google Sheet.
- New or Updated Spreadsheet Row: The trigger will be initiated when a new row is added or an existing row is updated in your Google Sheet.
For our example, we'll select New or Updated Spreadsheet Row as the Trigger. This gives us more flexibility and ensures that any changes made to our Google Sheet will be reflected in Databox.
- Here we must select a Google Sheets Account. If you don't have Google Sheets connected, click Create an Account. This will open a window where you can select the Google Sheets Account that you want to sync data from.
- Next, we have to tell Zapier exactly which Google Sheet, Worksheet, and Trigger Column to sync data from.
For our example, we'll choose Q1 Sales Data as the Google Sheet, Q1 Sales as the Worksheet, and Deal Amounts as the Trigger Column

- It's best practice to test our current setup. When we click on the drop-down arrow, we can validate that we're seeing data from the correct cell in our Google Sheet.
- We now have to define the Action that will happen as a result of the Trigger. To start, we'll select Databox as the Action App
- We must select a Databox Action. Databox Actions define how the data is tracked.
- Increase Counter: Every Action that is triggered in a Zap will count as 1 event. This means that Databox will increment the current value by 1 each time the Zap is triggered.
- Push Custom Data: Every Action that is triggered in a zap will sync as custom data with Databox.
We want to track the specific Deal Amounts that are entered in our Google Sheet, so increasing a counter will not be sufficient for our use case. Instead, we'll select Push Custom Dataso the Deal Amounts are synced with Databox.
- Here we must select a Databox Account. If you don't have Databox connected, click Create an Account. This will open a window where you can enter the push token that was generated for Zapier in Databox.
- Rather than pushing custom data to a Metric that already exists in our Databox Account, we want to create a completely new Zapier Metric to track this data.
To do that, we'll select **Use a custom value (advanced)**from the Metric drop-down list. This will reveal another field called Custom Value for Metric ID. This is where we'll enter the name for our Metric. This is the Metric name that we'll select in the Designer in Databox.
For our example, we'll enter Closed Won Amount by Deal Nameas the Custom Value for Metric ID.
On the same page, we'll select Deal Amount from the Value drop-down list.
"Titles" are the same as "Dimensions," and essentially recategorize the selected Metric Value based on a specific field. For Dimensional Metrics, we must select a Title.
For our example, we want to split up Closed Won Amounts based on the Deal Name. So, we will select Deal Name from the Titledrop-down list.
From the Date/ Timestamp drop-down list, we'll select the Date column from our Google Sheet. After confirming that each row is unique, we'll click Continue.
- We can now send test data to Databox to confirm everything is working as expected.
- Click Finish to complete the Zap.

- Enter a name for the Zap. We'll name our Zap **Q1 Sales: Closed Won Amount by Deal Name.**Click the toggle to turn the Zap on.
- Finally, we must trigger the Zap so the Action is performed. We can do this by adding the rows from our duplicated Worksheet back to our original Worksheet.
Copy all rows with data into the original Worksheet, including the first row with data (row 2). In your Google Sheet, the entries in rows 2 and 3 will be identical. Only row 3 will be synced with Databox, since row 2 was used while creating the Zap for testing purposes.
Learn how to build a Databoard using Zapier data here.
In this section, we'll walk through some of the most common cases that may arise as you use Zapier with Databox.
If your Zap stops running, it may be because Zapier thinks it has reached the end of your Sheet. Check your Google Sheet to ensure there are no blank rows in your Sheet. Zapier recognizes blank rows as the end of the document and will not sync data from new rows.
If your Google Sheet has hundreds of rows that you're attempting to sync with Databox, it's possible that rows were not accounted for when the Zap was triggered. This is due to limitations in Zapier that prevent you from syncing too much data at once.
To resolve this, it's recommended that you sync smaller batches of data at a time (100 rows max).
If you are trying to delete or rename existing entries in your Google Sheet, it's recommended that you first turn off your Zap. You can turn it back on after the changes are made.
If you are trying to make changes to the Zap itself, it's recommended that you duplicate the existing Zap and make the changes to the copied version. You will need to follow the standard configuration process of removing rows from your Google Sheet, customizing the Zap, etc.